Home>Devices & Equipment>Subwoofer>How To Hook Subwoofer To TV
Subwoofer
How To Hook Subwoofer To TV
Published: January 20, 2024
Learn how to easily hook up a subwoofer to your TV and enhance your audio experience. Step-by-step guide for connecting a subwoofer to your television.
(Many of the links in this article redirect to a specific reviewed product. Your purchase of these products through affiliate links helps to generate commission for AudioLover.com, at no extra cost. Learn more)
Table of Contents
- Introduction
- Understanding Subwoofers
- Types of Subwoofers
- Choosing the Right Subwoofer for Your TV
- Required Cables and Connectors
- Step 1: Determine the Available Audio Outputs on Your TV
- Step 2: Select the Proper Cable for Connection
- Step 3: Connect the Subwoofer to Your TV
- Step 4: Configuring the TV Audio Settings
- Step 5: Testing the Subwoofer Connection
- Troubleshooting Tips
- Conclusion
Introduction
Welcome to the world of immersive sound and bass-thumping audio! If you’re a true audio aficionado or simply love getting the best out of your TV viewing experience, then adding a subwoofer to your TV setup is a game-changer. A subwoofer is an essential component that reproduces low-frequency audio, delivering deep and impactful bass that regular speakers can’t quite match.
In this comprehensive guide, we’ll walk you through the process of hooking up a subwoofer to your TV, so you can enjoy a cinema-like audio experience in the comfort of your own home. Whether you’re a tech-savvy individual or someone who’s new to audio setups, we’ve got you covered with step-by-step instructions and helpful tips to ensure a seamless integration.
Before we dive into the nitty-gritty of connecting a subwoofer to your TV, it’s helpful to understand the basics. So, let’s start by exploring what a subwoofer is and the different types available in the market.
Understanding Subwoofers
Subwoofers are specialized speakers designed to reproduce low-frequency audio, particularly the deep bass notes that add depth and impact to music, movies, and TV shows. They are called “sub”woofers because they primarily handle frequencies below the range of typical speakers and provide the “sub” or foundation of the sound. These low-frequency sounds create a more immersive and realistic audio experience, allowing you to feel the rumble of explosions or the thump of bass-heavy music.
Subwoofers typically consist of a speaker driver housed in a specially designed enclosure. The speaker driver is larger and more powerful than those found in regular speakers, allowing it to move more air and produce low-frequency sounds effectively. It is often paired with a built-in amplifier to provide sufficient power for driving the subwoofer driver.
When it comes to subwoofers, there are two main types to consider: passive and active.
Passive Subwoofers
Passive subwoofers require an external amplifier to supply power to the speaker. These subwoofers are connected to the amplifier through speaker cables, and the amplifier is responsible for driving the subwoofer driver. Passive subwoofers are typically used in more complex audio setups where a separate amplifier is already in use.
Active Subwoofers
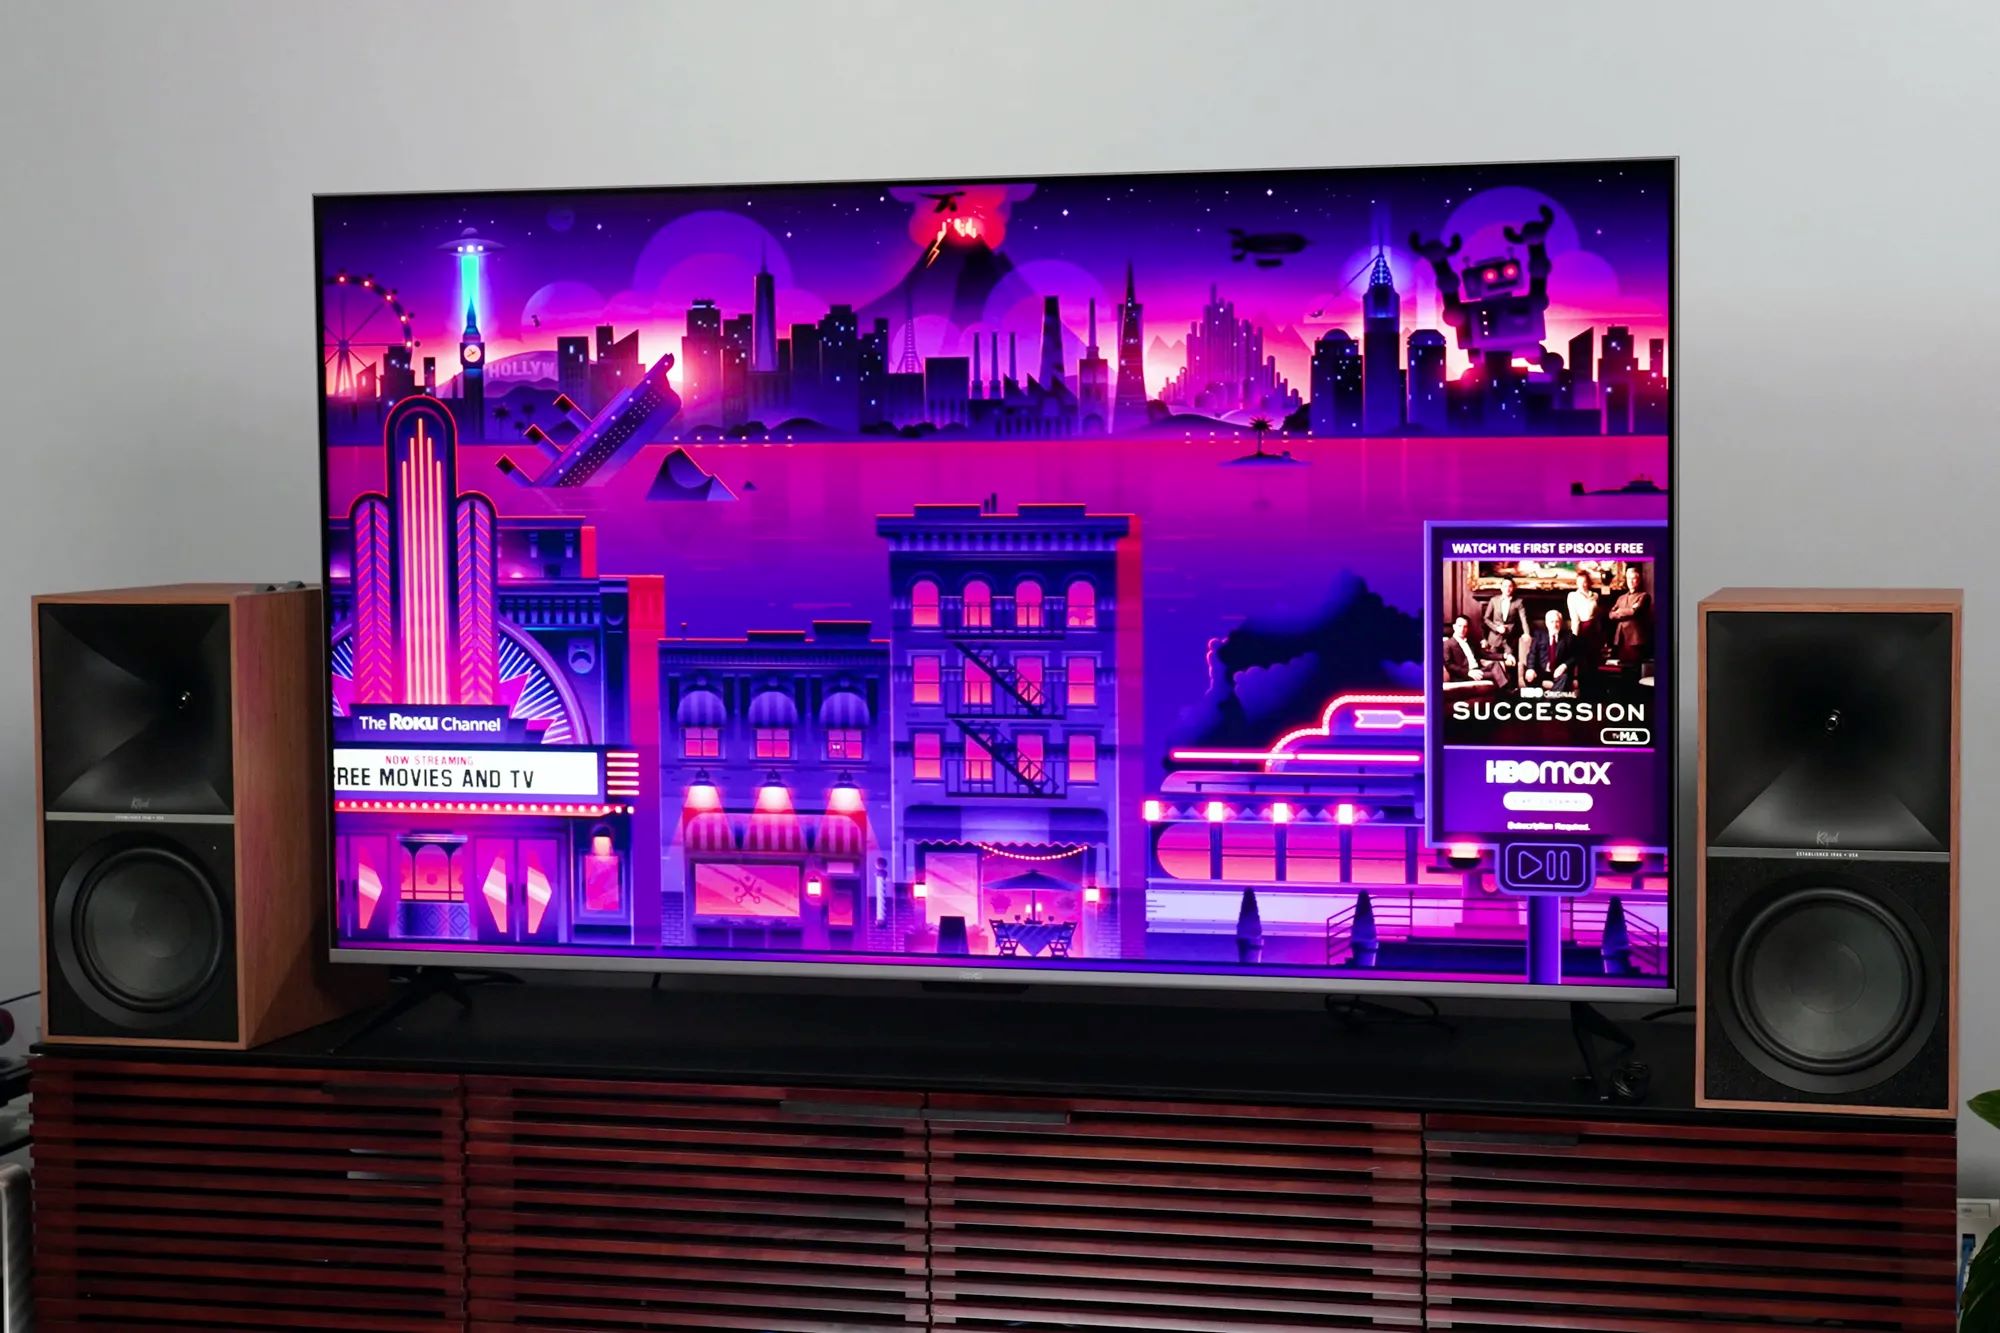
Active subwoofers, on the other hand, have a built-in amplifier, making them more convenient and easier to set up. They usually have dedicated input and output connections, allowing for a direct connection to your TV or audio source. Active subwoofers are the more common choice for home theater setups because of their simplicity and integrated amplification.
Now that we understand the basics of subwoofers and their types, let’s proceed to the next step: selecting the right subwoofer for your TV setup.
Types of Subwoofers
When it comes to selecting a subwoofer for your TV setup, you’ll come across a variety of options to choose from. Understanding the different types of subwoofers can help you make an informed decision that suits your specific needs and preferences. Let’s explore the most common types:
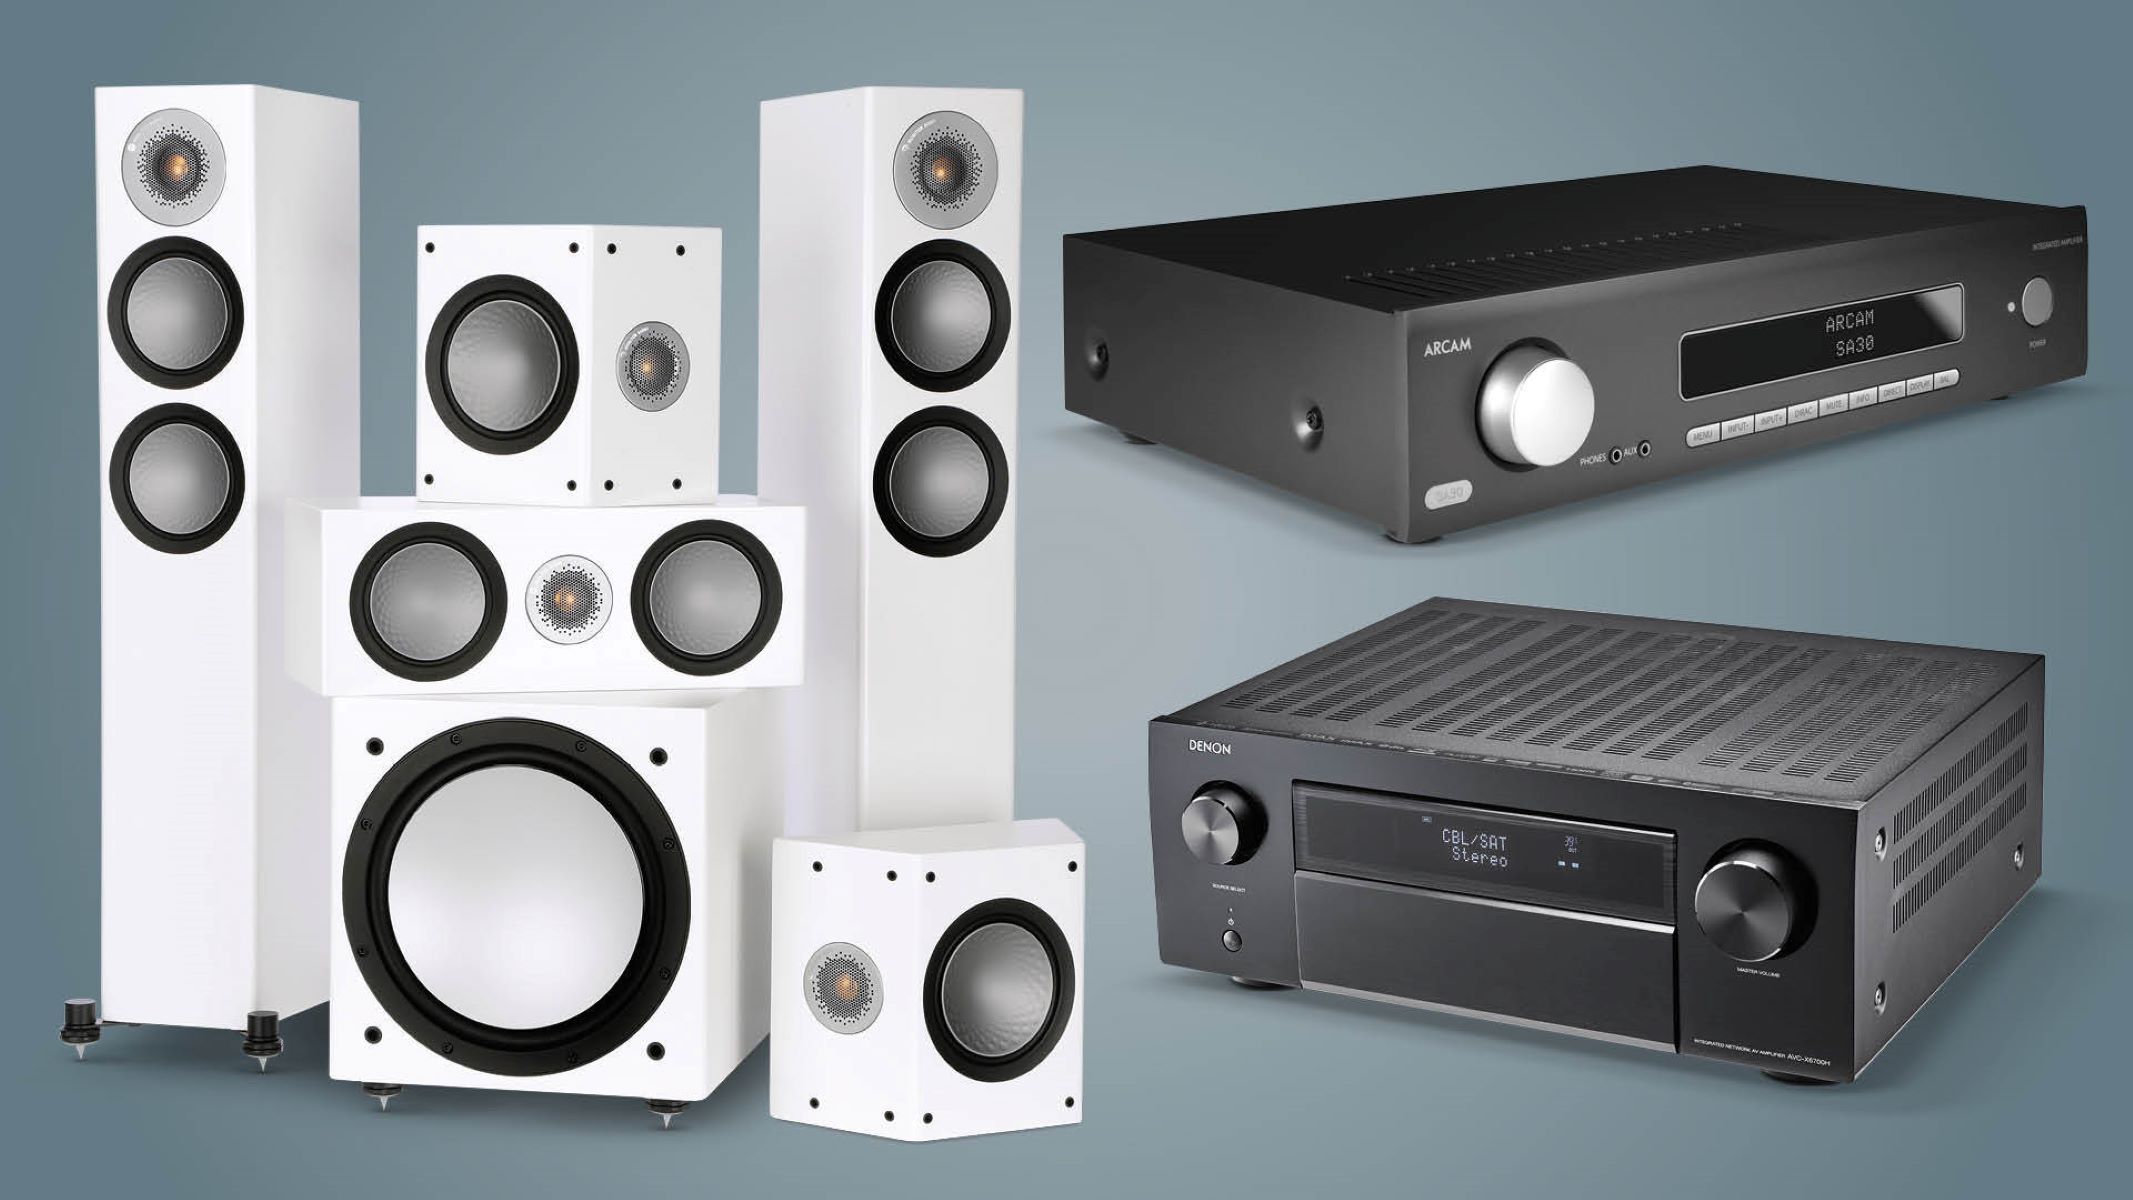
1. Floor-standing Subwoofers
Floor-standing subwoofers, also known as tower subwoofers, are large, standalone units that sit on the floor. They come with built-in amplifiers and are capable of producing powerful bass output. These subwoofers are ideal for large rooms or home theater setups and offer exceptional low-frequency performance.
2. Bookshelf Subwoofers
Bookshelf subwoofers are more compact in size, designed to be placed on a shelf or mounted on a wall. They work well in smaller rooms where space is limited. While they may not offer the same booming bass as floor-standing subwoofers, they still provide a significant improvement in low-frequency reproduction compared to regular speakers.
3. In-wall or In-ceiling Subwoofers
If you prefer a more discreet setup, in-wall or in-ceiling subwoofers may be the right choice for you. These subwoofers are mounted flush with your wall or ceiling, blending seamlessly into your room’s decor. They deliver good bass performance while keeping the floor space free from clutter.
4. Powered Subwoofers
Powered subwoofers, also known as active subwoofers, have a built-in amplifier and are self-powered. They are the most common type of subwoofers used in home theater setups for their convenience and ease of use. Powered subwoofers typically come with various connectivity options, making them compatible with different audio sources.
5. Wireless Subwoofers
Wireless subwoofers offer the flexibility of placement as they can be positioned anywhere in the room without the need for long cables. These subwoofers connect wirelessly to the sound system or TV, providing a hassle-free setup. They are a popular choice for those who prefer a clean and clutter-free living space.
When selecting a subwoofer, consider factors such as your room size, desired bass performance, and overall aesthetic appeal. Now that you’re familiar with the different types, let’s move on to choosing the right subwoofer for your TV setup.
Choosing the Right Subwoofer for Your TV
When it comes to choosing the right subwoofer for your TV, there are a few key factors to consider. By taking these factors into account, you can ensure that your subwoofer perfectly complements your TV setup and delivers the best audio experience possible.
1. Room Size
The size of your room plays a significant role in determining the type and size of the subwoofer you should choose. Larger rooms typically require a more powerful subwoofer with a larger driver to fill the space with deep bass. Conversely, smaller rooms may benefit from a more compact subwoofer that can still provide impressive low-frequency performance without overpowering the space.
2. Frequency Response
Pay attention to the frequency response of the subwoofer you’re considering. The frequency response indicates the range of frequencies that a subwoofer can reproduce. Look for a subwoofer that can reach as low as 20Hz or even lower. This will ensure that you can fully appreciate the deep rumble of explosions or the rich bass of your favorite music.
3. Power Output
The power output of a subwoofer is measured in watts and determines how much sound the subwoofer can produce. Opt for a subwoofer with sufficient power to match the capabilities of your TV and audio setup. A rule of thumb is to match the power output of the subwoofer to that of your main speakers for a balanced and immersive audio experience.
4. Connectivity Options
Consider the connectivity options offered by the subwoofer. Most subwoofers come with various input options such as line-level inputs, speaker-level inputs, and even wireless connectivity. Ensure that the subwoofer you choose is compatible with the audio outputs of your TV or audio system.
5. Brand and Reviews
Lastly, do some research on different subwoofer brands and read reviews from other customers. Look for reputable brands known for their quality and durability. It’s also helpful to read user reviews to get a sense of real-world experiences with specific subwoofer models.
By considering these factors, you can confidently choose a subwoofer that perfectly suits your TV setup and delivers the thunderous bass you desire. With your subwoofer selected, it’s time to move on to the next steps—connecting and configuring it with your TV.
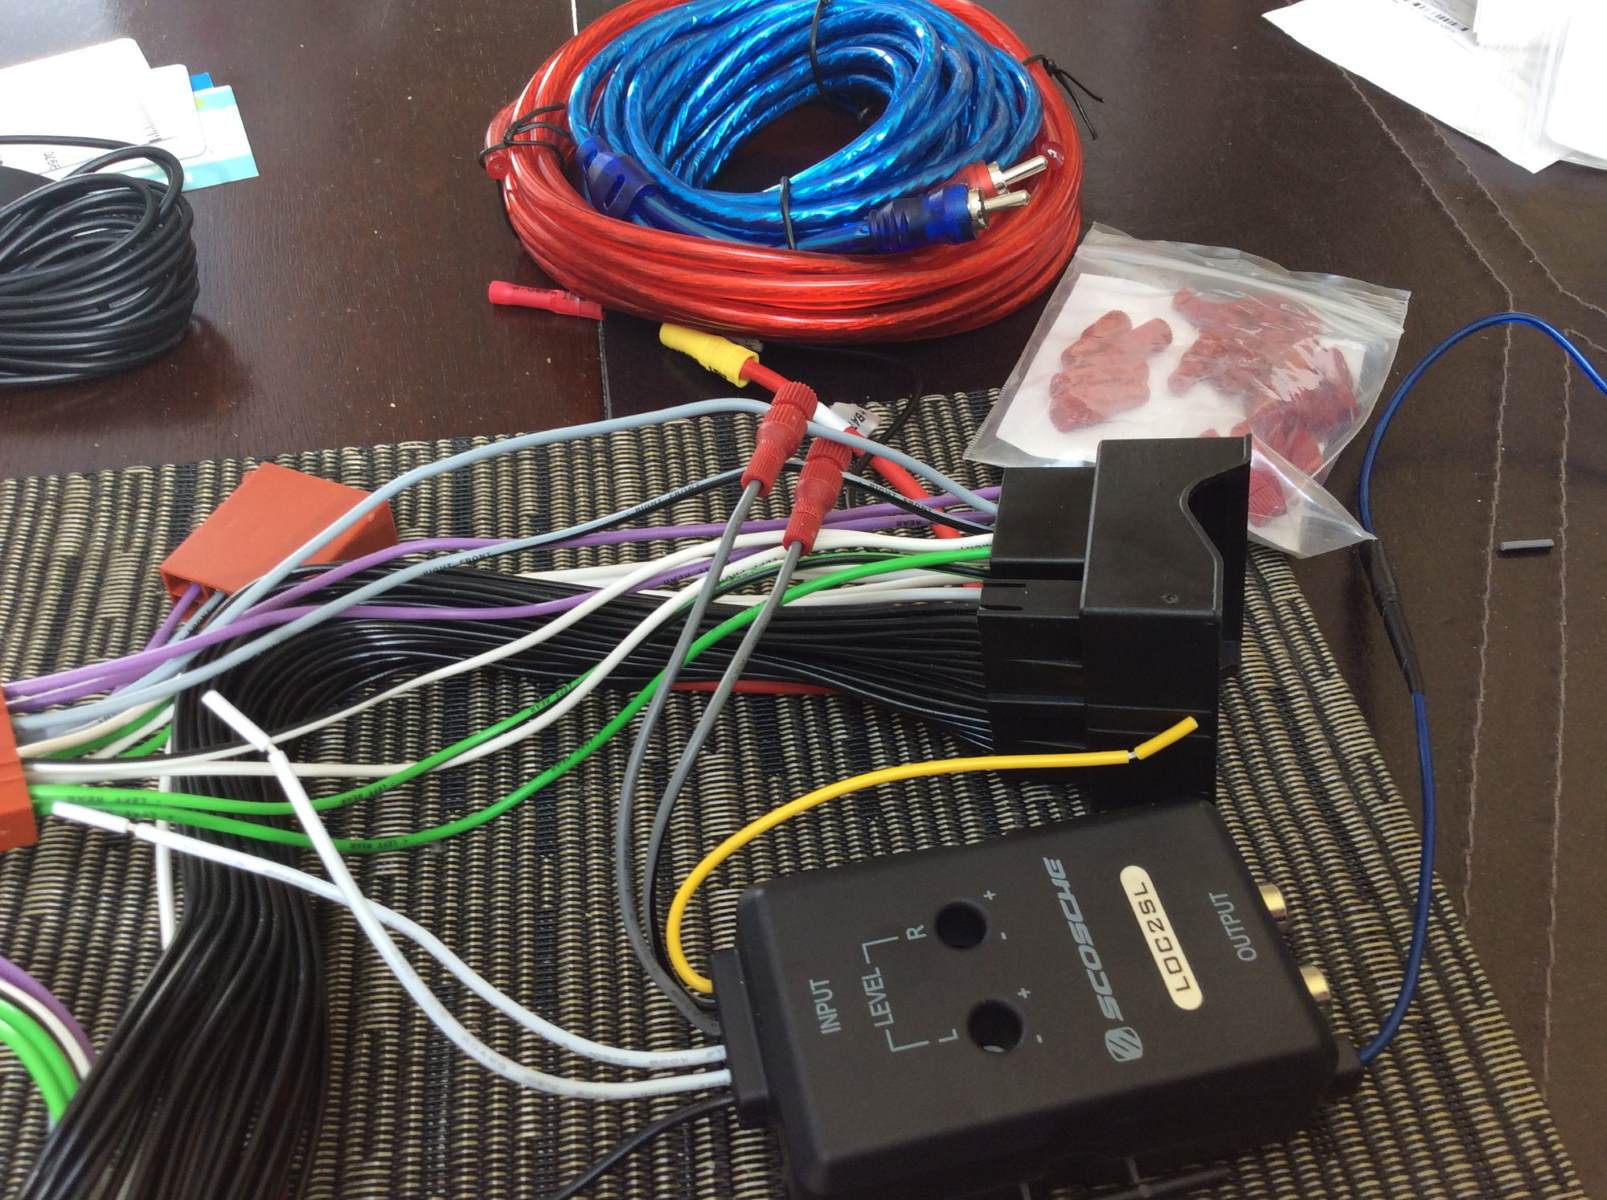
Required Cables and Connectors
Before you can connect your subwoofer to your TV, it’s essential to gather the necessary cables and connectors. The specific cables needed may vary depending on your TV’s available audio outputs and the type of subwoofer you have chosen. Let’s take a look at some common cables and connectors you may need:
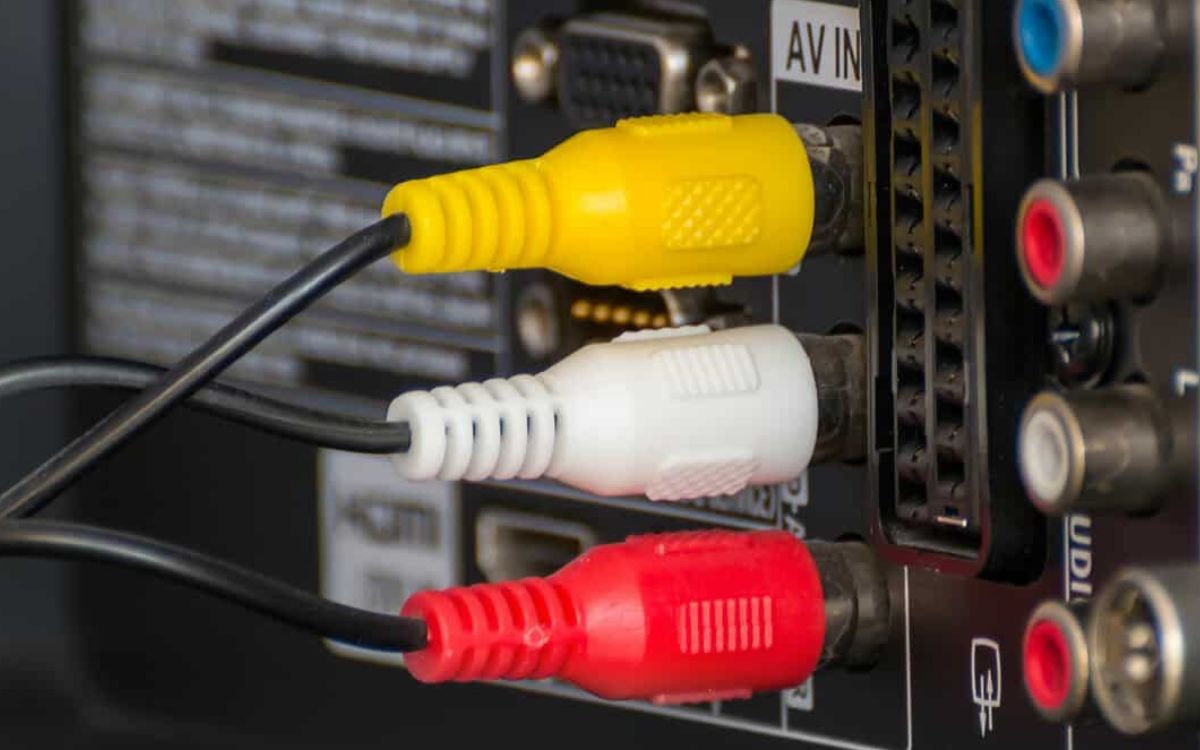
1. RCA Cables
RCA cables, also known as composite cables, are a popular choice for connecting subwoofers to TVs. These cables have red and white connectors that carry the audio signal from the TV to the subwoofer. RCA cables are typically used when connecting passive subwoofers or subwoofers with RCA inputs.
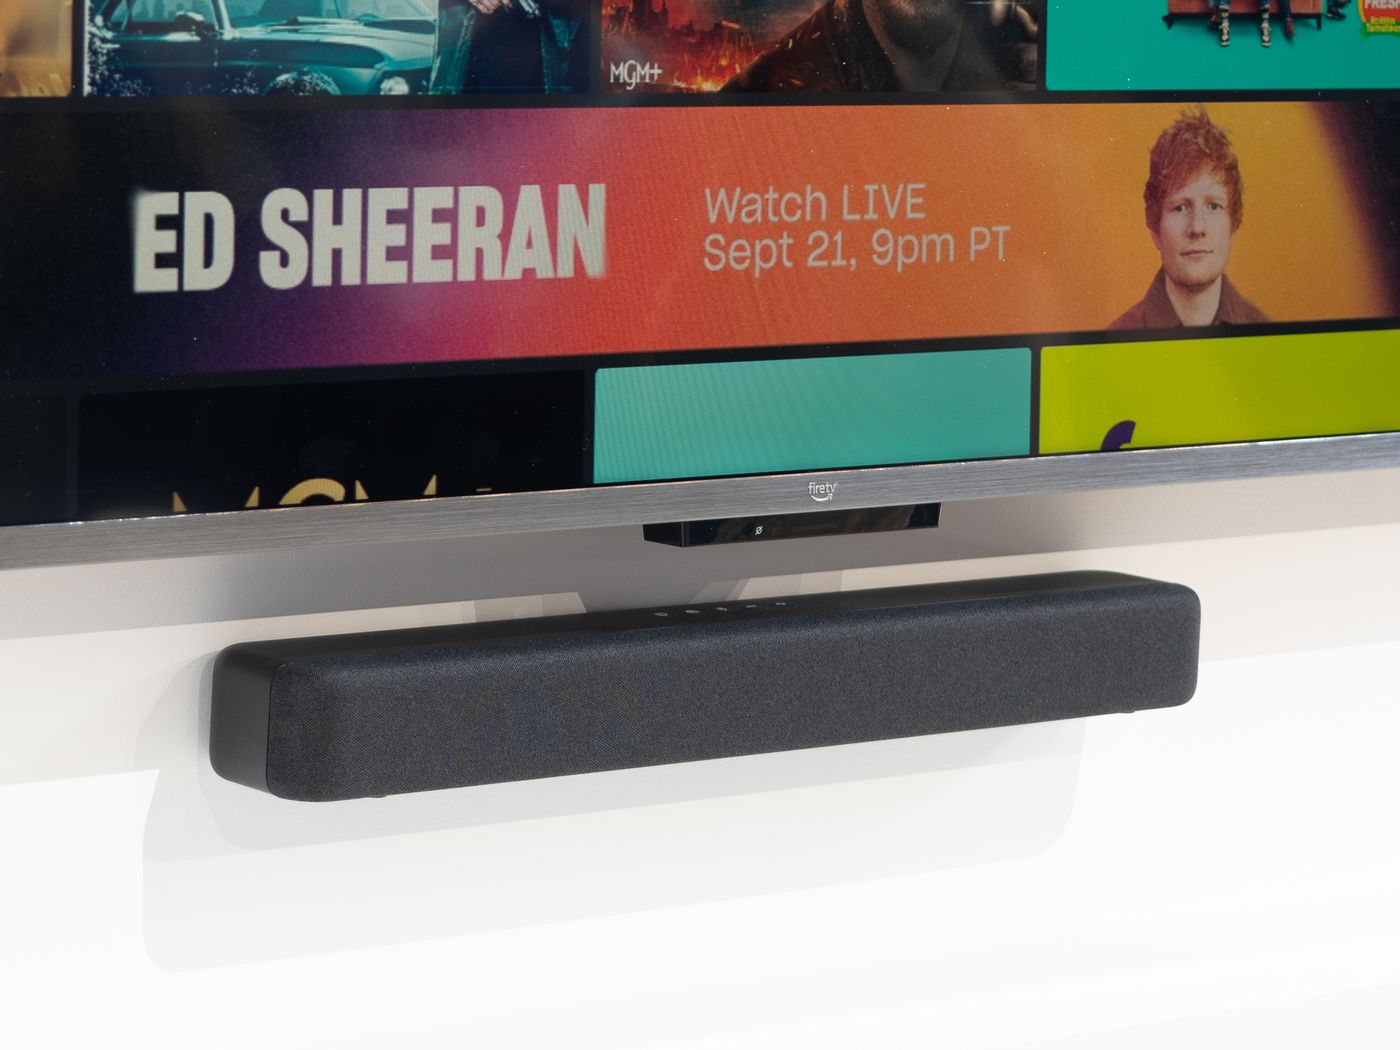
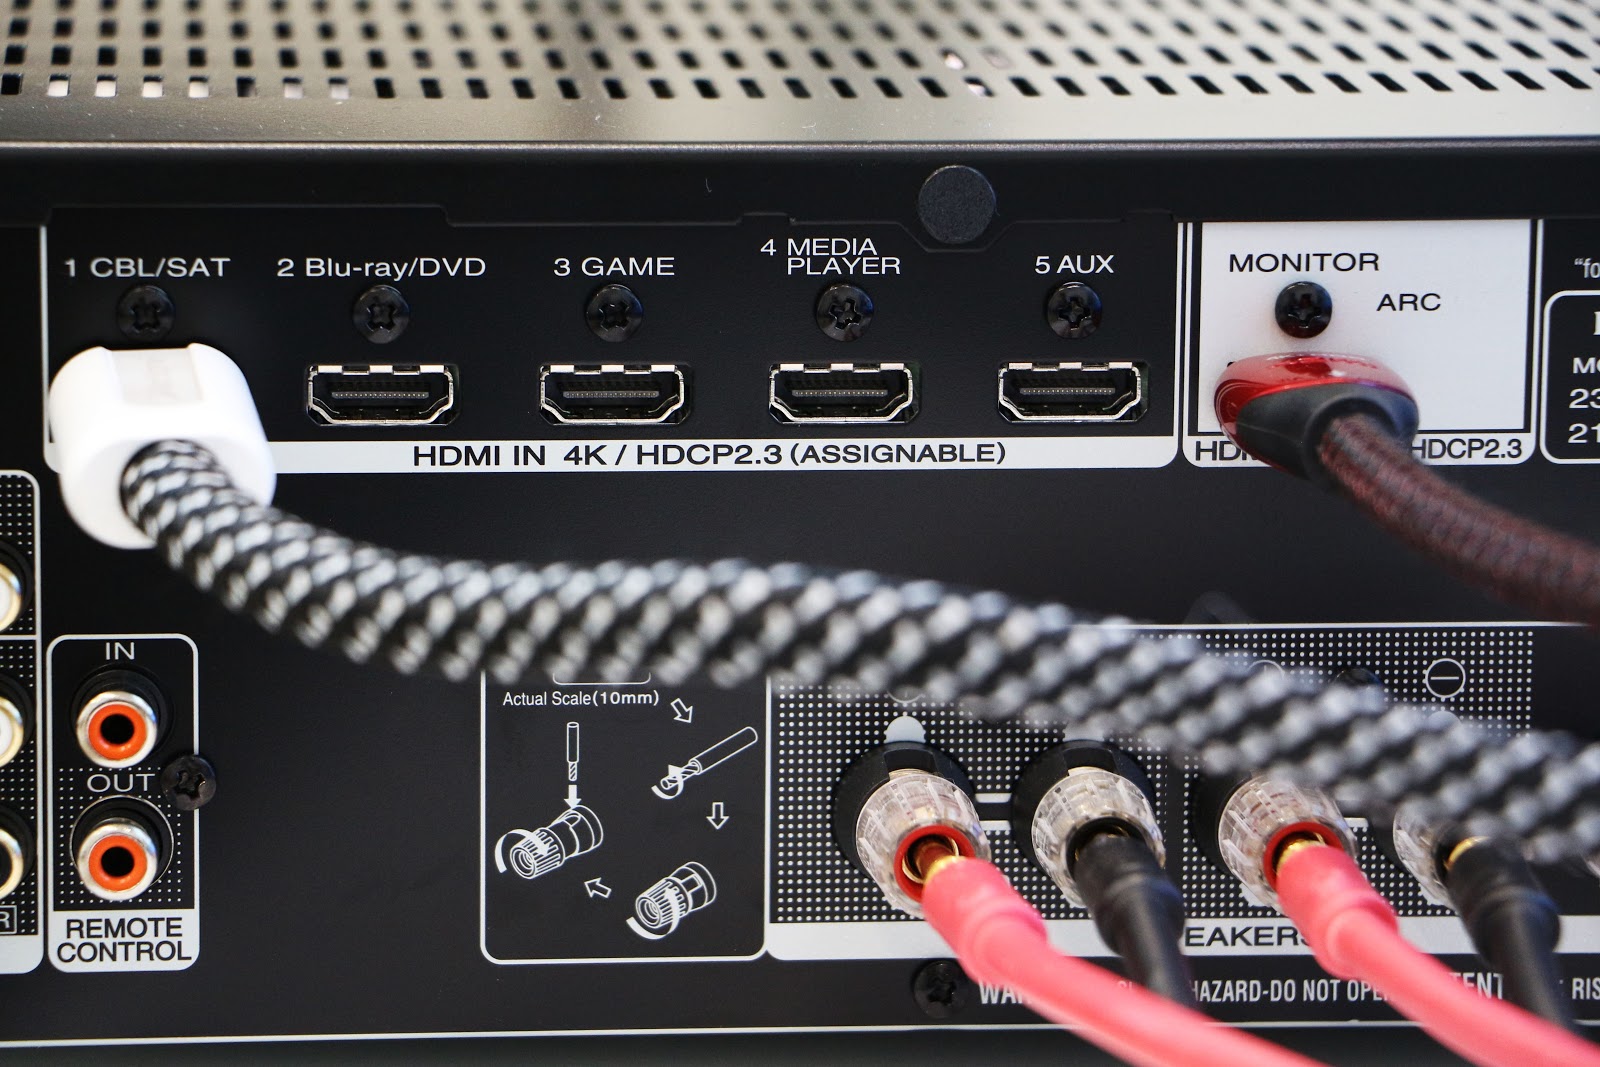
2. HDMI Cable
If your TV and subwoofer support HDMI connections, using an HDMI cable is a convenient option. HDMI cables transmit both audio and video signals, allowing for a single cable connection between your TV and subwoofer. Ensure that your subwoofer has an HDMI input and your TV has an HDMI ARC (Audio Return Channel) or an HDMI output that supports audio output.
3. Optical Cable (Toslink)
An optical cable, often referred to as a Toslink cable, can be used to connect your TV to a subwoofer with an optical input. These cables transmit audio signals using light, resulting in high-quality digital audio transmission. Optical cables are a popular choice for connecting sound systems, including subwoofers.
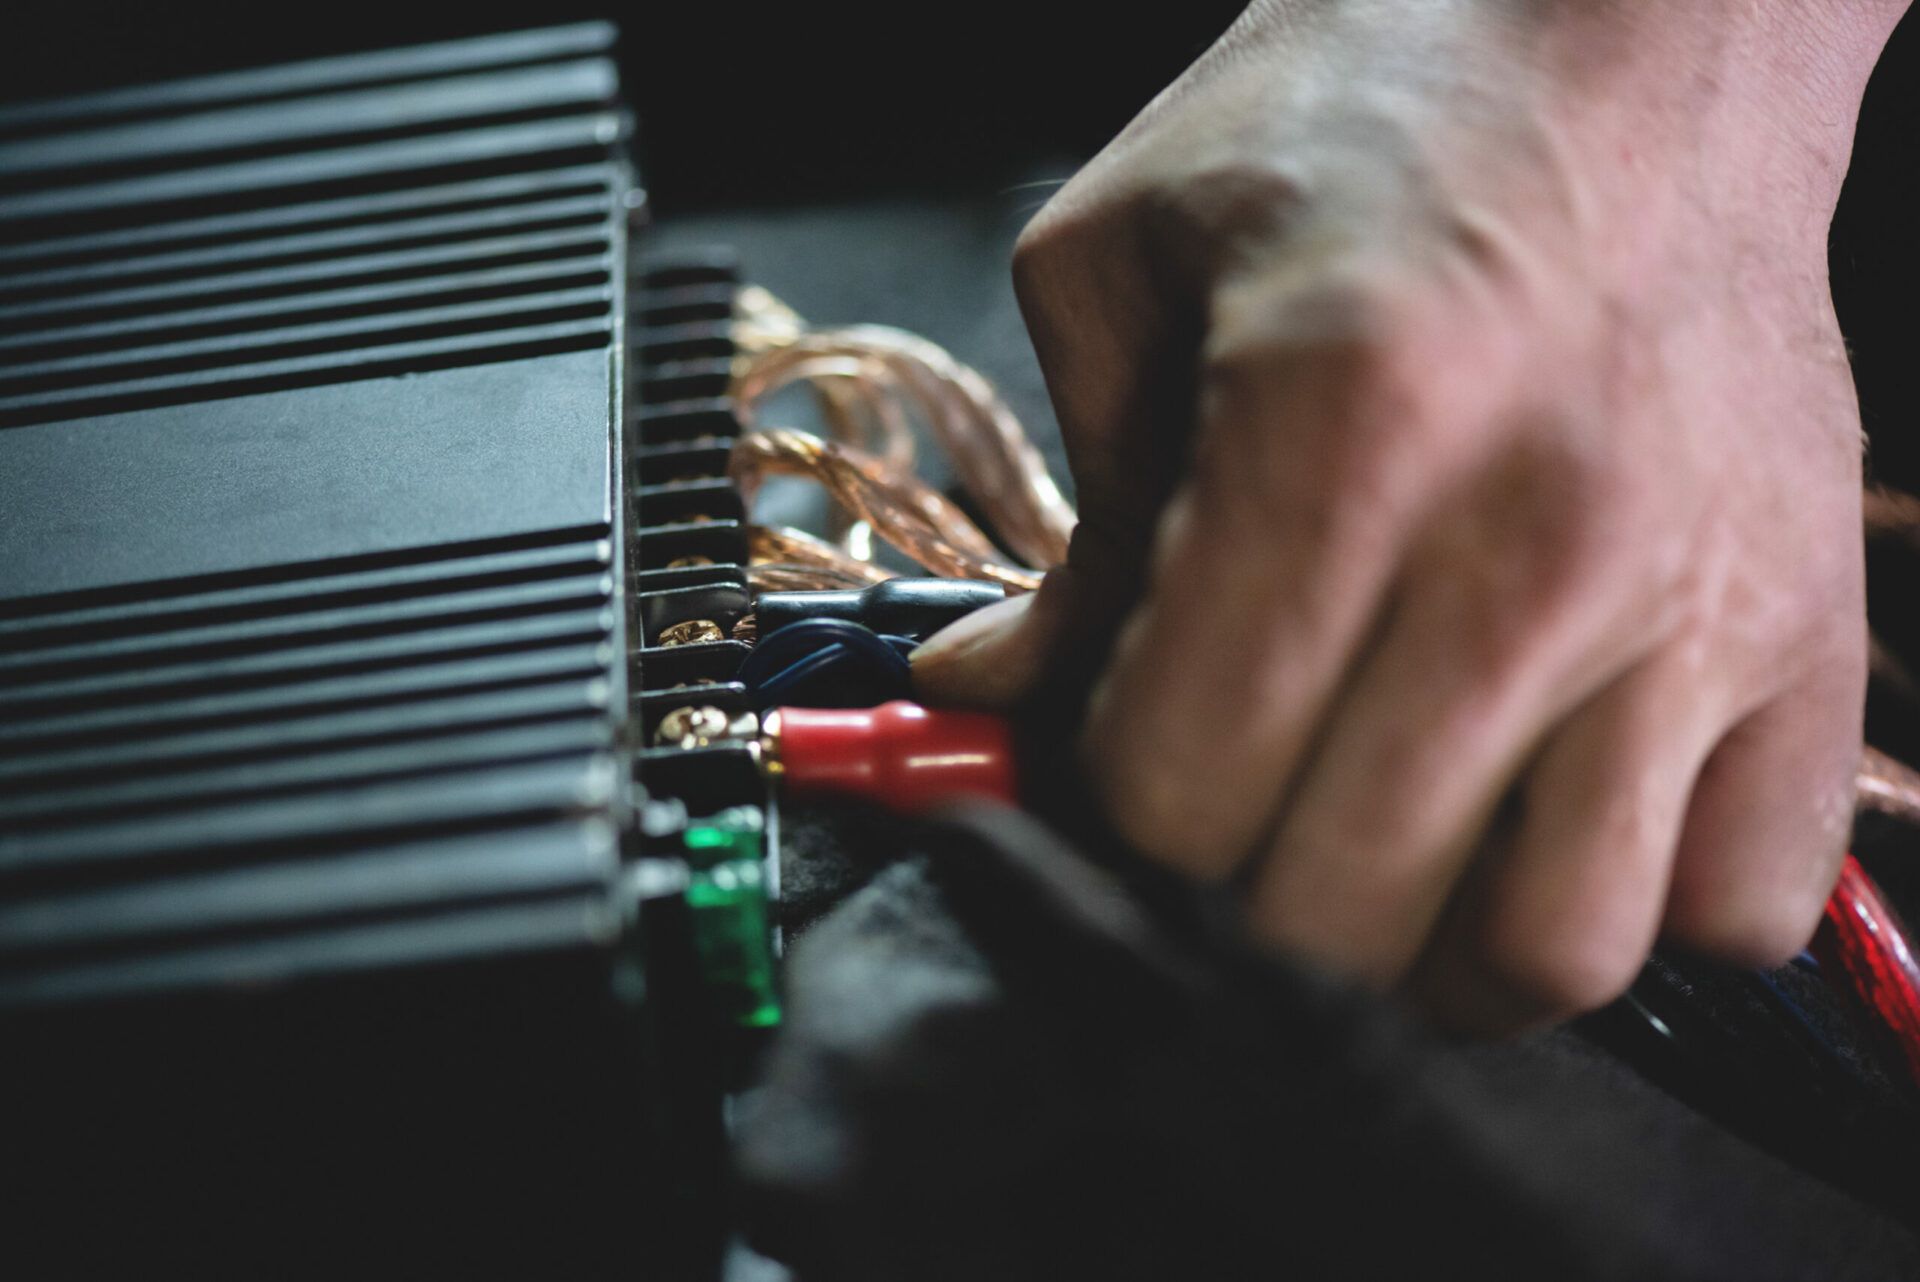
4. Speaker Wire
If you are using a passive subwoofer, you will need speaker wire to connect the subwoofer to an external amplifier or AV receiver. Speaker wire is available in different gauges, and the specific gauge you need depends on the power requirements and distance between the subwoofer and the amplifier.
5. Wireless Transmitter and Receiver Kit
If you have a wireless subwoofer, you may need a wireless transmitter and receiver kit. This kit enables wireless connection between your TV and subwoofer, eliminating the need for physical cables. The transmitter connects to your TV’s audio output, and the receiver connects to your subwoofer, allowing for seamless wireless audio transmission.
Be sure to check the specifications of your subwoofer and TV to determine the appropriate cables and connectors for your setup. Once you have the necessary cables and connectors ready, you can proceed to the next steps of connecting your subwoofer to your TV and configuring the audio settings.
Step 1: Determine the Available Audio Outputs on Your TV
Before you can connect your subwoofer to your TV, it’s important to identify the available audio outputs on your TV. This will help you determine the type of cable or connector you need to make the connection.
Here are some common audio output options you may find on your TV:
1. HDMI ARC (Audio Return Channel)
If your TV supports HDMI ARC, it allows you to send audio signals both ways through a single HDMI cable. Simply locate the HDMI ARC port on your TV, usually labeled as “ARC,” and use an HDMI cable to connect it to your subwoofer’s HDMI input or HDMI ARC input if available. This connection method simplifies the setup process and eliminates the need for additional cables.
2. Optical (Toslink) Output
An optical output is another common audio output found on modern TVs. It uses a fiber optic cable to transmit digital audio signals. Locate the optical output port on your TV, usually labeled as “Optical” or “Toslink.” Connect one end of the optical cable to the TV’s optical output and the other end to your subwoofer’s optical input.
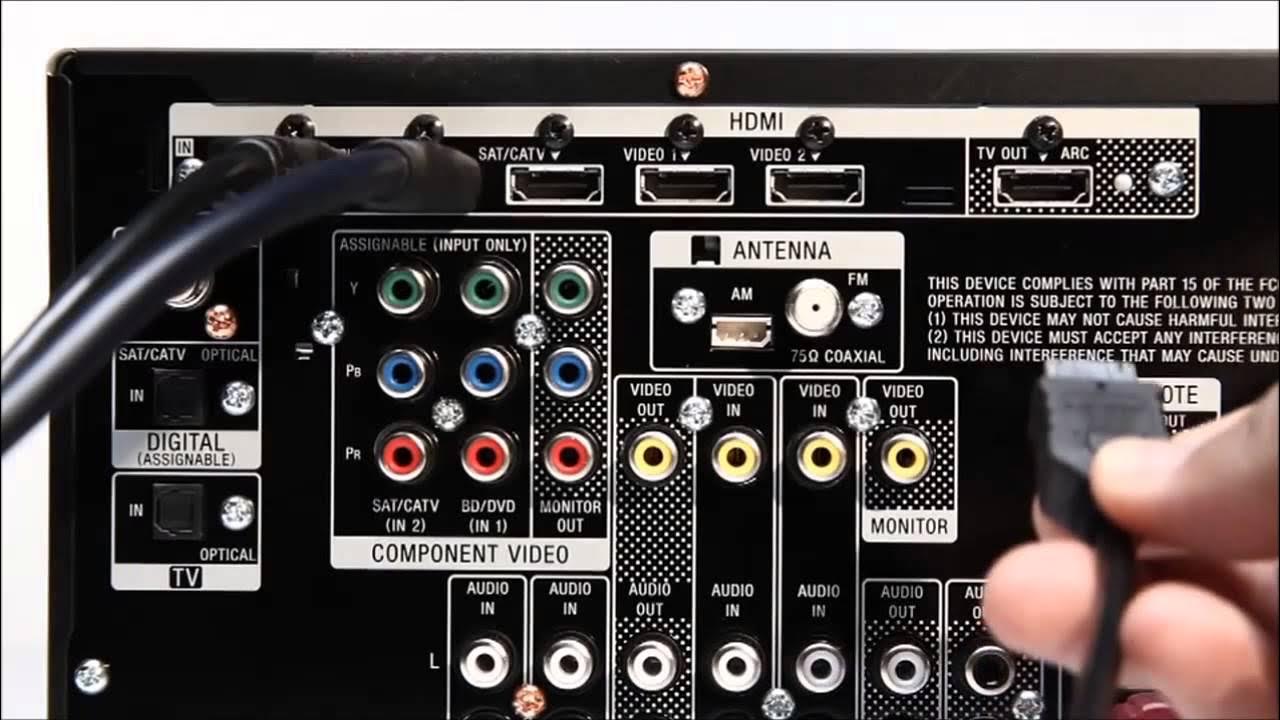
3. RCA Outputs
Most TVs have RCA outputs, which are color-coded red and white for right and left audio channels respectively. Look for the RCA output ports on your TV and connect the RCA cables (red and white connectors) to the corresponding ports. The other end of the cables will connect to the RCA inputs on your subwoofer.
4. 3.5mm Headphone Output
Some TVs may have a 3.5mm headphone output jack. You can use a 3.5mm to RCA adapter cable to connect the TV’s headphone output to the RCA inputs on your subwoofer. This adapter allows you to convert the 3.5mm connection to the RCA connection required by the subwoofer.
5. Speaker-level Outputs
If you have a passive subwoofer, you may need speaker-level outputs on your TV. These are typically used when connecting the subwoofer to an external amplifier or AV receiver. Locate the speaker-level outputs on your TV, usually labeled as “Speaker Out,” and connect the speaker wire from the subwoofer to these outputs.
Take some time to examine your TV’s back panel or consult the user manual to identify the available audio outputs. Once you’ve determined the available audio outputs on your TV, you can proceed to select the appropriate cable or connector for your subwoofer’s input. Ready to make the connection? Let’s move on to Step 2!
Step 2: Select the Proper Cable for Connection
Now that you know the available audio outputs on your TV, it’s time to select the proper cable or connector to make the connection between your TV and subwoofer. The cable you choose will depend on the type of audio output on your TV and the input options on your subwoofer.
If your TV has an HDMI ARC port:
You can use an HDMI cable to connect the HDMI ARC port on your TV to the HDMI input or HDMI ARC input on your subwoofer. Make sure to use a high-quality HDMI cable that supports ARC functionality for the best performance.
If your TV has an optical (Toslink) output:
For TVs with an optical output, you will need an optical cable (Toslink cable). Connect one end of the optical cable to the optical output on your TV and the other end to the optical input on your subwoofer.
If your TV has RCA outputs:
If your TV has RCA outputs (red and white connectors), you will need RCA cables. Connect the red and white connectors of the RCA cables to the corresponding RCA outputs on your TV, and then connect the other end of the cables to the RCA inputs on your subwoofer.
If your TV has a 3.5mm headphone output:
If your TV has a 3.5mm headphone output, you can use a 3.5mm to RCA adapter cable. Connect the 3.5mm end of the cable to the headphone output on your TV and the RCA connectors to the RCA inputs on your subwoofer.
If you have a passive subwoofer with speaker-level outputs:
If you’re connecting a passive subwoofer to your TV, you will need speaker wire. Connect one end of the speaker wire to the subwoofer’s speaker-level outputs and the other end to the speaker outputs or a dedicated subwoofer channel on your amplifier or AV receiver.
Make sure to choose cables or adapters that match the connectors and inputs on your TV and subwoofer. It’s also advisable to use high-quality cables for optimal audio performance.
Once you have selected the proper cable or connector, you’re ready to move on to the next step: connecting the subwoofer to your TV. Let’s proceed to Step 3!
Step 3: Connect the Subwoofer to Your TV
With the appropriate cable or connector selected, it’s time to connect your subwoofer to your TV and establish the audio connection. Follow these steps to ensure a successful connection:
1. Power Off Your TV and Subwoofer
Before connecting any cables, make sure your TV and subwoofer are powered off. This will prevent any potential electrical issues or damage during the connection process.
2. Locate the Audio Output on Your TV
Refer to Step 1 to identify the audio output on your TV. Once located, ensure that it is easily accessible, allowing you to connect the cable without any constraints.
3. Connect the Cable or Connector
Take the selected cable or connector and connect one end to the audio output on your TV. Ensure a secure and snug connection to minimize any signal loss or interference.
4. Connect the Other End to the Subwoofer
With one end of the cable connected to your TV, connect the other end to the corresponding input on your subwoofer. Double-check that the connection is secure to avoid any loose connections or audio distortion.
5. Power On Your TV and Subwoofer
Once the cable connections are made, power on your TV and subwoofer. Allow them a few moments to initialize and establish the audio connection.
6. Adjust the Subwoofer Settings (if applicable)
If your subwoofer has adjustable settings, such as volume control or crossover frequency, take some time to adjust these settings according to your preference. This will help fine-tune the audio performance to your liking and ensure a balanced sound output.
Congratulations! You have successfully connected your subwoofer to your TV. However, there is one more crucial step remaining—configuring the audio settings on your TV to enable the subwoofer output. Let’s move on to Step 4 to complete the setup process.
Step 4: Configuring the TV Audio Settings
With the subwoofer physically connected to your TV, it’s time to configure the audio settings to ensure that the subwoofer is recognized and properly utilized. Follow these steps to configure the audio settings on your TV:
1. Access the Audio Settings Menu
Using your TV’s remote control, navigate to the settings menu. Look for the audio settings options, which may be labeled as “Sound,” “Audio,” or something similar. Each TV brand and model may have a slightly different menu layout, so consult your TV’s user manual if needed.
2. Select the Audio Output
Within the audio settings menu, locate the option to choose the audio output. Select the audio output that corresponds to the connection you made in Step 3. For example, if you connected your subwoofer using HDMI, select the HDMI output or HDMI ARC output if available.
3. Enable Subwoofer Output
In the audio settings menu, look for an option to enable or adjust the subwoofer output. This option may be labeled as “Subwoofer,” “Bass,” or “Low-Frequency Effects (LFE).” Ensure that the subwoofer output is enabled or set to an appropriate level to allow the subwoofer to receive the low-frequency audio signals.
4. Test the Audio Output
Some TVs provide a test tone feature that allows you to verify the audio output of each speaker, including the subwoofer. Look for the option to run a test tone or audio test. This will play a sound through each speaker, allowing you to ensure that the subwoofer is producing sound properly.
5. Adjust Audio Settings as Desired
Take some time to explore additional audio settings on your TV. You may find options for equalizers, sound modes, or audio presets. Adjust these settings according to your preference for an enhanced audio experience.
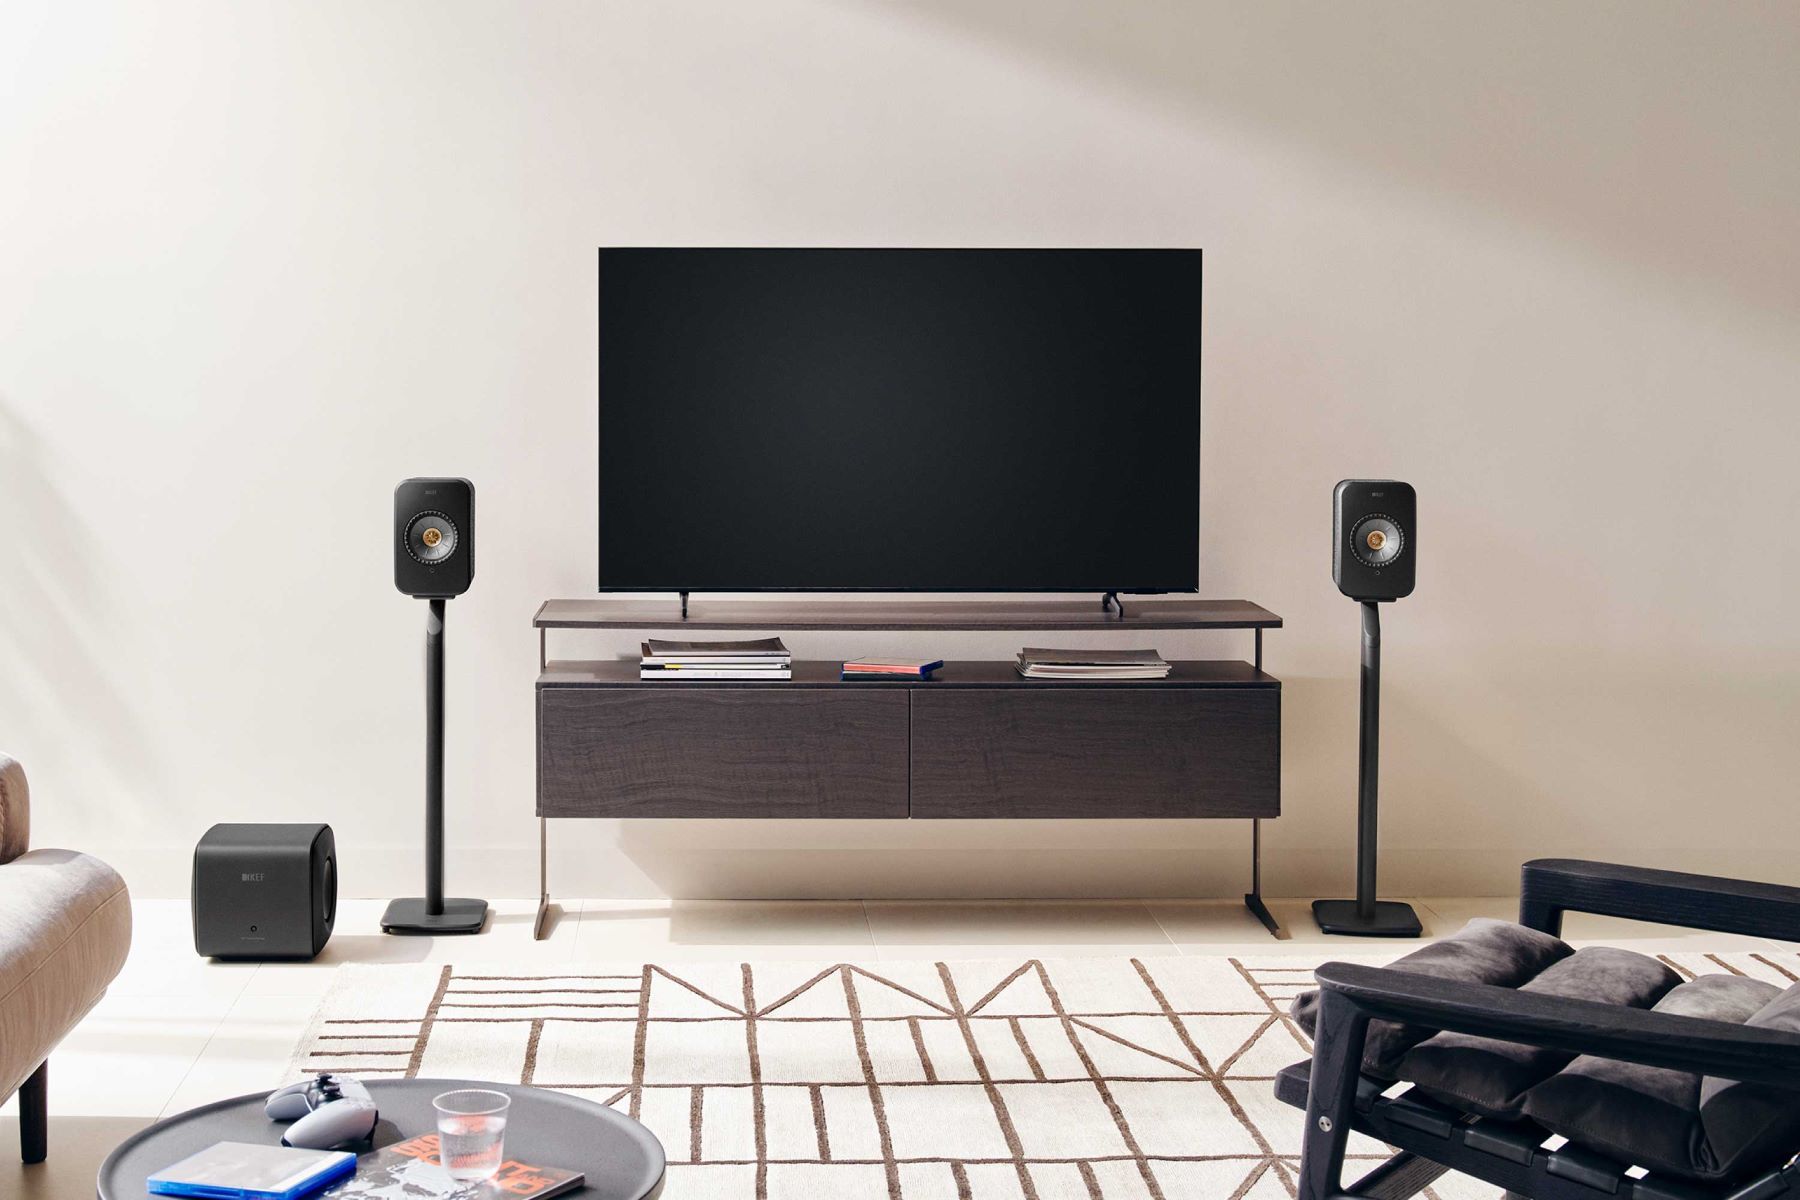
Once you have configured the audio settings on your TV and verified that the subwoofer is working correctly, you’re ready to enjoy the immersive sound experience that your subwoofer adds to your TV setup. Sit back, relax, and enjoy the deep bass response and enhanced audio quality.
If you experience any issues during the configuration process, refer to the troubleshooting tips in the next section or consult the user manual for your specific TV model. Otherwise, congratulations on successfully configuring the audio settings, and get ready to experience a whole new level of audio immersion!
Step 5: Testing the Subwoofer Connection
After connecting and configuring your subwoofer to your TV, it’s important to test the subwoofer connection to ensure that everything is working as expected. Follow these steps to test the subwoofer connection:
1. Play Audio Content
Select a piece of audio content that you are familiar with, such as a movie, TV show, or music. Play the content on your TV and make sure the volume is set to a reasonable level.
2. Listen for Bass Response
Pay close attention to the audio coming from your TV. Focus on any low-frequency sounds, such as deep movie sound effects or bass-heavy music. Listen for the presence and clarity of the bass response. The subwoofer should enhance the audio by delivering deep and impactful bass notes.
3. Adjust Subwoofer Settings
If you feel that the bass response is too overpowering or lacking, you can make adjustments to the subwoofer settings. Refer to the subwoofer’s user manual to learn how to adjust settings such as volume, crossover frequency, or phase. Experiment with these settings to achieve the desired balance and impact of the bass.
4. Run a Speaker Test
Some audio systems or TVs have built-in speaker test features. Use this feature to ensure that all speakers, including the subwoofer, are functioning properly. The speaker test will play a test tone or sound through each speaker, allowing you to verify their presence and audio output.
5. Fine-tune the Audio Experience
Take the time to fine-tune the audio experience to your liking. Adjust the volume levels for the main speakers and the subwoofer to achieve the perfect balance. Experiment with different audio content to ensure that the subwoofer enhances the overall audio experience across a range of content types.
If you notice any issues during the testing process, such as distorted or uneven bass output, make sure to check the cable connections, audio settings, and subwoofer settings. Refer to the troubleshooting tips in the next section if necessary.
Once you’re satisfied with the subwoofer performance and the overall audio experience, sit back, relax, and enjoy the immersive sound that your subwoofer adds to your TV setup!
Troubleshooting Tips
While setting up and connecting a subwoofer to your TV is generally a straightforward process, you may encounter some common issues along the way. Here are a few troubleshooting tips to help you resolve any problems you might face:
1. No Sound from the Subwoofer:
Double-check that the cable connections between your TV and subwoofer are secure. Ensure that you have selected the correct audio output on your TV and enabled the subwoofer output in the audio settings. Confirm that the subwoofer is powered on and that the volume is adjusted appropriately.
2. Distorted or Muddy Bass:
If the bass from the subwoofer sounds distorted or muffled, check the subwoofer settings. Adjust the volume and crossover frequency to find the optimal balance. Additionally, ensure that the subwoofer and other speakers are positioned correctly within your room to prevent sound interference or reflections.
3. No Low-Frequency Response:
If you’re not getting any low-frequency response, ensure that your subwoofer is compatible with your TV and has the necessary audio input capabilities. Check that the correct cable or connector is being used and that it is connected to the proper audio output on your TV. Verify that the subwoofer’s settings are configured correctly and that the volume is not set too low.
4. Interference or Humming Noise:
If you’re experiencing interference or a humming noise, try repositioning the subwoofer and the cables to reduce the proximity to other electronic devices or power sources. Make sure that all cables are properly shielded and free from any damage or wear.
5. Audio Delay:
If you notice audio delay between the sound coming from your TV’s main speakers and the subwoofer, adjust the audio delay settings on your TV or receiver. This option is typically found in the audio settings menu. Experiment with different delay settings until you achieve synchronized audio playback.
If you’ve tried these troubleshooting tips and are still experiencing issues, refer to the user manuals for your TV and subwoofer or contact the manufacturer’s customer support for further assistance.
Remember, patience and thoroughness are key when troubleshooting. By following these tips and taking the time to understand your equipment, you’ll be able to overcome any hurdles and enjoy a seamless audio experience with your subwoofer and TV setup.
Conclusion
Congratulations! You have successfully learned how to hook up a subwoofer to your TV, taking your audio experience to a whole new level. By understanding subwoofers, selecting the right one for your TV setup, and connecting it properly, you can enjoy deep, impactful bass that enhances your favorite movies, TV shows, and music.
Throughout this guide, we explored the different types of subwoofers, discussed the importance of choosing the right subwoofer for your TV, identified the required cables and connectors, and walked through the step-by-step process of connecting and configuring your subwoofer with your TV. We also provided troubleshooting tips to help you overcome any issues that may arise along the way.
Remember, each TV and subwoofer setup may have slight variations, so it’s always a good idea to consult your specific product manuals or contact customer support for detailed instructions and guidance.
Now that your subwoofer is integrated into your TV setup, sit back, relax, and enjoy the immersive sound experience. Feel the deep rumble of explosions, the thumping bass of your favorite music, and the overall enhanced audio quality that a subwoofer brings to your entertainment space.
Thank you for joining us on this journey to enhance your TV audio with a subwoofer. We hope this guide has been informative and helpful in achieving the best audio experience possible. Happy listening!