Home>Devices & Equipment>Subwoofer>How To Hook Up Subwoofer And Amp In Car
Subwoofer
How To Hook Up Subwoofer And Amp In Car
Modified: February 18, 2024
Learn how to easily hook up a subwoofer and amp in your car for an immersive audio experience. Supercharge your bass with our expert tips and step-by-step guide!
(Many of the links in this article redirect to a specific reviewed product. Your purchase of these products through affiliate links helps to generate commission for AudioLover.com, at no extra cost. Learn more)
Table of Contents
- Introduction
- Step 1: Gather the Necessary Equipment
- Step 2: Choose a Suitable Location for the Subwoofer and Amp
- Step 3: Disconnect the Car Battery
- Step 4: Run Power and Ground Cables
- Step 5: Connect the Remote Turn-On Wire
- Step 6: Connect the RCA Cables
- Step 7: Connect the Speaker Wires
- Step 8: Mount and Install the Subwoofer and Amp
- Step 9: Adjust the Subwoofer Settings
- Step 10: Reconnect the Car Battery
- Conclusion
Introduction
Welcome to the world of deep bass and immersive audio experiences! Adding a subwoofer and amp to your car audio system can take your music and movies to a whole new level. Whether you’re a passionate audiophile or simply someone who loves to feel the thumping bass in your favorite songs, a subwoofer can deliver the low-frequency punch that regular car speakers often lack.
In this article, we will guide you through the process of hooking up a subwoofer and amp in your car, step by step. We’ll cover everything from gathering the necessary equipment to mounting and installing the subwoofer and amp. By the end of this guide, you’ll have a deeper understanding of how to create a powerful and dynamic audio setup in your car.
Before diving into the installation process, it’s important to understand the role of a subwoofer and amp in your car audio system. A subwoofer is a specialized speaker designed to reproduce low-frequency sound waves, commonly referred to as bass. It adds depth and richness to your music, making every beat and note more impactful. An amplifier, on the other hand, enhances the power and clarity of the audio signal sent to the speakers, ensuring optimal performance.
Now, let’s get started with the step-by-step process of hooking up a subwoofer and amp in your car. Grab your tools and let’s embark on this audio adventure!
Step 1: Gather the Necessary Equipment
Before you start the installation process, it’s crucial to gather all the necessary equipment. Here’s a list of items you’ll need:
- Subwoofer: Choose a subwoofer that suits your preferences and fits your car. Consider factors like size, power handling, and enclosure type.
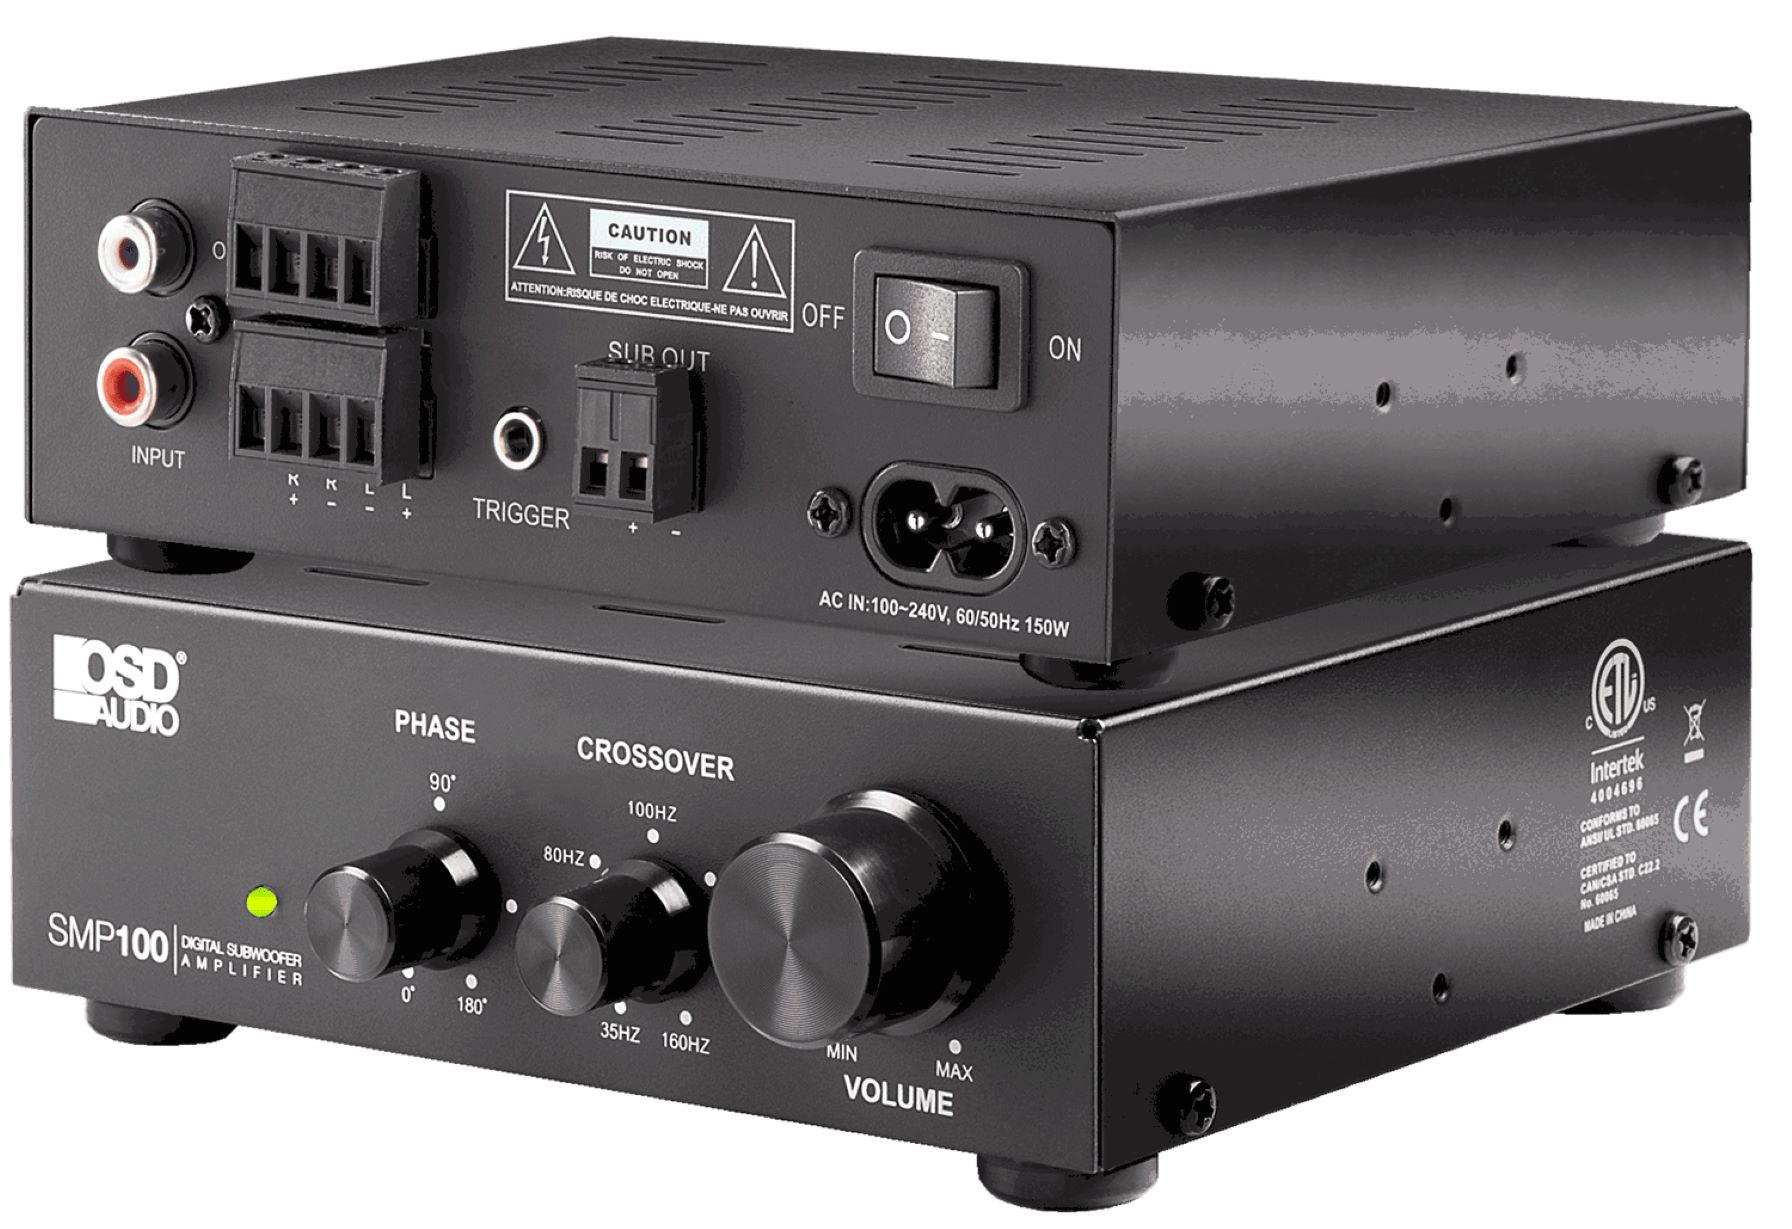
- Amplifier: Select an amplifier that matches the power requirements of your subwoofer. Make sure it has the necessary inputs, outputs, and controls.
- Wiring Kit: Invest in a quality wiring kit that includes power cables, ground cables, RCA cables, speaker wires, and remote turn-on wire.
- Electrical Tape: Use electrical tape to secure and insulate the connections.
- Fuse Holder and Fuse: Install a fuse holder along the power cable near the car battery. Choose a fuse that matches the amp’s recommended amperage.
- Trim Removal Tools: These tools are essential for accessing the interior panels and hiding the wiring.
- Screwdriver and Drill: You’ll need these tools to mount the subwoofer and amp.
It’s important to invest in high-quality equipment to ensure optimal performance and longevity. Consider consulting with a car audio professional or doing thorough research to select the best products for your specific needs and budget.
Once you have gathered all the necessary equipment, you’ll be ready to move on to the next steps of the installation process. Stay tuned for our next section, where we’ll guide you through choosing a suitable location for the subwoofer and amp.
Step 2: Choose a Suitable Location for the Subwoofer and Amp
When it comes to choosing a location for your subwoofer and amp, it’s important to consider both aesthetics and functionality. You want to find a space that allows for proper installation, while also enhancing the overall audio experience in your car.
Here are some factors to keep in mind:
- Trunk Space: The trunk is a popular choice for installing subwoofers and amps. It offers ample space and allows for easy access to the necessary connections. However, keep in mind that placing the subwoofer in the trunk may affect the overall sound distribution in the car.
- Under Seat: Some car models have limited trunk space, making it challenging to install a subwoofer. In such cases, consider installing a compact subwoofer under one of the front seats. This location can save space while still delivering impressive bass.
- Spare Tirewell: If your car has a spare tirewell in the trunk, it can be a convenient and discreet location for hiding the subwoofer. However, make sure the subwoofer enclosure fits properly and does not obstruct access to the spare tire.
- Custom Enclosures: If you want a more integrated look, consider custom enclosures that fit specific areas of your car, such as the sides or rear panels. These enclosures are designed to blend seamlessly with the interior while providing optimal bass performance.
Once you’ve decided on a location, ensure that the subwoofer and amp will have enough ventilation to prevent overheating. Additionally, consider the wiring and cable lengths required to connect the subwoofer and amp to your car’s audio system. Avoid placing them too far away, as it may result in signal loss or poor audio quality.
Remember to consult the user manuals or seek professional advice if you’re unsure about the best location for your subwoofer and amp. With a suitable location in mind, you’re ready to move on to the next steps of the installation process, which involve disconnecting the car battery and running power and ground cables. Stay tuned!
Step 3: Disconnect the Car Battery
Before you begin the installation process, it’s crucial to disconnect the car battery to prevent any electrical accidents or damage. Here’s how to do it:
- Locate the car battery. It is usually found in the engine bay or the trunk of the car.
- Put on safety gloves and goggles to protect yourself from any potential hazards.
- Identify the negative terminal of the battery. It is usually marked with a “-” symbol.
- Using a wrench or a socket wrench, loosen the nut or bolt that holds the negative cable in place.
- Gently remove the negative cable from the battery and secure it away from the battery terminal to prevent accidental contact.
- Move on to disconnecting the positive terminal of the battery. It is typically marked with a “+” symbol.
- Follow the same steps as before to loosen and remove the positive cable from the battery.
Once you have disconnected both the positive and negative cables, double-check that they are secured away from the battery terminals and any metal surfaces. This will ensure that there is no accidental contact and minimize the risk of electrical shocks.
Remember that disconnecting the car battery will reset certain settings in your car, such as the radio presets and clock. Take note of any important settings before proceeding with the installation.
With the car battery safely disconnected, you are ready to move on to the next step: running power and ground cables. Stay tuned for an in-depth guide on how to properly route and connect the cables to your subwoofer and amp for optimal performance.
Step 4: Run Power and Ground Cables
Running the power and ground cables is a crucial step in installing a subwoofer and amp in your car. These cables provide the necessary power to your amp and ensure a reliable electrical connection. Here’s how to do it:
- Choose a suitable route for the power cable. It should be routed away from any moving parts, hot surfaces, or areas prone to water damage.
- Measure the distance between your amp and the car battery. This will determine the length of the power cable you need.
- Using the appropriate tools, remove any interior panels or carpeting necessary to access the areas where you will run the power cable.
- Secure the power cable using cable ties or clips to ensure it does not move or get entangled.
- Route the power cable through the firewall. Look for existing wiring grommets or use a firewall pass-through to create a new opening. Make sure to seal the hole properly to prevent water or dust ingress.
- Now it’s time to run the ground cable. Find a suitable grounding point near the amp, such as a bolt or stud connected to the chassis. Make sure to clean the grounding point to ensure a good electrical connection.
- Measure and cut the ground cable to the appropriate length, leaving enough slack to reach the grounding point.
As you run the power and ground cables, be mindful of any other wiring or components in the car to avoid interference or damage. It’s also crucial to use the correct gauge of wire for both the power and ground cables, depending on the power requirements of your subwoofer and amp.
With the power and ground cables properly routed and connected, you’re one step closer to enjoying an enhanced audio experience in your car. Next, we’ll guide you through connecting the remote turn-on wire. Stay tuned!
Step 5: Connect the Remote Turn-On Wire
The remote turn-on wire is responsible for activating the amplifier when you start your car’s audio system. It ensures that the amp powers on and off with the car’s ignition, eliminating the need for manual switching. Here’s how to connect the remote turn-on wire:
- Locate the remote turn-on wire on your head unit or aftermarket radio. It is typically labeled as “REM” or “REMOTE.”
- Measure the distance between your head unit and the amp to determine the length of the remote turn-on wire you’ll need.
- Using the appropriate tools, run the remote turn-on wire from the head unit to the amp location. Take a route that avoids interference from power or speaker wires.
- Strip about half an inch of insulation from the end of the remote turn-on wire.
- If you have a head unit with a dedicated remote turn-on output, connect one end of the wire to that output. If not, you can often use the accessory wire (usually red) on the head unit’s wiring harness as the remote turn-on wire.
- At the amp, strip another half-inch of insulation from the wire’s end.
- Connect the remote turn-on wire to the remote turn-on terminal on the amp. This terminal is usually labeled as “REM” or “REMOTE.”
- Ensure a snug and secure connection by tightening the terminal or using an appropriate connector.
Once you have properly connected the remote turn-on wire, its function is to send a signal to the amp when the head unit receives power. This will turn on the amplifier, allowing it to receive and amplify the audio signal from the head unit.
Be sure to check the specific instructions provided with your head unit and amplifier, as the remote turn-on wire connection process may vary slightly depending on the models and manufacturers.
With the remote turn-on wire successfully connected, you’re ready to move on to the next step: connecting the RCA cables. Stay tuned for our next section, where we’ll guide you through this essential step in the installation process.
Step 6: Connect the RCA Cables
The RCA cables play a crucial role in transmitting the audio signal from your head unit to the amplifier. These cables deliver a clear and high-quality audio signal, ensuring optimal sound performance. Here’s how to connect the RCA cables:
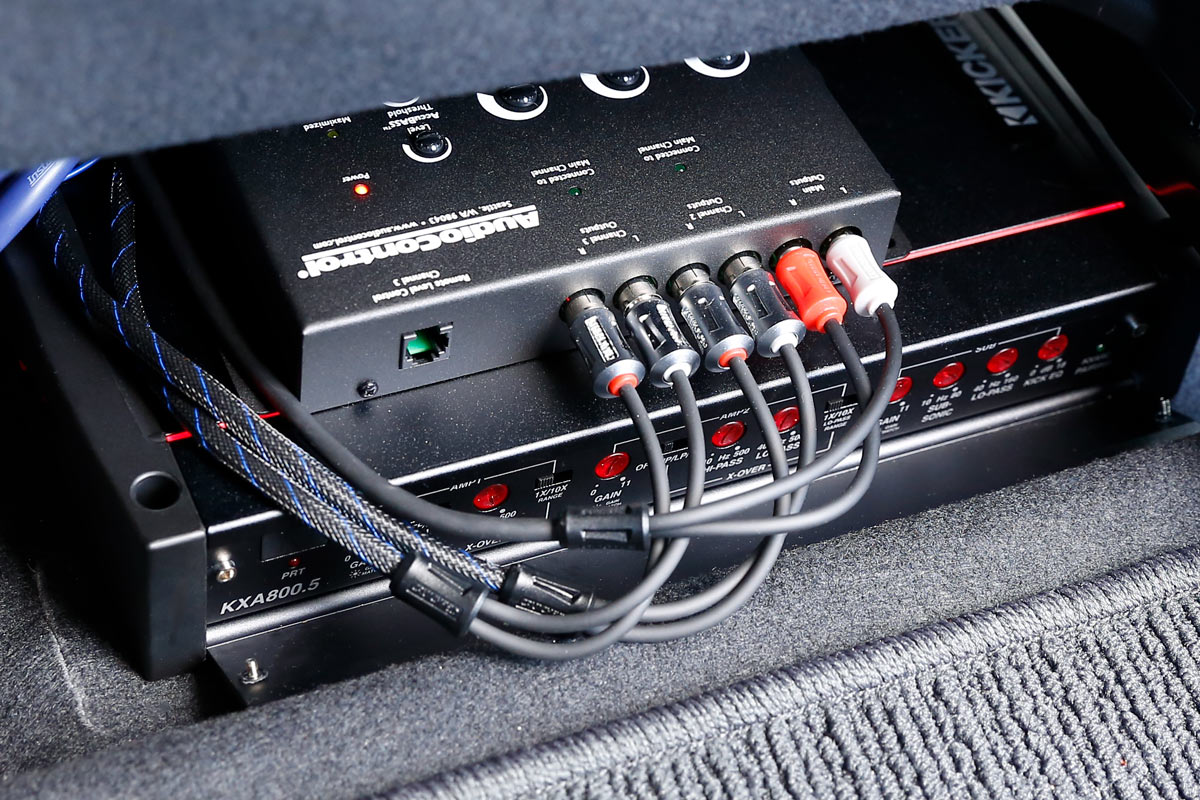
- Locate the RCA preamp outputs on your head unit or aftermarket radio. These outputs are usually labeled as “Subwoofer Out” or “RCA Out.”
- Measure the distance between your head unit and the amp to determine the length of the RCA cables you’ll need.
- Using the appropriate tools, run the RCA cables from the head unit to the amp location. Keep them separate from power and speaker wires to minimize interference and signal degradation.
- At the head unit end, connect the RCA cables to the corresponding preamp outputs. Ensure a secure and tight connection.
- At the amp end, connect the RCA cables to the RCA inputs. Match the left (L) channel to the left input and the right (R) channel to the right input.
- Ensure a secure connection by gently pushing the connectors into place until you feel a click or until they are firmly seated in the input jacks.
- If your amp has multiple input channels or you are using a Y-cable or splitter, make sure to adjust the settings on the amp accordingly to match your setup.
It is important to use high-quality RCA cables to minimize signal loss and interference. Look for cables with gold-plated connectors and good shielding to ensure optimal performance.
After connecting the RCA cables, double-check that all connections are secure and tight. Loose connections can result in poor audio quality or intermittent sound issues.
With the RCA cables successfully connected, you’re one step closer to experiencing the deep and immersive bass from your subwoofer. Next, we’ll guide you through connecting the speaker wires to complete the installation process. Keep reading!
Step 7: Connect the Speaker Wires
Connecting the speaker wires is an important step in ensuring that the audio signal from your amplifier reaches your subwoofer accurately. Properly connecting the speaker wires will result in clear and powerful bass reproduction. Here’s how to do it:
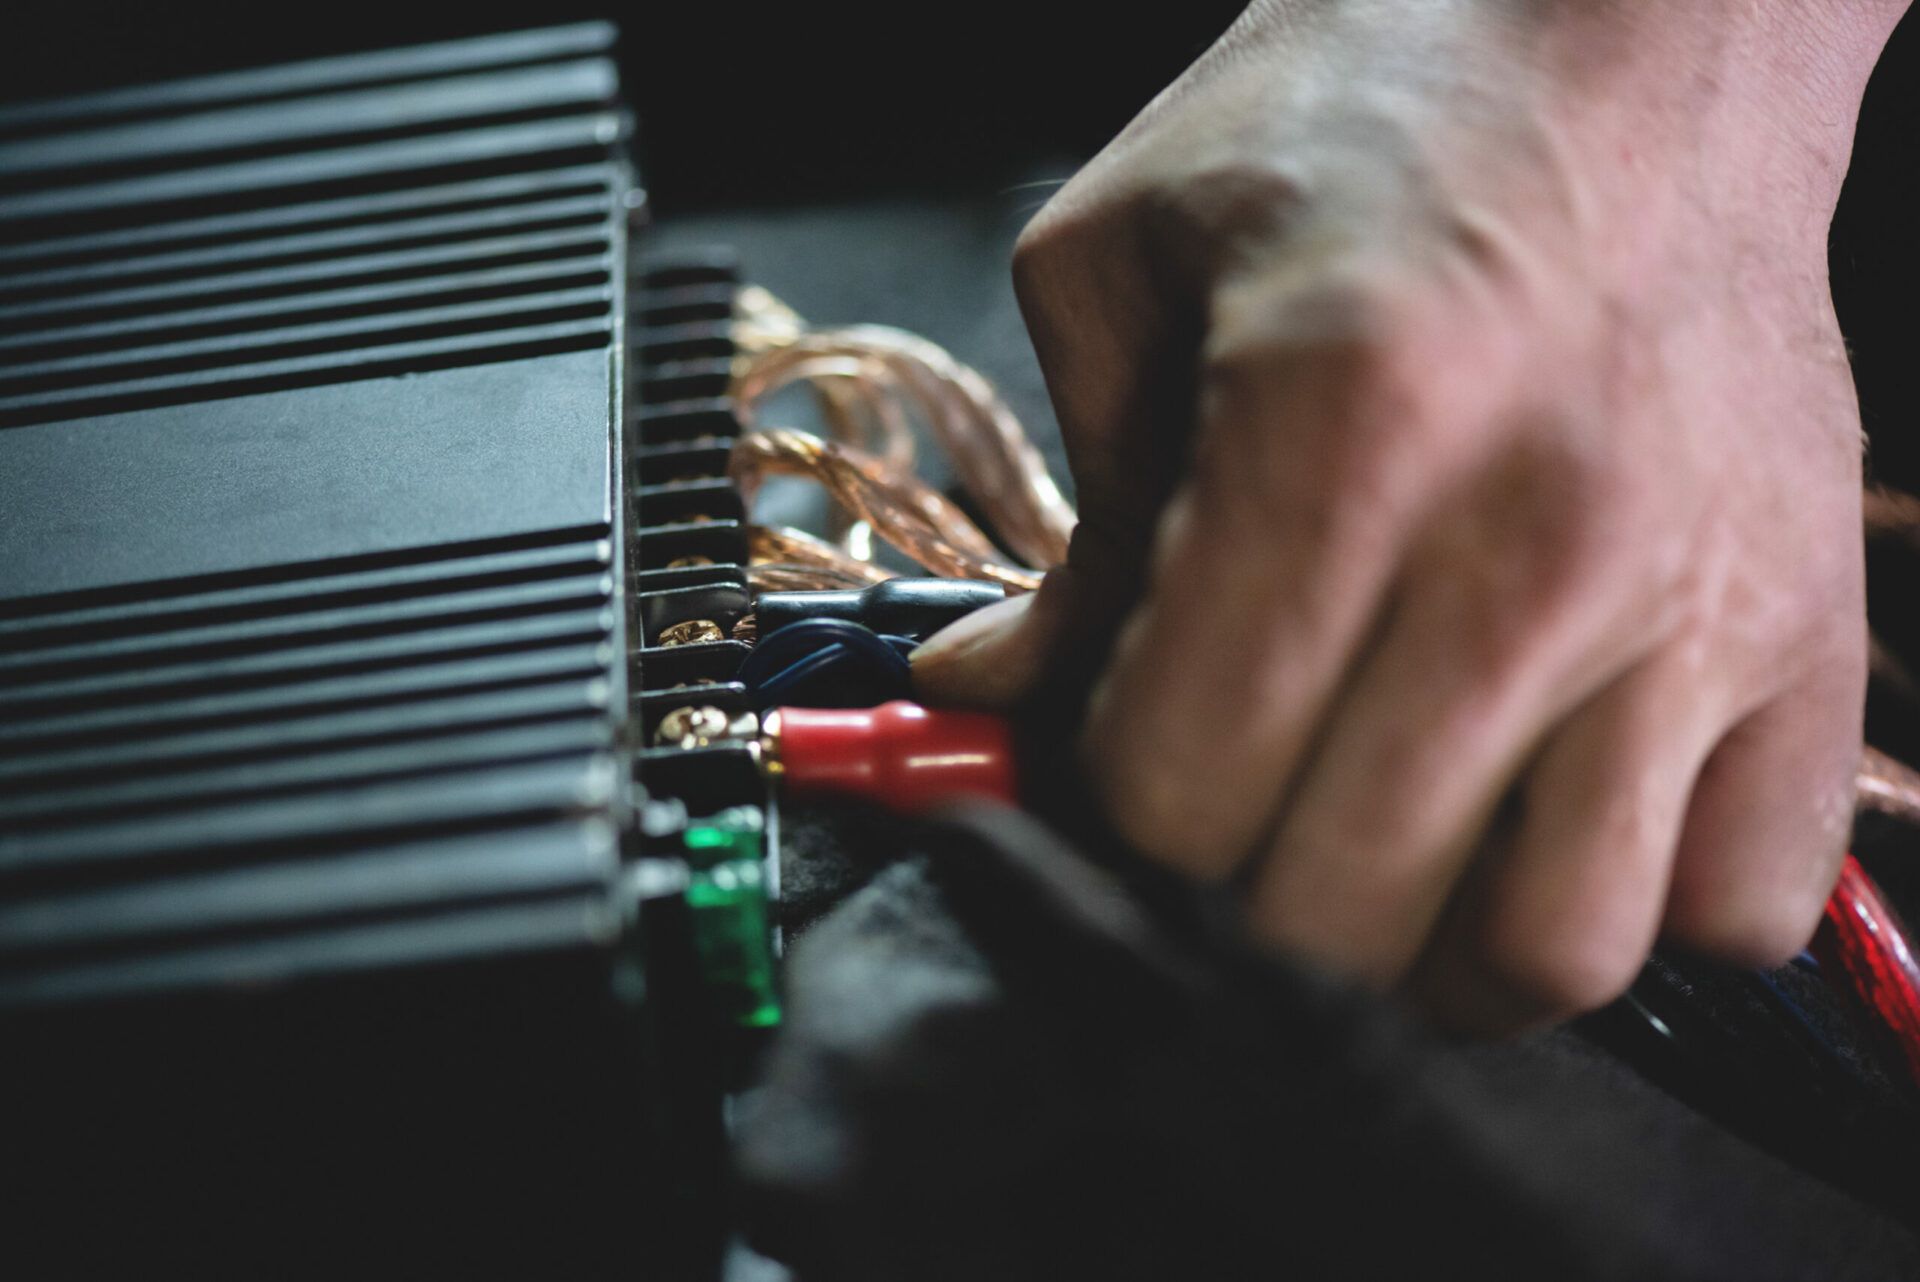
- Identify the speaker outputs on your amplifier. These outputs are usually labeled as “Speaker Out” or “Speaker Terminal.”
- Measure the distance between your amplifier and subwoofer to determine the length of speaker wire you’ll need.
- Cut the speaker wire into two equal lengths, one for each channel (left and right).
- Strip about half an inch of insulation from the ends of each speaker wire.
- At the amplifier end, connect the positive (+) terminal of the left channel speaker wire to the positive terminal of the left channel output. Repeat this process for the negative (-) terminals, ensuring correct polarity.
- Repeat step 5 for the right channel, connecting the speaker wire to the corresponding positive and negative terminals.
- At the subwoofer end, connect the positive (+) speaker wire to the positive terminal of the subwoofer. Connect the negative (-) speaker wire to the negative terminal.
- Ensure tight and secure connections by verifying that the wires are securely inserted into the terminal connectors.
It is important to maintain consistent polarity when connecting the speaker wires. Typically, the positive terminal is denoted with a “+” symbol or a red-colored marking, while the negative terminal is denoted with a “-” symbol or a black-colored marking.
Remember to carefully route the speaker wires to avoid any interference or contact with other electrical components or moving parts in the car.
Once the speaker wires are properly connected, you’re almost there! In the next step, we’ll guide you through mounting and installing the subwoofer and amp in your car. Stay tuned!
Step 8: Mount and Install the Subwoofer and Amp
Mounting and installing the subwoofer and amplifier is the final step in the installation process. Proper installation ensures that the equipment is securely in place and positioned for optimal sound performance. Here’s how to do it:
- Choose a suitable location for mounting the subwoofer. Depending on your earlier decision, this might be in the trunk, under a seat, or in a custom enclosure. Ensure that the subwoofer is securely mounted and positioned for optimal sound dispersion.
- Use appropriate mounting brackets or screws to secure the subwoofer in place. Be cautious not to damage any internal components or cables during the installation process.
- If your subwoofer requires an enclosure, make sure it is properly sealed and securely mounted, following the manufacturer’s instructions.
- Mount the amplifier in a safe and accessible location. Ensure that it is positioned securely and with proper ventilation to prevent overheating.
- Use mounting brackets or screws to secure the amp in place, taking care not to block any necessary connections or controls.
- Ensure all connections are secure and properly tightened on both the subwoofer and amp.
- Double-check all wiring connections, including the power, ground, remote turn-on, RCA, and speaker wires, making sure they are properly routed and secured.
- Test the subwoofer and amp by turning on your car’s audio system and playing some music with bass. Adjust the settings on the amp and head unit, as needed, to achieve the desired sound quality.
- Once you are satisfied with the sound performance, tidy up the wiring by using cable ties or clips to secure and organize the wires.
Keep in mind that the specific mounting and installation process may vary depending on the make and model of your subwoofer, amp, and car. Consult the user manuals for detailed instructions or seek assistance from a professional if needed.
With the subwoofer and amplifier securely mounted and installed, you’re now ready to fine-tune the subwoofer settings and enjoy a deep and immersive audio experience in your car. In the next step, we’ll guide you through adjusting the subwoofer settings for optimal performance. Keep reading!
Step 9: Adjust the Subwoofer Settings
After mounting and installing the subwoofer and amplifier, it’s essential to adjust the subwoofer settings to achieve the best possible sound performance. Properly tuning the subwoofer ensures that it blends seamlessly with your car’s audio system and delivers the desired bass response. Here’s how to do it:
- Refer to the user manual of your amplifier to locate the controls and settings specific to your model.
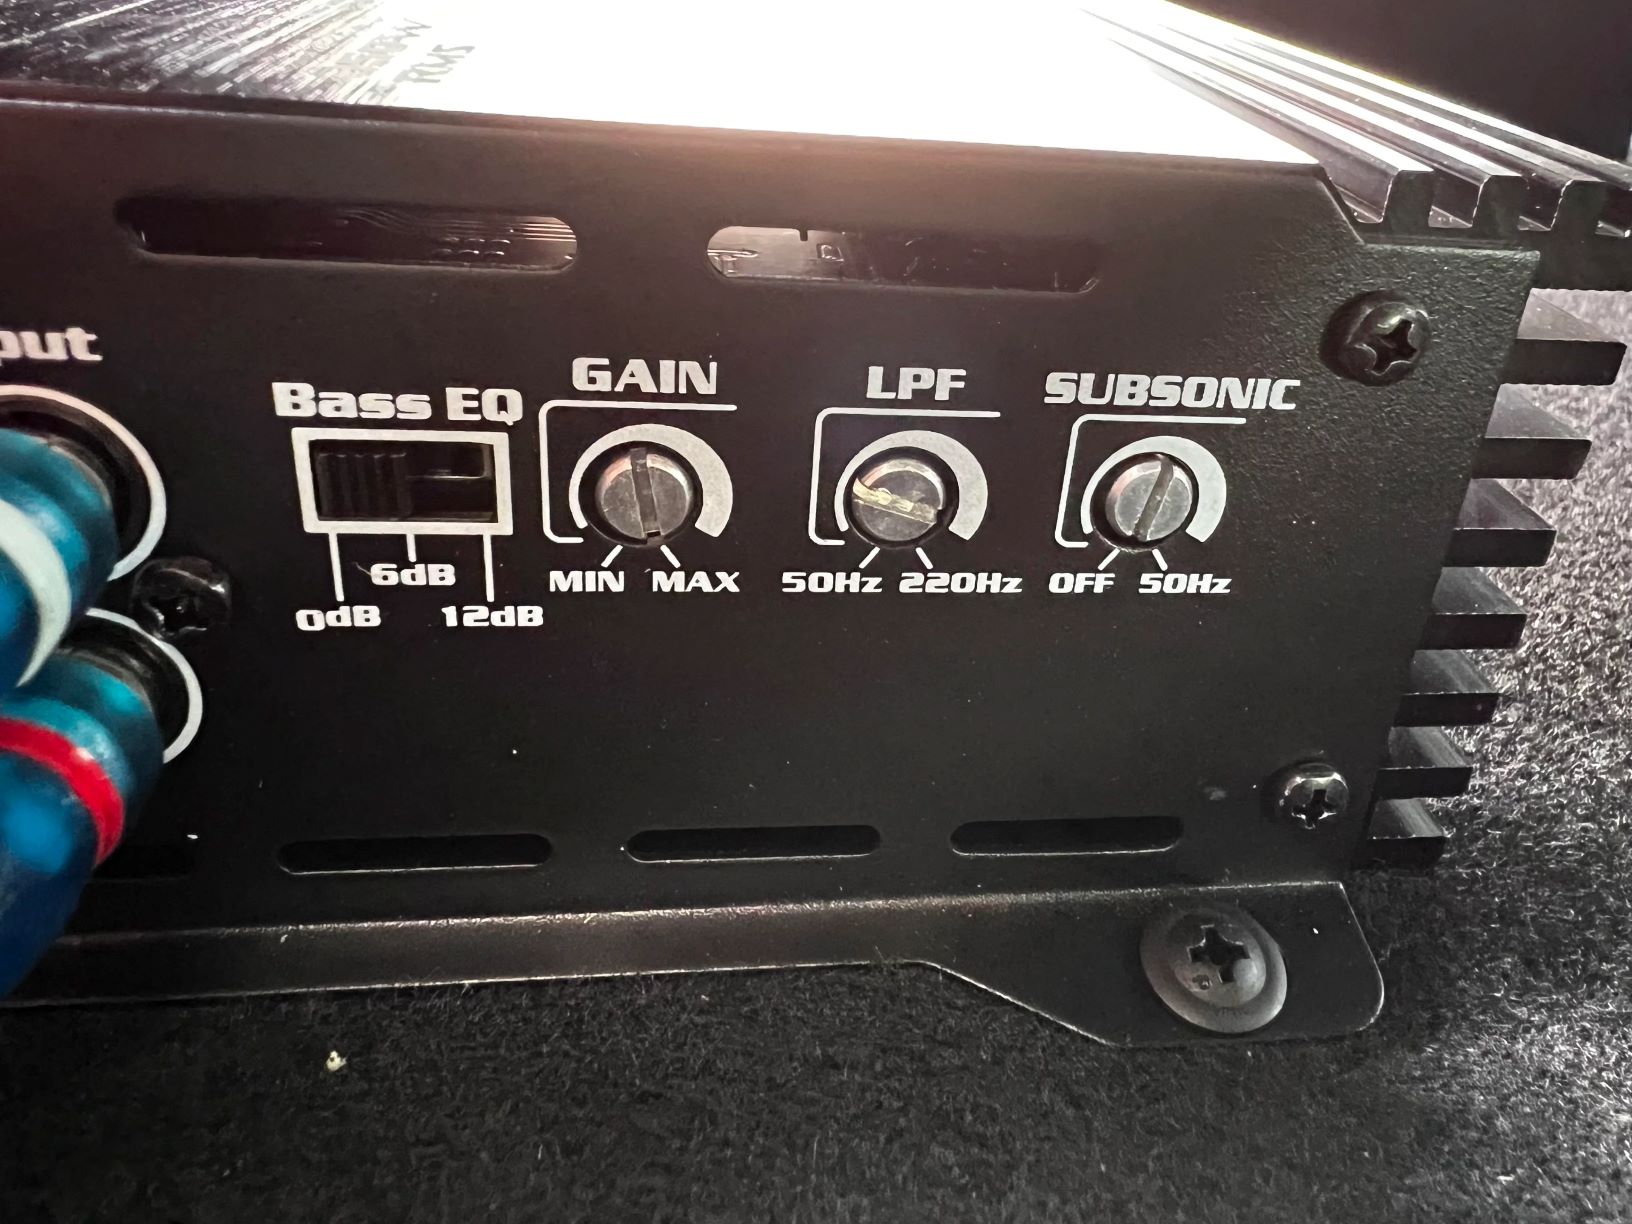
- Start by adjusting the gain control on the amplifier. This controls the input sensitivity of the amp and determines how much power is sent to the subwoofer. Begin with a low gain setting and gradually increase it until you achieve the desired bass level without distortion.
- Adjust the low-pass filter (LPF) on the amplifier. This determines the frequency range that the subwoofer will reproduce. Set it to a frequency that complements your car’s audio system and personal preferences. Experiment with different settings to find the optimal balance between bass impact and clarity.
- Some amplifiers may have additional settings like phase control, bass boost, or subsonic filter. Consult the user manual and adjust these settings as desired, taking care not to overdo any boosts or filters, which can result in an unnatural or distorted bass response.
- Use your car’s equalizer or audio system settings to fine-tune the overall sound balance. Make adjustments to the bass, midrange, and treble settings to ensure the subwoofer and other speakers are performing harmoniously.
- Listen to a variety of music tracks that you’re familiar with to assess the subwoofer’s performance. Pay attention to the bass response, clarity, and overall impact. Make further adjustments to the settings as needed to achieve the desired audio experience.
- Take note of the settings and adjustments you make so that you can easily recreate them or make changes in the future.
Keep in mind that the tuning process may require some trial and error, as each car’s acoustics and personal preferences can vary. Take the time to fine-tune the subwoofer settings until you achieve a sound that is satisfying and that enhances your listening pleasure.
With the subwoofer settings properly adjusted, you’re now ready to reconnect the car battery and experience the deep bass and immersive sound in your car once again. Let’s move on to the final step: reconnecting the car battery.
Step 10: Reconnect the Car Battery
After completing the installation and adjustment of your subwoofer and amplifier, it’s time to reconnect the car battery. This final step will restore power to your audio system and allow you to enjoy your enhanced sound experience. Here’s how to do it:
- Double-check that all connections, including the power, ground, remote turn-on, RCA, and speaker wires, are securely and correctly in place.
- Put on safety gloves and goggles to protect yourself from any potential hazards.
- Locate the negative terminal of the car battery. It is typically marked with a “-” symbol.
- Take the negative cable that you disconnected earlier and carefully position it over the negative battery terminal.
- Tighten the nut or bolt to secure the negative cable, ensuring a snug and secure connection.
- Repeat the process with the positive cable, connecting it to the positive battery terminal, usually marked with a “+” symbol.
- Ensure that both the positive and negative cables are tight and securely attached to the battery terminals.
- Inspect the surrounding area to make sure no tools or loose materials are near the battery that could cause a short circuit.
- Turn on your car’s audio system and test the subwoofer and amp. Play different types of music to ensure that the bass response is accurate and satisfying.
- Make any final adjustments to the amplifier settings, if necessary, to fine-tune the sound to your liking.
Reconnecting the car battery will allow your subwoofer and amplifier to power on with your car’s audio system. Be sure to observe any changes in audio performance and check for any issues like excessive heat or abnormal noises.
Now that you have successfully reconnected the car battery, you can enjoy the impressive bass and immersive audio experience provided by your subwoofer system. Sit back, relax, and enjoy the powerful low-frequency sound that brings your music and movies to life.
Congratulations on completing the installation process and setting up your subwoofer and amplifier in your car! If you have any questions or encounter any difficulties, don’t hesitate to consult with a professional or reach out to the manufacturer for assistance.
Conclusion
Congratulations on successfully installing a subwoofer and amplifier in your car! You’ve taken the necessary steps to enhance your audio system and experience deep, immersive bass that will elevate your music and movie enjoyment to new heights. By following the step-by-step process outlined in this guide, you’ve learned how to gather the necessary equipment, choose a suitable location, disconnect and reconnect the car battery, run power and ground cables, connect the remote turn-on wire, RCA cables, and speaker wires, mount and install the subwoofer and amp, and adjust the settings for optimal performance.
Remember to always prioritize safety when working with electrical components and consult user manuals or seek professional assistance if needed. High-quality equipment, proper installation, and careful adjustments are key to achieving the best sound quality and ensuring a positive and long-lasting experience with your new subwoofer setup.
Now, it’s time to enjoy the immersive bass and powerful audio that your subwoofer and amplifier have brought to your car. Sit back and revel in the enhanced musical experience, feeling every beat and experiencing every thump in your favorite songs. Let the deep bass envelop you and transform your car into a personal concert hall or a state-of-the-art home theater on wheels.
Thank you for taking the time to follow this comprehensive guide. We hope it has provided you with the knowledge and confidence to successfully install and set up your subwoofer and amplifier system. Feel free to experiment with different settings and continue exploring the world of enhanced audio. Happy listening!