Home>Production & Technology>Sound Bar>How To Hook Up Sound Bar To Onn TV
Sound Bar
How To Hook Up Sound Bar To Onn TV
Modified: January 22, 2024
Learn how to easily connect a soundbar to your Onn TV and enhance your audio experience. Follow our step-by-step guide for a hassle-free setup.
(Many of the links in this article redirect to a specific reviewed product. Your purchase of these products through affiliate links helps to generate commission for AudioLover.com, at no extra cost. Learn more)
Table of Contents
- Introduction
- Required Equipment
- Step 1: Identify the available audio ports on your Onn TV
- Step 2: Connect the sound bar to your Onn TV using an HDMI cable
- Step 3: Set the sound bar as the default audio output device on your Onn TV
- Step 4: Adjust the sound bar settings
- Step 5: Test the sound bar connection
- Troubleshooting Tips
- Conclusion
Introduction
Welcome to our guide on how to hook up a sound bar to an Onn TV. A sound bar is a great addition to your home entertainment setup as it can greatly enhance the audio quality of your TV viewing experience. Whether you want to enjoy immersive surround sound or simply amplify the sound output from your TV, connecting a sound bar to your Onn TV is a relatively straightforward process.
In this article, we will walk you through the step-by-step process of connecting a sound bar to your Onn TV. We will cover the required equipment, the different connection options available, and provide some troubleshooting tips in case you encounter any issues along the way.
It’s important to note that the specific steps may vary slightly depending on the model of your Onn TV and your sound bar. However, the general principles and connections we will discuss should apply to most Onn TVs and sound bars.
So, if you’re ready to take your TV audio to the next level, let’s dive in and get started on hooking up your sound bar to your Onn TV!
Required Equipment
Before you begin setting up your sound bar with your Onn TV, make sure you have the following equipment on hand:
- Sound bar: This is the main component that will provide enhanced audio output for your TV. Choose a sound bar that suits your budget and audio preferences.
- HDMI cable: This is the most common and recommended method of connecting a sound bar to your TV. Ensure that you have an HDMI cable with sufficient length to reach the sound bar from your TV.
- Power cables: Depending on the sound bar model, you may need one or more power cables to connect to a power source. Make sure you have the appropriate power cables for your specific sound bar.
- Remote control (optional): Some sound bars come with their own remote control for easy adjustments and settings. Check if your sound bar includes a remote control and keep it handy during the setup process.
It’s worth noting that while an HDMI cable is the recommended method for connecting your sound bar to your Onn TV, some sound bars and TVs also offer alternative connection options such as optical audio and RCA cables. Make sure to check the available ports on your sound bar and TV to determine which connection method is best for you.
Once you have gathered all the necessary equipment, you’re ready to proceed with connecting your sound bar to your Onn TV.
Step 1: Identify the available audio ports on your Onn TV
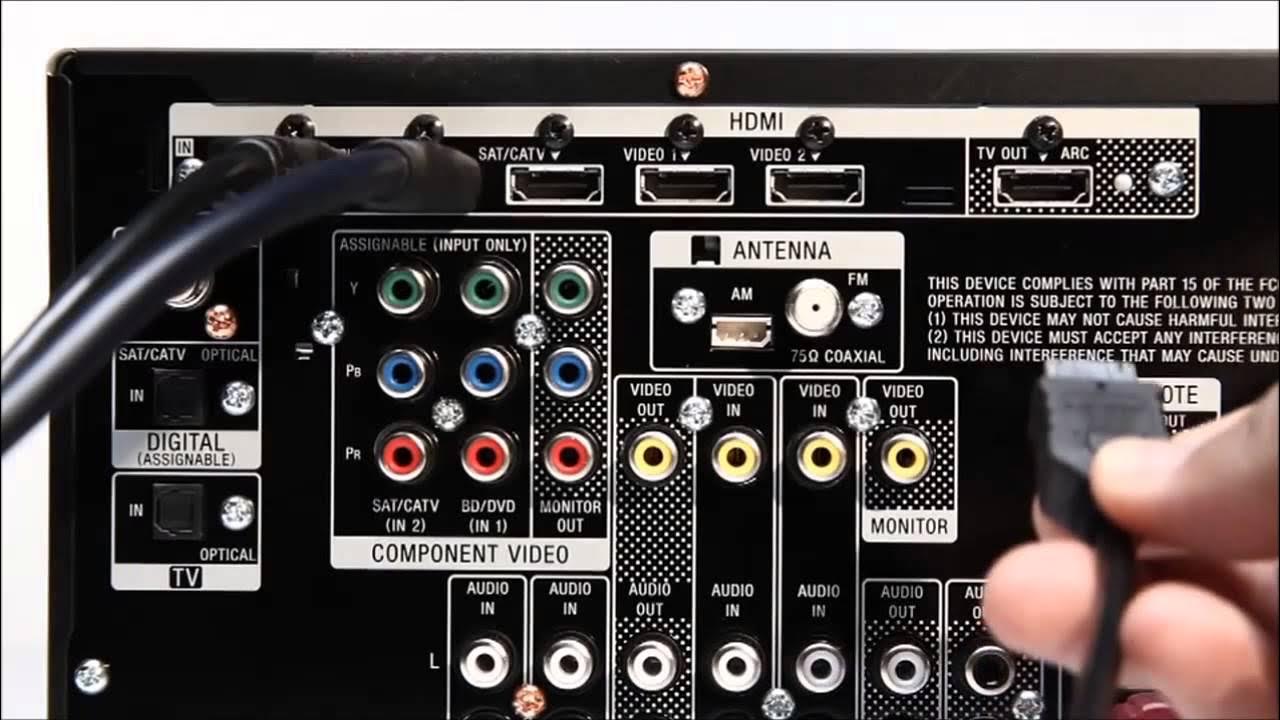
Before connecting your sound bar to your Onn TV, you need to identify the available audio ports on your TV. This will vary depending on the model of your Onn TV, but common audio ports include HDMI, optical audio, and RCA.
Start by examining the back or side panel of your Onn TV. Look for labeled audio input ports such as “HDMI ARC,” “Optical,” or “RCA.” These ports may also be color-coded for easier identification. HDMI ARC stands for “Audio Return Channel” and is the preferred method for connecting a sound bar as it allows for two-way communication between the TV and sound bar.
If you have multiple HDMI ports on your Onn TV, ensure that you locate the one labeled “ARC” or “Audio Return Channel” for the best audio experience.
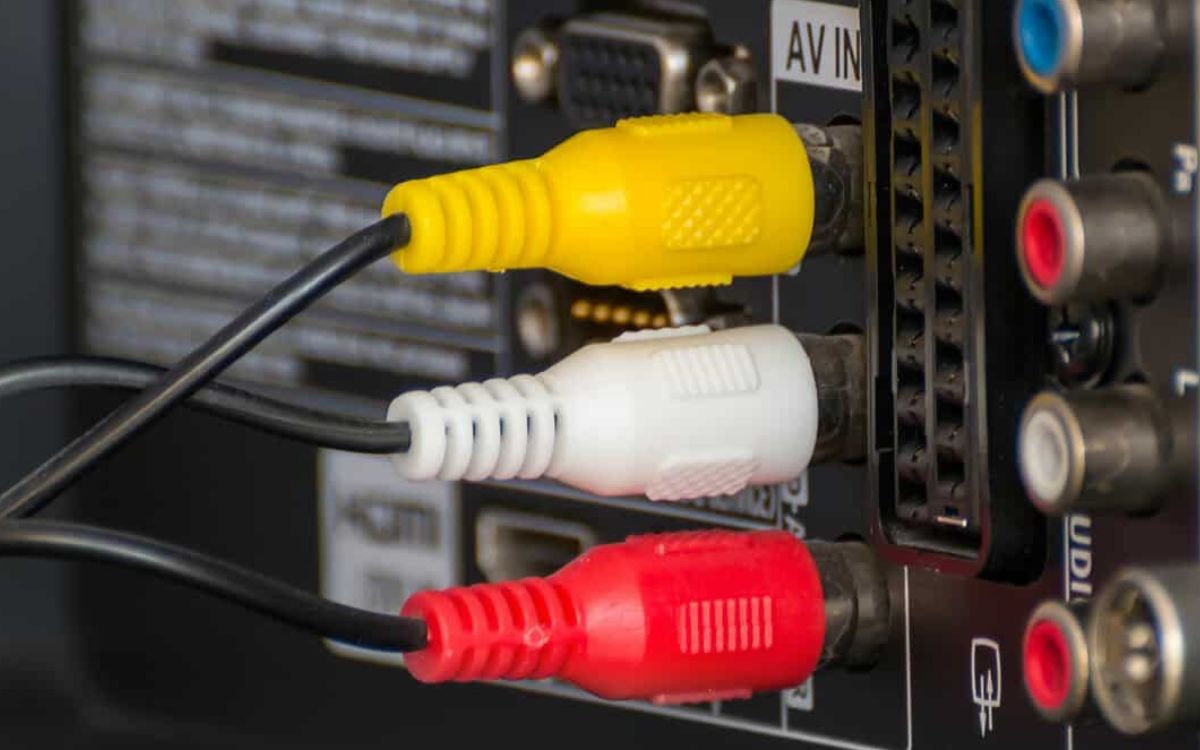
If your Onn TV does not have an HDMI ARC port, you can still connect your sound bar using an optical audio or RCA cable. The optical audio port will be labeled as “Optical” or “Digital Audio Out,” while the RCA ports are usually red and white and labeled “Audio Out” or “Analog Out.”
Once you have identified the available audio ports on your Onn TV, you are ready to proceed to the next step and connect your sound bar.
Step 2: Connect the sound bar to your Onn TV using an HDMI cable
Connecting your sound bar to your Onn TV using an HDMI cable is the most common and recommended method as it allows for high-quality audio transmission and often includes additional features like audio return channel (ARC).
Here’s how to connect your sound bar to your Onn TV using an HDMI cable:
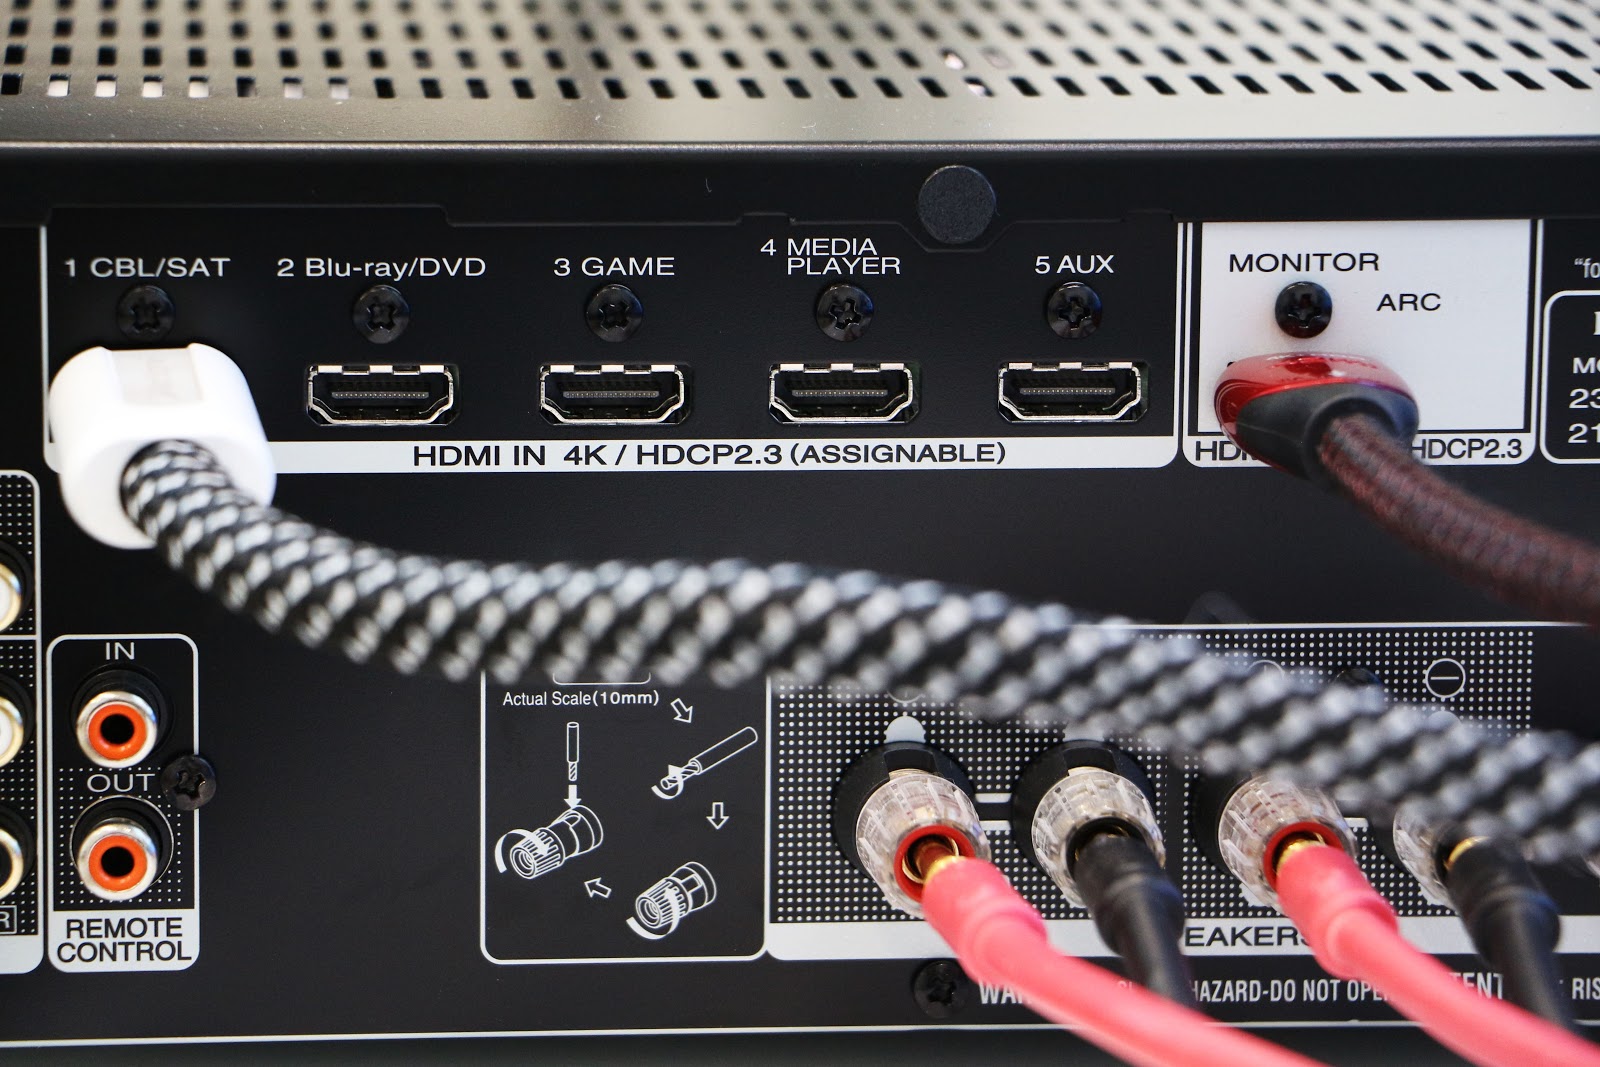
- Locate the HDMI ARC port on the back or side panel of your Onn TV. It is usually marked as “ARC” or “Audio Return Channel”.
- Plug one end of the HDMI cable into the HDMI ARC port on your TV.
- Insert the other end of the HDMI cable into the HDMI ARC or HDMI Out port on your sound bar.
- Make sure both ends of the HDMI cable are securely plugged in.
Once the HDMI cable is connected, power on both your Onn TV and sound bar. Your TV should automatically detect the sound bar connection, and you should see an on-screen notification confirming the audio output settings.
If your Onn TV doesn’t detect the sound bar automatically, you may need to manually adjust the audio settings. Using your TV remote, navigate to the settings menu and select the audio settings section. Look for an option to set the sound output to “HDMI ARC” or “External Speakers.” Choose the appropriate option to enable audio output through the connected sound bar.
Now that you have successfully connected your sound bar to your Onn TV using an HDMI cable, you can move on to the next step of setting the sound bar as the default audio output device on your TV.
Step 3: Set the sound bar as the default audio output device on your Onn TV
After connecting the sound bar to your Onn TV, you need to set it as the default audio output device to ensure that all audio is routed through the sound bar rather than the TV’s built-in speakers.
Follow these steps to set the sound bar as the default audio output device on your Onn TV:
- Using your TV remote, navigate to the settings menu.
- Look for an option related to audio settings or sound output.
- Select the audio output options and choose the sound bar as the default audio device.
The specific steps may vary depending on your Onn TV model and interface. You may need to explore different sections of the settings menu or refer to the TV’s user manual to find the audio output settings.
Once you have set the sound bar as the default audio output device, any audio played on your Onn TV will be directed to the sound bar, providing you with enhanced sound quality and immersion.
Remember to adjust the volume settings on both your Onn TV and the sound bar itself to achieve the desired sound levels.
Now that you have properly configured the audio output settings, you can move on to step 4, where we will discuss adjusting the sound bar settings for optimal performance.
Step 4: Adjust the sound bar settings
Once your sound bar is connected and set as the default audio output device on your Onn TV, it’s time to fine-tune the sound bar settings for optimal audio performance.
Here are some key settings you should consider adjusting on your sound bar:
- Sound modes: Many sound bars offer different sound modes such as movie, music, or sports. Experiment with these modes to find the one that suits your content and personal preference.
- Equalizer settings: Some sound bars allow you to customize the sound using EQ settings. Adjust the bass, treble, and other sound parameters to achieve the desired audio balance.
- Volume leveling: Some sound bars have a volume leveling feature that helps to equalize the sound between different sources or channels, preventing sudden volume changes.
- Virtual surround sound: If your sound bar supports virtual surround sound technology, enable this feature to create a more immersive audio experience.
Refer to your sound bar’s user manual for specific instructions on accessing and adjusting these settings. It’s worth spending some time experimenting with different settings to fine-tune the audio quality according to your preferences.
Keep in mind that the optimal sound settings may differ depending on the content you are watching or listening to. Adjust the settings accordingly to enhance your overall audio experience.
With the sound bar settings adjusted to your liking, you’re now ready to move on to the final step: testing the sound bar connection.
Step 5: Test the sound bar connection
After connecting and adjusting the settings of your sound bar with your Onn TV, it’s essential to test the sound bar connection to ensure everything is working correctly.
Here’s how you can test the sound bar connection:
- Play a video or audio content on your Onn TV.
- Observe if the audio is coming from the sound bar instead of the TV’s built-in speakers.
- Adjust the volume levels on both the sound bar and the TV to find a balance that suits your preference.
- Try different audio sources such as streaming services, gaming consoles, or external devices to ensure the sound bar is working consistently across various inputs.
While testing the sound bar connection, pay attention to the sound quality and ensure that all speakers in the sound bar are functioning correctly. If you notice any audio distortions, unbalanced sound, or missing channels, double-check the connections and settings to address any potential issues.
Additionally, it’s advisable to test different sound modes and settings to find the optimal audio experience for different types of content. Adjust the equalizer settings based on personal preference and the type of media you’re consuming, whether it’s movies, music, or sports.
Remember, sound preferences can vary from person to person, so take the time to experiment and find the settings that provide the best audio experience for you.
Congratulations! If the sound bar connection tests are successful and you’re satisfied with the audio quality, you have successfully hooked up your sound bar to your Onn TV.
If you encounter any issues during the testing process or require further assistance, refer to the user manuals of your Onn TV and sound bar or reach out to their respective customer support.
Now sit back, relax, and enjoy your favorite movies, shows, and music with immersive and enhanced audio from your sound bar!
Troubleshooting Tips
While setting up your sound bar with your Onn TV, you may encounter some common issues that can be easily resolved. Here are a few troubleshooting tips to help you overcome potential challenges:
- No sound: If you’re not getting any sound from your sound bar, check the following:
- Ensure that the sound bar is powered on and connected to the TV properly.
- Make sure the sound bar is set as the default audio output device on your Onn TV.
- Verify that the volume on both the TV and sound bar is turned up.
- Check if the TV’s mute function is enabled.
- Poor sound quality: If the audio quality from the sound bar is not up to par, consider the following:
- Adjust the sound bar’s equalizer settings to fine-tune the audio balance.
- Ensure that the audio source, such as the streaming service or device connected to the TV, is of good quality.
- Check for any audio enhancements or virtual surround sound features on the sound bar that may impact the sound quality.
- Audio lag or synchronization issues: If you experience a lag between the video and audio or notice synchronization issues, try the following:
- Check if there are any software updates available for both your Onn TV and sound bar. Updating the firmware can sometimes resolve synchronization issues.
- Disconnect and reconnect the HDMI cable between the TV and sound bar to ensure a secure connection.
- If available, enable “Audio Sync” or “Lip Sync” settings on your sound bar to help align the audio with the visuals. Adjust the settings until the synchronization improves.
If you are still experiencing issues after attempting these troubleshooting tips, consult the user manuals of your Onn TV and sound bar for further guidance. You can also reach out to their customer support for assistance specific to your device model.
Remember, troubleshooting can often solve common problems, so don’t get discouraged. With a little patience and persistence, you’ll be able to enjoy the full benefits of your sound bar and Onn TV setup.
Conclusion
Congratulations! You have now learned how to successfully hook up a sound bar to your Onn TV. By following the step-by-step guide and troubleshooting tips provided in this article, you have enhanced your TV viewing experience with superior audio quality.
Remember to gather the necessary equipment, identify the available audio ports on your Onn TV, and connect the sound bar using an HDMI cable. Set the sound bar as the default audio output device on your TV, adjust the sound bar settings to your preference, and test the sound bar connection to ensure everything is working as expected.
If you encounter any issues along the way, refer to the troubleshooting tips and reach out to customer support for further assistance.
Now, sit back, relax, and enjoy your favorite movies, shows, and music with immersive sound from your sound bar. Experience the depth, clarity, and richness of audio that will truly enhance your entertainment journey.
Thank you for choosing to follow our guide. We hope this article has been helpful in setting up your sound bar with your Onn TV. Happy viewing!