Home>Production & Technology>Audio Interface>How To Connect Fishman Loudbox Mini To Audio Interface
Audio Interface
How To Connect Fishman Loudbox Mini To Audio Interface
Modified: February 17, 2024
Learn how to easily connect your Fishman Loudbox Mini to an audio interface for enhanced sound quality. Maximize the potential of your audio setup with this step-by-step guide.
(Many of the links in this article redirect to a specific reviewed product. Your purchase of these products through affiliate links helps to generate commission for AudioLover.com, at no extra cost. Learn more)
Table of Contents
Introduction
Welcome to the world of audio interfaces and the endless possibilities they offer for musicians and audio enthusiasts. If you own a Fishman Loudbox Mini, you’re already familiar with its rich and vibrant sound. But have you ever wondered how to connect it to an audio interface to take your recordings and performances to the next level?
An audio interface is a device that acts as a bridge between your instruments, microphones, and other audio gear and your computer or mobile device. It allows you to capture high-quality audio, manipulate it digitally, and interface with recording software. By connecting your Fishman Loudbox Mini to an audio interface, you can record your acoustic guitar, vocals, and other instruments directly into your computer, resulting in professional-quality recordings and seamless integration with your digital audio workstation (DAW).
In this article, we will guide you through the process of connecting your Fishman Loudbox Mini to an audio interface, step by step. Whether you’re a singer-songwriter looking to record your latest masterpiece, a podcaster wanting to capture pristine audio, or a live performer seeking to enhance your sound, this guide is for you.
Before we dive into the steps, it’s worth mentioning that the specific instructions may vary slightly depending on the make and model of your audio interface. Always refer to the manufacturer’s user manual for detailed information and instructions specific to your device.
Step 1: Gather the necessary equipment
Before you can connect your Fishman Loudbox Mini to an audio interface, make sure you have the following equipment ready:
- Fishman Loudbox Mini: This is your trusty amplifier that produces the exceptional acoustic sound you love.
- Audio interface: Choose an audio interface that suits your needs and budget. Look for one that has the necessary inputs and outputs to accommodate your Fishman Loudbox Mini.
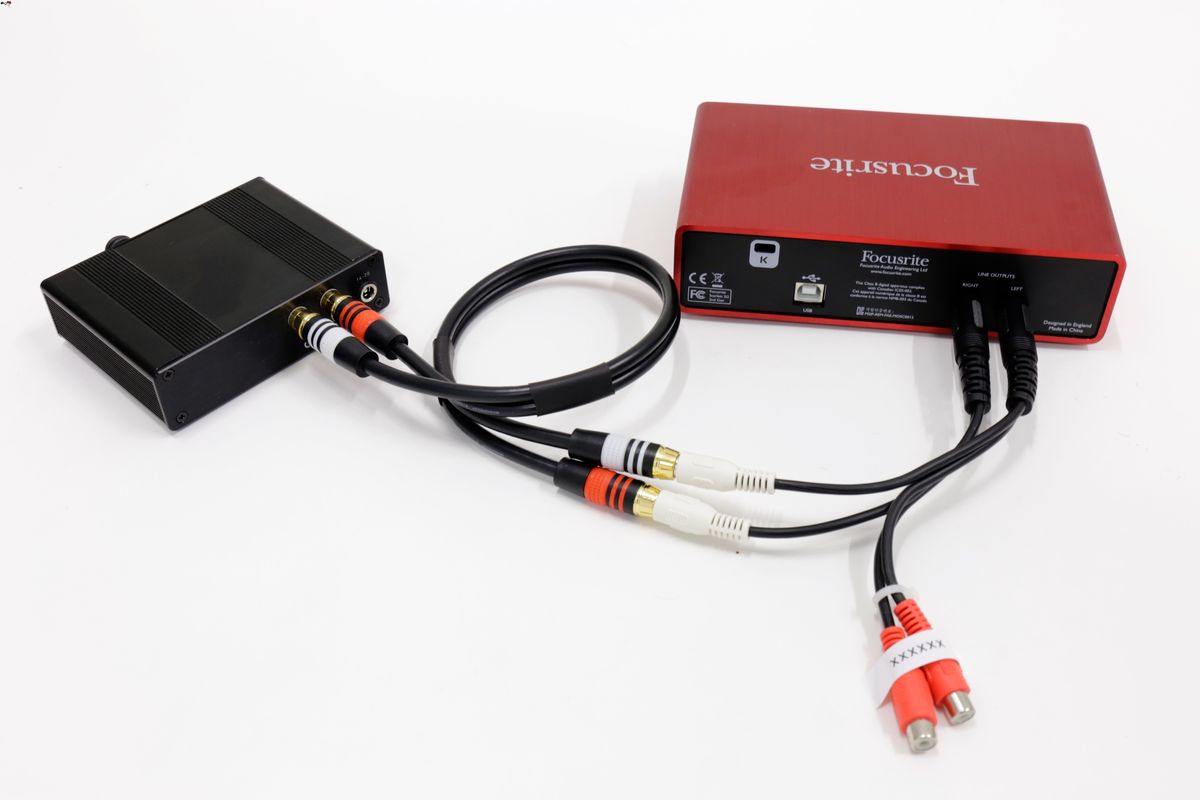
- Instrument cables: You will need instrument cables to connect your Fishman Loudbox Mini to the audio interface. Make sure they are in good condition and long enough to reach from the amplifier to the interface.
- XLR or TRS cables: Depending on the outputs of your Fishman Loudbox Mini and the inputs on your audio interface, you may need XLR or TRS cables for a balanced connection.
- Computer or mobile device: You will need a computer or mobile device with recording software or a digital audio workstation (DAW) installed to record and process the audio.
- Monitoring equipment: If you want to listen to the audio being recorded or played back in real time, you will need headphones or studio monitors.
Once you have gathered all the necessary equipment, you are ready to proceed to the next step.
Step 2: Connect the audio interface to the Fishman Loudbox Mini
Now that you have all the required equipment, it’s time to connect your audio interface to the Fishman Loudbox Mini. Follow these steps:
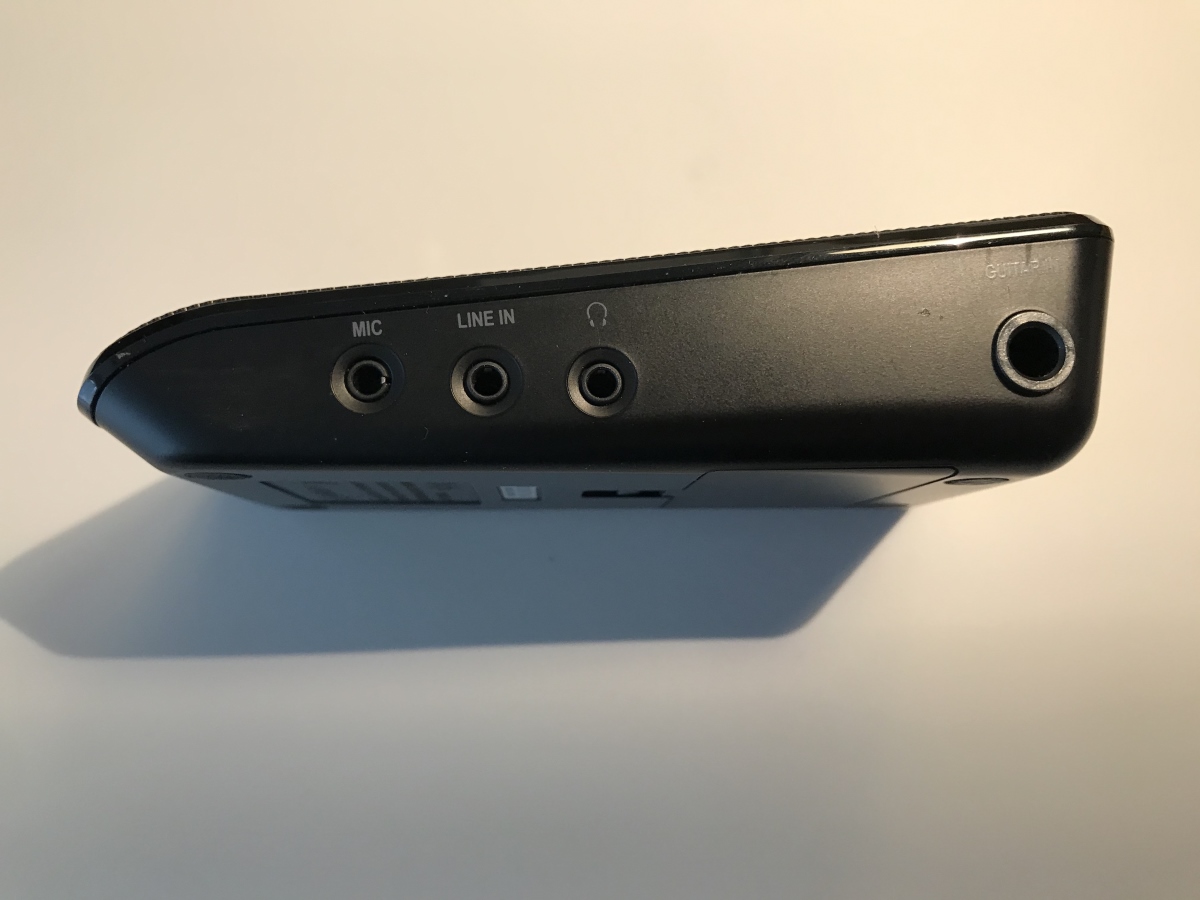
- Locate the output ports on your Fishman Loudbox Mini. Typically, there will be two 1/4-inch output jacks labeled “Left” and “Right”. These are usually used to connect the amplifier to a mixer or PA system. However, in this case, we will utilize them to connect to the audio interface.
- Take one end of an instrument cable and insert it into the “Left” output jack of the Fishman Loudbox Mini. Make sure the cable is securely inserted.
- Connect the other end of the instrument cable to one of the input jacks on your audio interface. The input jacks are typically labeled with numbers or letters. Choose an available input jack, ensuring a secure connection.
- If your Fishman Loudbox Mini has a “Right” output jack, repeat the process by connecting another instrument cable from the “Right” output to another available input on the audio interface. This will allow for stereo recording.
- If your Fishman Loudbox Mini has XLR output jacks instead of 1/4-inch jacks, you will need XLR cables to connect to the audio interface. Simply plug one end of the XLR cable into the appropriate output jack on the amplifier and the other end into the corresponding input jack on the audio interface.
- Once you have made the necessary connections, ensure that all cables are securely inserted and tightened. Loose connections can cause noise or signal loss.
With the audio interface connected to the Fishman Loudbox Mini, you are now ready to move on to the next step, where we will adjust the settings on the audio interface.
Step 3: Adjust the settings on the audio interface
Now that you have successfully connected your audio interface to the Fishman Loudbox Mini, it’s time to adjust the settings on the interface to ensure optimal sound quality and performance. Follow these steps:
- Turn on your audio interface and make sure it is properly connected to your computer or mobile device.
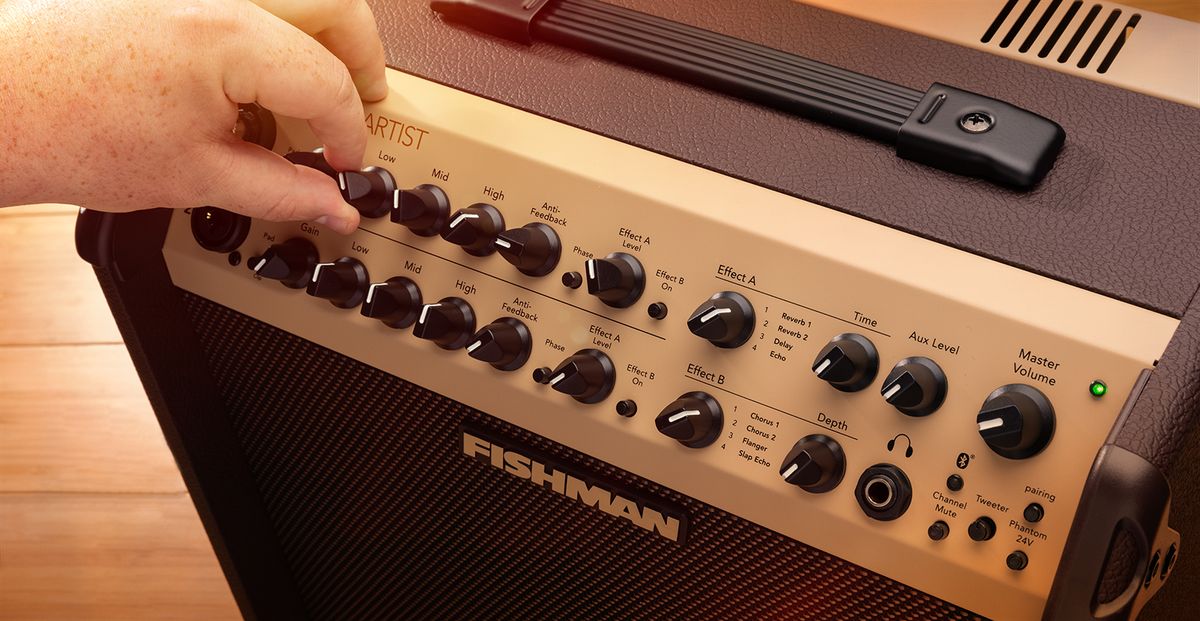
- Locate the input gain knobs or sliders on your audio interface. These are typically labeled with numbers or symbols and control the input level of the connected devices.
- Starting with the input connected to the Fishman Loudbox Mini, set the input gain to an appropriate level. Turn the knob or slide it up gradually until you achieve a strong, clean signal. Avoid setting the input gain too high to prevent distortion or clipping.
- Depending on your audio interface, you may have additional settings such as a pad or high-pass filter. Use these as necessary to adjust the signal according to your specific requirements.
- If your audio interface has phantom power and you are using a condenser microphone or other devices that require phantom power, make sure to activate it. Phantom power is typically a switch or button labeled “+48V” or “Phantom”. Be cautious not to activate phantom power if it is not required, as it can damage certain devices.
- Refer to the manufacturer’s user manual for any specific settings or features unique to your audio interface model. Familiarize yourself with the controls and explore the options available to optimize your recording setup.
With the settings on the audio interface adjusted, you are now ready to move on to the next step, where we will configure the audio input/output settings on your device.
Step 4: Configure the audio input/output settings on your device
Now that the audio interface settings are optimized, it’s time to configure the audio input and output settings on your computer or mobile device. Follow these steps:
- Open the audio settings on your computer or mobile device. This can usually be found in the control panel or system preferences.
- Select the audio input settings and choose the audio interface as the input device. This ensures that your device recognizes the audio interface as the source for incoming audio.
- Adjust the input gain or volume slider to an appropriate level. Use a level-metering display or the audio interface’s input level indicator to monitor the incoming signal. Aim for a strong signal without any clipping or distortion.
- Next, navigate to the audio output settings and select your desired output device. This can be your computer’s built-in speakers, headphones, or external studio monitors.
- Test the audio output by playing a sound or music file. Ensure that you hear the audio through the selected output device. Adjust the output volume as needed.
It’s worth noting that the configuration process may vary depending on the operating system and audio settings of your device. If you encounter any issues or need more specific instructions, refer to the user manual or online resources for your particular operating system and device.
Once you have successfully configured the audio input and output settings on your device, you are now ready to proceed to the final step: testing the connection and troubleshooting any issues.
Step 5: Test the connection and troubleshoot any issues
After connecting and configuring your audio interface and device, it’s important to test the connection to ensure everything is working correctly. Follow these steps:
- Open your preferred recording software or digital audio workstation (DAW) on your computer or mobile device.
- Create a new audio track or select an existing one to record on.
- Arm the audio track for recording. This typically involves clicking a button or enabling a feature that allows the track to receive incoming audio.
- Strum your guitar, sing into the microphone, or play any other instrument connected to the Fishman Loudbox Mini. You should see the input level meter on your recording software or audio interface software respond accordingly.
- Verify that you are capturing a clean and strong audio signal. If the input level is too low, adjust the gain on the audio interface. If the input level is too high and distorting, lower the gain or input level accordingly.
- Play back the recorded audio to ensure it is coming through the audio output device you selected earlier. Listen carefully for any issues such as background noise, interference, or hum that may indicate a problem with the connection or settings.
- If you encounter any issues, check your connections to ensure they are secure and properly inserted. Troubleshoot any software-related issues by referring to the user manual or online resources for your recording software or DAW.
- Experiment with different settings, such as microphone placement or input gain adjustments, to achieve the desired sound quality. Take advantage of any additional features offered by your audio interface, such as EQ settings or effects, to further enhance your recordings.
Remember, troubleshooting is a normal part of the recording process. If you still experience issues, don’t hesitate to reach out to the audio interface manufacturer’s support or consult online forums and communities for assistance.
Congratulations! You have successfully connected your Fishman Loudbox Mini to an audio interface and configured the necessary settings. You are now ready to explore endless possibilities in recording, producing, and enhancing your music.
As you gain more experience, don’t hesitate to experiment with different recording techniques and explore the wide range of features and capabilities your audio interface offers. Happy recording!
Conclusion
Connecting your Fishman Loudbox Mini to an audio interface opens up a world of possibilities for recording and enhancing your music. By following the steps outlined in this guide, you can easily set up your audio interface and achieve professional-quality recordings.
Throughout this process, it is essential to gather the necessary equipment, including your Fishman Loudbox Mini, audio interface, cables, and a computer or mobile device with recording software. Ensuring a proper connection between the Fishman Loudbox Mini and the audio interface is crucial for capturing the pristine sound of your instruments and vocals.
Adjusting the settings on the audio interface, including input gain, phantom power, and other available features, allows for optimal customization and control over your recordings. Configuring the audio input and output settings on your device ensures seamless integration between the audio interface and your recording software or DAW.
Once all the settings are in place, it’s essential to test the connection and troubleshoot any issues that may arise. By monitoring the input level, checking for clean and strong signals, and listening to playback, you can identify and resolve any potential problems that may affect the quality of your recordings.
Remember, the process of connecting your Fishman Loudbox Mini to an audio interface is just the beginning of your musical journey. As you delve deeper into the world of recording and production, don’t hesitate to explore different recording techniques, experiment with settings, and tap into the full potential of your audio interface’s features.
With the right equipment, proper connections, and a touch of creativity, the combination of your Fishman Loudbox Mini and audio interface can take your music to new heights. So, unleash your musical prowess and enjoy the process of capturing and producing beautiful sounds!