Home>Production & Technology>Audio Interface>How To Connect Korg With Audio Interface
Audio Interface
How To Connect Korg With Audio Interface
Modified: February 22, 2024
Learn how to connect your Korg device with an audio interface for optimal sound quality. Enhance your music production with this simple setup guide.
(Many of the links in this article redirect to a specific reviewed product. Your purchase of these products through affiliate links helps to generate commission for AudioLover.com, at no extra cost. Learn more)
Table of Contents
Introduction
Welcome to this comprehensive guide on how to connect your Korg synthesizer to an audio interface. Whether you’re a beginner musician exploring the world of electronic music or an experienced producer looking to expand your setup, understanding how to connect your Korg with an audio interface is essential for optimal sound quality and functionality.
Korg is known for producing high-quality synthesizers that offer a wide range of sounds and features. An audio interface, on the other hand, acts as a bridge between your Korg and your computer or recording device, allowing you to record, edit, and process your music. By connecting your Korg to an audio interface, you’ll have greater control over your sound, improved recording capabilities, and access to a variety of digital audio workstations (DAWs) and music production software.
In this guide, we will walk you through the step-by-step process of connecting your Korg synthesizer to an audio interface. You will learn about the necessary equipment, how to set up the audio interface, connect the Korg to the interface, and configure the settings to ensure optimal performance. Along the way, we’ll provide troubleshooting tips and share some best practices to help you achieve the best possible audio quality.
Whether you’re using Korg’s flagship synthesizer like the Kronos or a smaller model like the Minilogue, this guide is designed to be applicable to a wide range of Korg keyboards and audio interfaces. So, let’s dive in and get your Korg and audio interface connected for a seamless and immersive music production experience!
Understanding Korg and Audio Interface
Before diving into the process of connecting your Korg synthesizer to an audio interface, it’s important to have a basic understanding of what each component does and how they work together.
Korg is a renowned brand in the world of synthesizers, known for its innovative designs and cutting-edge technology. They offer a wide range of synthesizers, from portable and affordable models like the Korg Volca series to professional-grade keyboards like the Korg Kronos. Synthesizers like the Korg have built-in sound generators that allow you to create and manipulate a variety of sounds, making them ideal for electronic music production and live performances.
On the other hand, an audio interface is a hardware device that serves as the link between your Korg synthesizer and your computer or audio recording setup. It acts as a translator, converting analog audio signals from your synthesizer into digital signals that your computer can understand. This makes it possible to record, process, and edit your music using digital audio workstations (DAWs) and music production software.
When choosing an audio interface to connect with your Korg synthesizer, it’s important to consider factors such as the number of inputs and outputs, the quality of the preamps, the available connectivity options (such as USB, Thunderbolt, or FireWire), and the overall audio fidelity. A good audio interface will not only ensure low latency and high-quality audio recording but also provide a seamless integration experience with your Korg synthesizer.
It’s worth noting that some Korg models come equipped with USB or MIDI connectivity options, which allows for direct connection to your computer without the need for an external audio interface. However, using an audio interface offers several advantages, including better audio quality, more flexible routing options, and the ability to use professional-grade preamps and converters.
In summary, understanding the basics of your Korg synthesizer and an audio interface will help you make informed choices when it comes to connecting and utilizing these components. With this knowledge in mind, you’ll be ready to explore the next steps of setting up your audio interface and connecting it to your Korg synthesizer.
Necessary Equipment
Before you can start connecting your Korg synthesizer to an audio interface, it’s important to gather the necessary equipment for a smooth and successful setup. Here are the key pieces of equipment you will need:
- Korg Synthesizer: Of course, the main component you’ll need is your Korg synthesizer. Whether you have a Korg Volca, a Minilogue, or a Kronos, ensure that it’s in good working condition and has the necessary cables for connectivity.
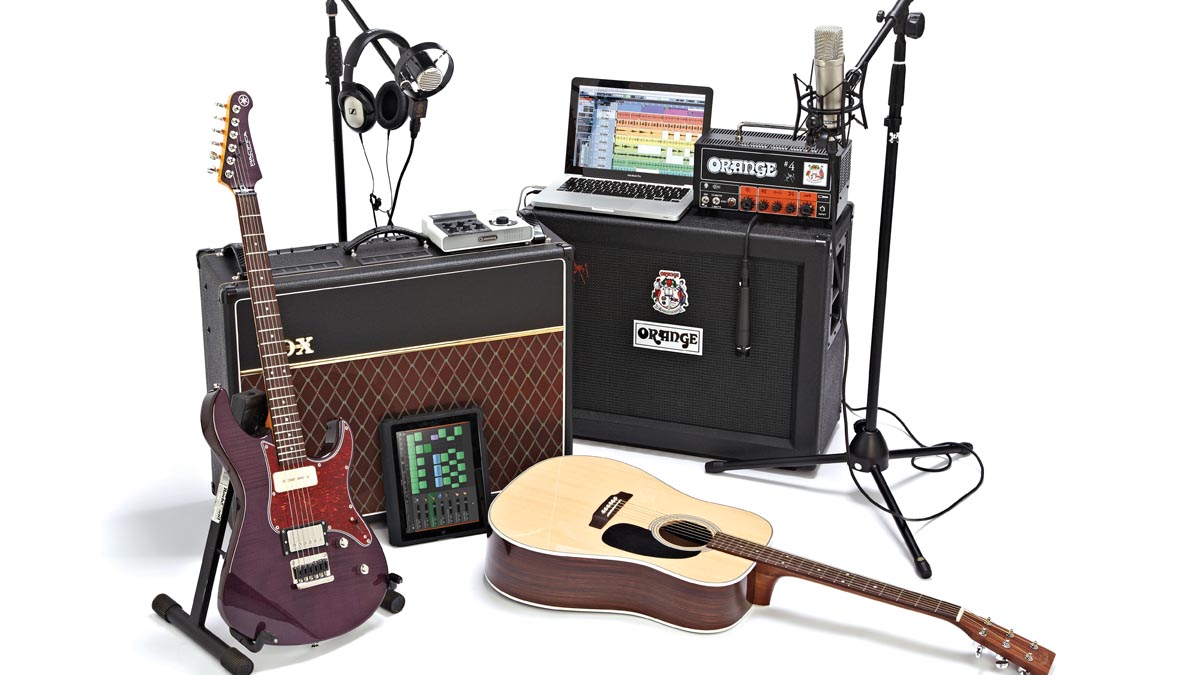
- Audio Interface: This is a crucial piece of equipment that acts as the bridge between your Korg synthesizer and your computer. Choose an audio interface that fits your needs in terms of inputs and outputs, audio quality, and connectivity options. Some popular audio interfaces for home studios include the Focusrite Scarlett series, Universal Audio Apollo, and Presonus AudioBox.
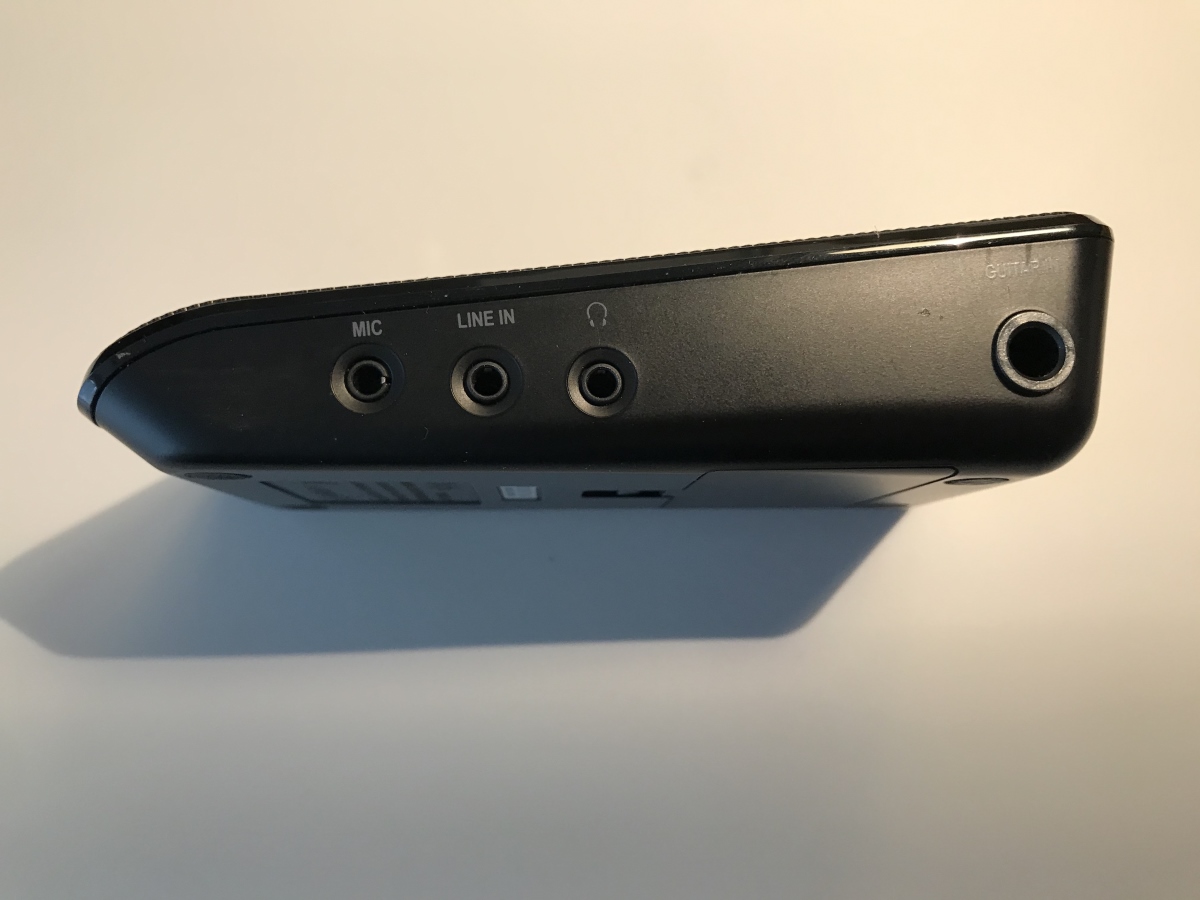
- USB or MIDI Cables: Most Korg synthesizers come with built-in USB or MIDI ports for connecting to a computer or audio interface. Make sure you have the appropriate cables to connect your Korg to the audio interface. USB cables are typically used for direct digital audio transfer, while MIDI cables are used for MIDI data transfer.
- Audio Cables: You’ll need audio cables to connect the audio outputs of your Korg synthesizer to the audio inputs of the audio interface. The type of cables you’ll need depends on the audio connections available on both your Korg synthesizer and your audio interface. Common audio cable types include 1/4″ TRS cables, RCA cables, and XLR cables.
- Headphones or Studio Monitors: To listen to your music while using the audio interface, you’ll need a pair of headphones or studio monitors. Studio monitors are recommended for accurate sound reproduction, but if you’re on a budget, a good pair of headphones will suffice.
Once you have gathered all the necessary equipment, you’ll be ready to move on to the next steps of setting up your audio interface and connecting it to your Korg synthesizer. Remember to always check the compatibility and specifications of your equipment to ensure proper connectivity and performance.
Setting Up the Audio Interface
Now that you have collected all the necessary equipment, it’s time to set up your audio interface. Follow these steps to ensure a smooth and successful setup:
- Read the Manual: Start by reading the user manual of your audio interface. This will provide you with specific instructions and guidelines for setting up your particular model. Familiarize yourself with the inputs, outputs, and controls of the audio interface.
- Install the Drivers: Most audio interfaces require drivers to be installed on your computer for proper communication. These drivers are usually provided on a CD or can be downloaded from the manufacturer’s website. Install the drivers according to the provided instructions.
- Connect the Audio Interface to Your Computer: Depending on the connectivity options of your audio interface, connect it to your computer using the appropriate cable, such as USB, Thunderbolt, or FireWire. Ensure that the connection is secure and stable.
- Power On the Audio Interface: Connect the power supply to the audio interface and turn it on. Follow any additional power-related instructions provided by the manufacturer.
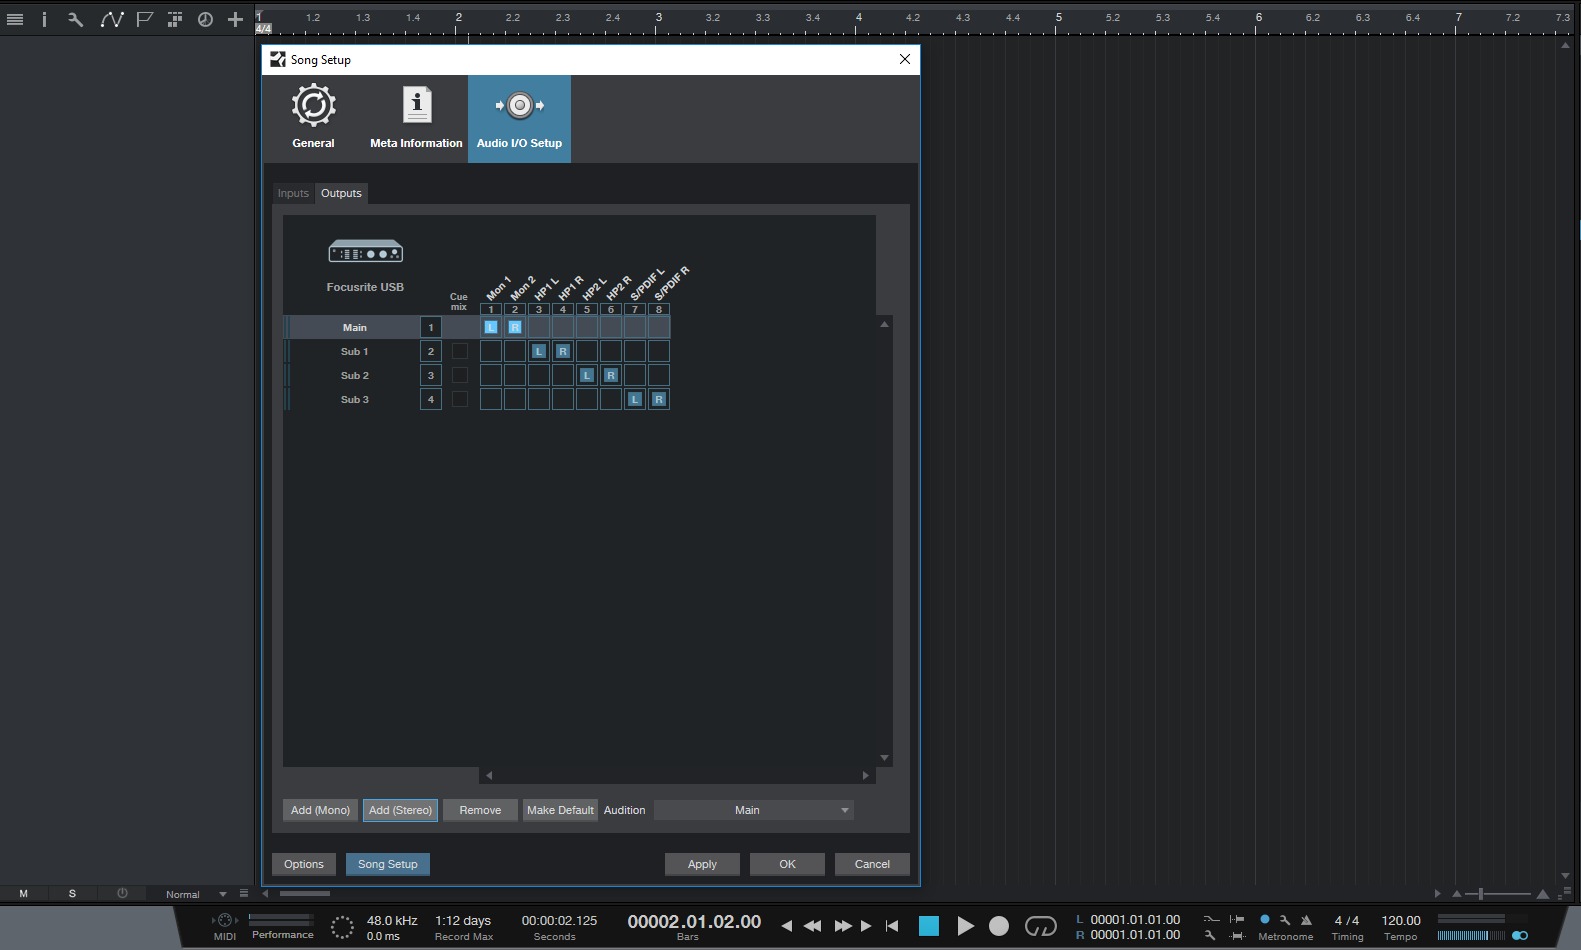
- Adjust the Audio Interface Settings: Open the audio settings on your computer and make sure that the audio interface is selected as the default input and output device. Set the sample rate and buffer size according to your preferences and the capabilities of your audio interface.
- Test the Audio Interface: To ensure that the audio interface is working correctly, play some audio on your computer and check that you can hear it through your headphones or studio monitors connected to the audio interface.
By following these steps, you will have successfully set up your audio interface and established a connection between your computer and the audio interface. Now it’s time to move on to the next step, which is connecting your Korg synthesizer to the audio interface.
Connecting the Korg to the Audio Interface
Now that you have set up your audio interface, it’s time to connect your Korg synthesizer to the interface. Follow these steps to establish the connection:
- Locate the Audio Outputs: Identify the audio outputs on your Korg synthesizer. These outputs may be labeled as “Main Output,” “Line Out,” or something similar.
- Connect the Audio Cables: Take the appropriate audio cables, such as 1/4″ TRS cables or RCA cables, and connect the audio outputs of your Korg synthesizer to the corresponding audio inputs on your audio interface. Make sure to use the correct cables for a secure and stable connection.
- Check the Input Levels: Adjust the input levels on your audio interface for the connected inputs. These controls may be knobs or sliders labeled as “Gain” or “Input Level.” Set the input levels to an appropriate level, ensuring that the audio signal from your Korg synthesizer is not too low or too high.
- Check the Output Settings: Make sure that the output settings on your Korg synthesizer are properly configured. This may include selecting the appropriate output channels, adjusting volume levels, and enabling any necessary output routing options.
Once you have completed these steps, the audio signal from your Korg synthesizer should now be flowing into your audio interface. You can monitor the sound through your headphones or studio monitors connected to the output of the audio interface.
Remember, the exact steps and connections may vary depending on the specific models of your Korg synthesizer and audio interface. Therefore, it’s always a good idea to refer to the user manuals and documentation provided by the manufacturers for detailed instructions tailored to your specific setup.
With the Korg now connected to the audio interface, you are ready to move on to the next step of configuring the audio interface and Korg settings for optimal performance.
Configuring the Audio Interface and Korg Settings
Once you have connected your Korg synthesizer to the audio interface, it’s important to properly configure the settings on both devices to ensure optimal performance. Follow these steps to configure the audio interface and Korg settings:
- Audio Interface Settings:
- Open the control software or settings panel for your audio interface. This can typically be accessed through your computer’s system preferences or a dedicated software provided by the manufacturer.
- Set the sample rate and bit depth according to your intended recording or playback requirements. Higher sample rates and bit depths offer better audio quality but may require more computing power.
- Configure the input and output routing options if available. This allows you to control how the audio signal from your Korg synthesizer is routed through the audio interface to your computer or monitoring devices.
- Adjust the buffer size to balance between low latency and system stability. A smaller buffer size reduces latency but may put more strain on your computer’s processing power.
- Test the input and output levels to ensure proper signal flow. Adjust the gain or volume controls on your audio interface to achieve optimal levels without clipping or distortion.
- Korg Synthesizer Settings:
- Refer to the user manual of your Korg synthesizer to navigate through the various settings available.
- Set the output level of your Korg synthesizer to an appropriate level that matches the input levels of your audio interface.
- Configure any specific MIDI settings if you’re using MIDI connectivity. This includes selecting the MIDI channels, enabling MIDI clock sync, and assigning controller functions.
- Experiment with the various sound parameters and settings on your Korg synthesizer to find the desired sound you intend to achieve. This may involve adjusting oscillators, filters, envelopes, effects, and modulation options.
- Save your settings if your Korg synthesizer offers preset or user memory options. This allows you to recall your preferred settings quickly in future sessions.
Remember that the specific settings and options available may vary depending on your Korg synthesizer model and audio interface. It’s crucial to consult the user manuals and documentation provided by the manufacturers for detailed instructions and specific configurations.
Once you have properly configured the audio interface and Korg settings, you’re ready to start producing and recording music with your Korg synthesizer connected to the audio interface. Explore the endless possibilities of sound creation and enjoy the enhanced functionality and control offered by this setup!
Troubleshooting and Tips
While setting up and connecting your Korg synthesizer to an audio interface can be a straightforward process, you may encounter some common issues or challenges along the way. Here are some troubleshooting tips to help you overcome potential obstacles:
- No Sound: If you’re not hearing any sound from your Korg synthesizer through the audio interface, double-check the connections. Ensure that the audio cables are securely plugged into the correct inputs and outputs.
- Low Volume or Distortion: If the sound is too soft or distorted, check the input and output levels. Make sure the input gain on the audio interface is set appropriately, and adjust the output level on the Korg synthesizer accordingly.
- Latency Issues: If you experience latency (delay) between playing a note on your Korg synthesizer and hearing the sound, try reducing the buffer size in your audio interface settings. However, keep in mind that decreasing the buffer size too much can put a strain on your computer’s processing power.
- Driver Issues: If you’re experiencing stability or compatibility issues with the audio interface drivers, ensure that you have the latest drivers installed. Visit the manufacturer’s website to check for any driver updates specific to your operating system.
- Signal Noise: If you notice unwanted noise or interference in the audio signal, ensure that your audio cables are of good quality and properly shielded. Additionally, make sure that your audio interface is connected to a stable power source.
Here are some additional tips to optimize your setup:
- Use high-quality audio cables to minimize signal degradation and interference.
- Consider investing in a dedicated audio interface with low-latency performance for a better recording and monitoring experience.
- Experiment with different audio interface settings to find the sweet spot for your specific needs and hardware configuration.
- Regularly update your audio interface drivers and firmware to ensure compatibility and stability.
- Keep your Korg synthesizer firmware up to date to access any new features or bug fixes.
If you encounter persistent issues or need further assistance, consult the user manuals for your Korg synthesizer and audio interface, reach out to the manufacturer’s customer support, or seek help from online forums and communities dedicated to music production and synthesizers.
Remember, patience and experimentation are key when troubleshooting and optimizing your setup. With a little persistence, you’ll be able to overcome any challenges and fully enjoy the creative possibilities that come with connecting your Korg synthesizer to an audio interface.
Conclusion
Congratulations! You have successfully learned how to connect your Korg synthesizer to an audio interface. By following the steps outlined in this guide, you can now enjoy the benefits of enhanced sound quality, expanded recording capabilities, and seamless integration with your computer-based music production setup.
Understanding the basics of both your Korg synthesizer and audio interface is crucial for a successful connection. Remember to gather all the necessary equipment, including your Korg synthesizer, audio interface, appropriate cables, and headphones or studio monitors.
Setting up the audio interface requires installing the necessary drivers, making the proper connections, adjusting settings, and ensuring that the audio interface is recognized by your computer. Once the audio interface is set up, you can then proceed to connect your Korg synthesizer using the appropriate audio cables.
Configuring the audio interface and Korg settings allows for optimal performance and customization. Adjusting input and output levels, selecting sample rates and buffer sizes, and exploring the various sound parameters on your Korg synthesizer will help you achieve the desired sound and functionality.
While troubleshooting potential issues, such as no sound, latency, or unwanted noise, remember to check your connections, adjust levels, update drivers, and seek assistance from manufacturer resources or online communities if needed.
By connecting your Korg synthesizer to an audio interface, you have unlocked a world of possibilities in your music production journey. Enjoy exploring the vast array of sounds, recording and editing capabilities, and the seamless integration with your favorite software and DAWs.
Remember to keep learning, experimenting, and honing your skills as you continue to delve deeper into the world of electronic music production. Stay inspired and let your creativity flow through the power of your Korg synthesizer and audio interface!