Home>Production & Technology>Audio Interface>How To Connect Audio Interface To TV

Audio Interface
How To Connect Audio Interface To TV
Modified: March 5, 2024
Learn how to seamlessly connect your audio interface to your TV and take your sound experience to the next level with our step-by-step guide.
(Many of the links in this article redirect to a specific reviewed product. Your purchase of these products through affiliate links helps to generate commission for AudioLover.com, at no extra cost. Learn more)
Table of Contents
- Introduction
- Understanding Audio Interfaces
- Selecting the Right Audio Interface for Your TV
- Connection Options for Audio Interfaces
- Connecting an Audio Interface to Your TV via HDMI
- Connecting an Audio Interface to Your TV via Optical Audio
- Connecting an Audio Interface to Your TV via Analog Audio
- Troubleshooting Audio Interface Connection Issues
- Conclusion
Introduction
Welcome to the world of audio interfaces and their connection to your TV! If you’re an audio enthusiast or professional looking to enhance your home entertainment system or create a multimedia setup, understanding how to connect an audio interface to your TV is essential. With the right audio interface, you can elevate the sound quality of your TV shows, movies, and music to new heights.
An audio interface is a device that allows you to connect audio equipment, such as microphones, instruments, and speakers, to your computer or other devices. While audio interfaces are commonly used in music production and recording studios, they can also be used to enhance the audio experience of your home theater system.
In this article, we will explore the different types of audio interfaces and guide you through the process of selecting the right one for your TV. We will also discuss the various connection options available and provide step-by-step instructions on how to connect an audio interface to your TV.
Whether you’re looking to improve the sound quality of your favorite TV shows and movies, connect professional-grade speakers to your TV for an immersive audio experience, or record audio directly from your TV, this article has got you covered.
Before we dive into the details, it’s important to note that the specific steps and requirements can vary depending on the make and model of your TV and audio interface. Always refer to the user manuals of your devices for precise instructions. Now, let’s get started on your audio interface and TV connection journey!
Understanding Audio Interfaces
To effectively connect an audio interface to your TV, it’s important to have a solid understanding of what an audio interface is and how it works. Essentially, an audio interface is a hardware device that acts as a bridge between your audio equipment and your computer or other devices.
The primary function of an audio interface is to convert analog audio signals into digital format and vice versa. This conversion process is crucial for capturing and reproducing high-quality audio. An audio interface typically features various inputs and outputs, allowing you to connect microphones, instruments, speakers, and other audio equipment.
Audio interfaces come in different forms, including USB, Thunderbolt, and PCI-Express. USB audio interfaces are the most common and versatile option, as they can be easily connected to different devices, including TVs. Thunderbolt interfaces provide faster data transfer speeds and are popular among professionals in the music industry. PCI-Express interfaces are typically used in desktop computers for high-bandwidth audio processing.
When choosing an audio interface for your TV, it’s important to consider its features and specifications. Some key factors to keep in mind include the number and type of inputs and outputs, the audio resolution and sample rate, the compatibility with your TV or other devices, and any additional features such as built-in preamps or DSP (Digital Signal Processing).
Additionally, it’s worth noting that audio interfaces can vary in price and quality. While there are entry-level options available for beginners or casual users, professionals often opt for higher-end interfaces that offer superior audio quality and more advanced features.
Now that you have a basic understanding of audio interfaces, let’s move on to selecting the right one for your TV.
Selecting the Right Audio Interface for Your TV
When it comes to selecting the right audio interface for your TV, there are a few key factors to consider. These factors will help ensure compatibility between your audio interface and TV, as well as meet your specific needs and preferences.
The first factor to consider is the type of connection your TV supports. Most modern TVs have multiple audio output options, such as HDMI, optical audio (TOSLINK), and analog audio (RCA or 3.5mm). It’s important to check the available audio outputs on your TV and ensure that the audio interface you choose has the corresponding input types.
The next factor to consider is the number of inputs and outputs that you require. If you only plan to connect a stereo system or a single microphone, a simple two-input/two-output interface may suffice. However, if you have a more complex setup, such as multiple speakers or instruments, you may need an interface with more inputs and outputs. It’s essential to assess your audio needs before making a purchase.
Another important aspect to consider is the audio resolution and sample rate supported by the audio interface. Higher resolution and sample rates can result in better audio quality, especially when it comes to music production or recording. However, if you’re primarily using the audio interface for TV and multimedia purposes, standard resolution and sample rates should be sufficient.
Compatibility with your TV and other devices is also crucial. Ensure that the audio interface you choose is compatible with your TV’s operating system and any additional devices you may want to connect, such as gaming consoles or streaming media players. Compatibility information can usually be found in the audio interface’s specifications or user manual.
Finally, don’t forget to consider your budget. Audio interfaces come in a wide price range, so it’s important to set a budget and find the best option that meets your needs within that range. It’s worth noting that higher-priced interfaces often offer better audio quality and additional features, but you can still find affordable options that provide good performance.
By considering these factors – connection type, inputs and outputs, audio resolution, compatibility, and budget – you’ll be able to select the right audio interface that meets your requirements and enhances your TV audio experience. In the next section, we will explore the different connection options available for audio interfaces and TVs.
Connection Options for Audio Interfaces
Connecting an audio interface to your TV requires understanding the available connection options. Depending on the audio interface and the audio outputs on your TV, there are several methods you can use to establish a connection.
Here are the common connection options for audio interfaces:
- HDMI: If your TV and audio interface both have HDMI ports, this is the most convenient option. HDMI carries both video and audio signals, allowing for a single cable connection. Simply connect one end of an HDMI cable to the HDMI output on your TV and the other end to the HDMI input on your audio interface. This method ensures a digital audio transfer, delivering high-quality sound.
- Optical Audio (TOSLINK): If your TV has an optical audio output and your audio interface has an optical input, you can use an optical audio cable (TOSLINK) for the connection. Plug one end of the optical cable into the TV’s optical audio output and the other end into the audio interface’s optical audio input. Optical audio cables transmit digital audio signals, ensuring a clean and noise-free audio transfer.
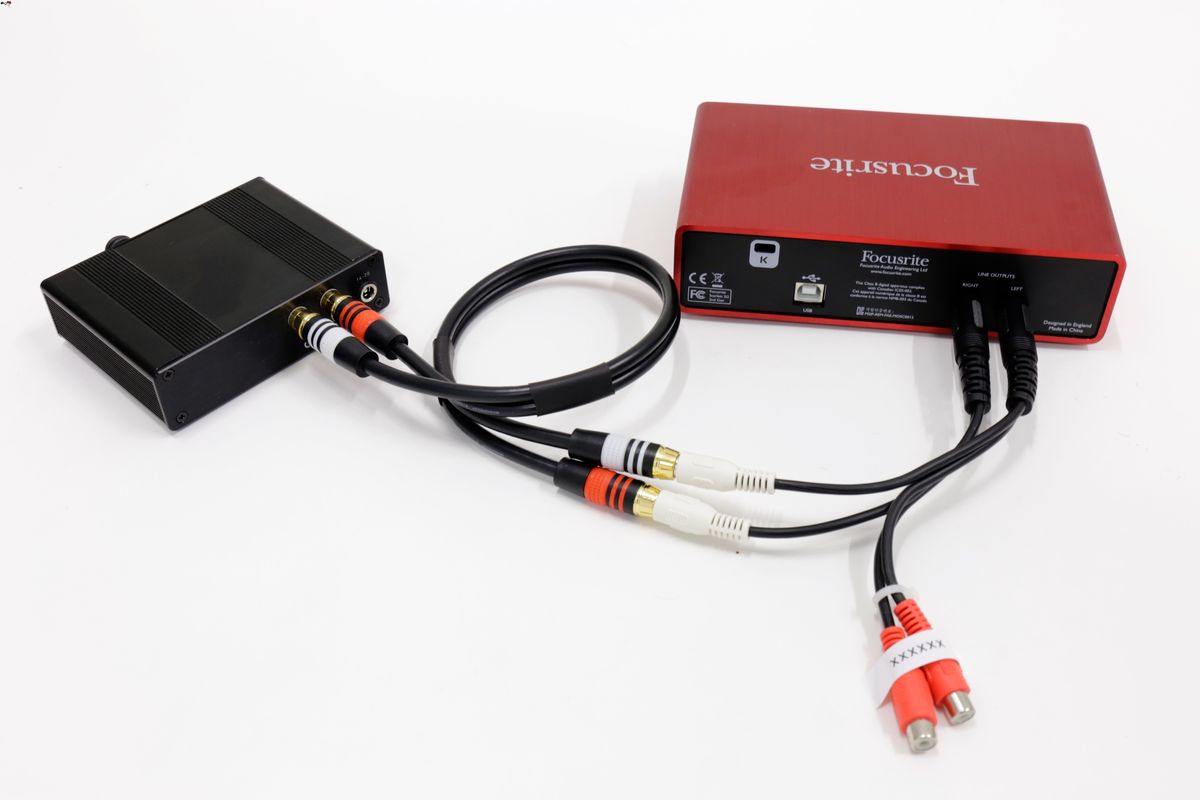
- Analog Audio: If your TV has analog audio outputs, such as RCA or 3.5mm, and your audio interface has corresponding analog inputs, you can use analog audio cables for the connection. Connect one end of the audio cable to the TV’s audio output and the other end to the audio interface’s analog audio input. Analog audio connections may be susceptible to interference, so it’s important to use high-quality cables and avoid long cable runs.
Before making a connection, ensure that your TV and audio interface are powered off. Once connected, power on both devices and select the appropriate input source on your audio interface. Your TV may also require you to adjust the audio settings to output the sound through the audio interface.
Remember, the specific connection method will depend on the available ports on your TV and audio interface. Always refer to the user manuals of your devices for detailed instructions on making the connections.
In the next sections, we will explore how to connect an audio interface to your TV using each of these connection options in more detail.
Connecting an Audio Interface to Your TV via HDMI
If your TV and audio interface both have HDMI ports, connecting them using an HDMI cable is one of the simplest and most convenient options available. HDMI carries both video and audio signals, eliminating the need for multiple cables.
Follow these steps to connect your audio interface to your TV via HDMI:
- Ensure that both your TV and audio interface are powered off.
- Locate the HDMI output port on your TV and the HDMI input port on your audio interface.
- Connect one end of the HDMI cable to the HDMI output port on your TV.
- Connect the other end of the HDMI cable to the HDMI input port on your audio interface.
- Power on your TV and audio interface.
- Using your TV remote or on-screen menu, navigate to the audio settings to select the audio output through the audio interface.
Once the connection is established and the audio settings are adjusted accordingly, the sound from your TV will be routed through the audio interface, enhancing the audio quality and allowing for further audio adjustments if desired.
It’s important to note that some audio interfaces may require additional configuration or settings adjustments. Refer to the user manual of your audio interface for any specific instructions or requirements.
Connecting an audio interface to your TV via HDMI is a straightforward method that ensures a digital audio transfer, providing high-quality sound for your TV shows, movies, and music. If your TV does not have an HDMI port or your audio interface lacks an HDMI input, don’t worry! There are alternative connection options we will explore in the following sections.
Connecting an Audio Interface to Your TV via Optical Audio
If your TV has an optical audio output and your audio interface has an optical audio input, you can connect them using an optical audio cable, also known as a TOSLINK cable. This method allows for a digital audio transfer, ensuring high-quality sound.
Here’s a step-by-step guide on how to connect your audio interface to your TV via optical audio:
- Ensure that both your TV and audio interface are powered off.
- Locate the optical audio output on your TV and the optical audio input on your audio interface.
- Plug one end of the optical audio cable (TOSLINK) into the optical audio output on your TV.
- Connect the other end of the optical audio cable to the optical audio input on your audio interface.
- Power on your TV and audio interface.
- Access the audio settings on your TV and select the audio output through the audio interface.
Once the connection is established and the audio settings are configured, the audio from your TV will be routed through the audio interface via the optical audio connection. This allows for improved sound quality and flexibility in adjusting the audio signal if needed.
Keep in mind that not all TVs have an optical audio output, so it’s important to check your TV’s specifications or user manual to confirm its availability. Additionally, some audio interfaces may have different types of optical audio inputs, so ensure that the cable you choose matches the correct connector.
If your TV doesn’t have an optical audio output, don’t worry! There are other connection options we will cover in the next section.
Connecting an Audio Interface to Your TV via Analog Audio
If your TV has analog audio outputs, such as RCA or 3.5mm, and your audio interface has corresponding analog audio inputs, you can connect them using analog audio cables. While analog audio connections are not as common in modern TVs, they are still a viable option for connecting your audio interface.
Follow these steps to connect your audio interface to your TV via analog audio:
- Make sure both your TV and audio interface are powered off.
- Locate the analog audio outputs on your TV. This could be RCA ports, 3.5mm headphone jack, or other analog audio connectors.
- Identify the corresponding analog audio inputs on your audio interface.
- If your TV has RCA outputs, use RCA cables: Connect the red and white plugs of the RCA cable to the right and left audio outputs on your TV respectively. Then, connect the other end of the RCA cable to the corresponding inputs on your audio interface.
- If your TV has a 3.5mm headphone jack, use a 3.5mm-to-dual RCA cable: Insert one end of the 3.5mm plug into the headphone jack of your TV and connect the respective RCA plugs to the audio inputs on your audio interface.
- Power on your TV and audio interface.
- Access the audio settings on your TV and select the audio output through the audio interface.
Once connected, the sound from your TV will be routed through the audio interface via the analog audio connection. While analog audio connections may not offer the same level of sound quality as digital connections, they are still a viable option for enhancing your TV audio experience.
It’s important to note that analog audio connections can be susceptible to interference and signal degradation, especially over long cable runs. To minimize these issues, use high-quality cables and avoid excessive cable lengths.
If your TV lacks analog audio outputs or your audio interface doesn’t have corresponding analog audio inputs, don’t worry! There are alternative connection options available, such as using a digital audio converter or utilizing HDMI-ARC (Audio Return Channel), which allows for audio transmission through the HDMI cable. These options may require additional equipment or configuration, so refer to the manuals or contact customer support for your specific devices.
Troubleshooting Audio Interface Connection Issues
While connecting an audio interface to your TV is generally straightforward, you may encounter some common issues along the way. Here are a few troubleshooting tips to help you resolve any potential connection issues:
- No audio signal: If you’ve connected the audio interface to your TV but there’s no sound, check the audio settings on your TV. Ensure that the audio output is set to the connected audio interface and the volume is turned up. Also, double-check that the audio connections are secure and properly inserted.
- Poor or distorted sound quality: If the sound from your TV through the audio interface is of poor quality or distorted, check the audio settings on both your TV and audio interface. Make sure they are set to the appropriate audio specifications and sample rates. Also, check your audio cables for any damage or loose connections.
- Incompatible cables or ports: Ensure that you are using the correct cables for your connections. For example, HDMI cables may have different versions, and some may not be compatible with certain devices. Additionally, check that the ports on your TV and audio interface are functioning correctly and match the type of cable you are using.
- Software or firmware updates: Sometimes, audio interface connection issues can be resolved by performing software or firmware updates on your TV or audio interface. Check the respective manufacturer’s website for any available updates and follow their instructions for installation.
- Power cycle your devices: If all else fails, try power cycling your TV and audio interface. Turn off both devices, unplug them from the power source, wait for a minute, and then reconnect and power them back on. This can help reset any temporary issues with the devices.
If you continue to experience connection issues or poor audio quality, refer to the user manuals of your TV and audio interface for further troubleshooting steps. Additionally, you can reach out to customer support for assistance.
Remember, every audio interface and TV setup may have slight variations, so it’s essential to consult the specific documentation for your devices. With some patience and troubleshooting, you can successfully connect your audio interface to your TV and enjoy a heightened audio experience.
Conclusion
Connecting an audio interface to your TV can greatly enhance your audio experience, whether you’re watching movies, enjoying TV shows, or listening to music. By understanding audio interfaces, selecting the right one for your TV, and utilizing the appropriate connection options, you can achieve superior sound quality and flexibility.
Throughout this article, we have explored the fundamentals of audio interfaces and their connection to TVs. We discussed the different types of audio interfaces, such as USB, Thunderbolt, and PCI-Express, and highlighted the importance of considering factors like connection options, inputs and outputs, audio resolution, compatibility, and budget when selecting the right audio interface for your TV.
We also examined various connection options, including HDMI, optical audio, and analog audio, providing step-by-step instructions on how to connect your audio interface to your TV using each method. Additionally, we offered troubleshooting tips for resolving common connection issues that may arise during the setup process.
Remember, it’s important to refer to the user manuals of your TV and audio interface for precise instructions that may pertain to your specific devices.
Now that you have a solid understanding of audio interfaces and their connection to TVs, you’re ready to embark on an enhanced audio journey. Whether you’re a dedicated audiophile, a music producer, or simply seeking to improve your home theater system, connecting an audio interface to your TV will undoubtedly elevate your audio experience and immerse you in a world of stellar sound quality.