Home>Production & Technology>Audio Interface>How To Connect A Guitar To An Audio Interface
Audio Interface
How To Connect A Guitar To An Audio Interface
Modified: February 17, 2024
Learn how to connect your guitar to an audio interface for high-quality recording and audio processing. Enhance your music production with the right audio interface.
(Many of the links in this article redirect to a specific reviewed product. Your purchase of these products through affiliate links helps to generate commission for AudioLover.com, at no extra cost. Learn more)
Table of Contents
Introduction
Welcome to the world of music recording and production! If you’re a guitarist looking to take your playing to the next level, or an aspiring producer aiming to capture the best guitar tones in your recordings, connecting your guitar to an audio interface is an essential step. An audio interface serves as the bridge between your guitar and your computer, allowing you to record and monitor your guitar’s sound with professional quality.
In this article, we will guide you through the process of connecting your guitar to an audio interface, step by step. We will cover everything from understanding the audio interface to configuring it correctly, setting up recording software, adjusting input levels, and troubleshooting common issues.
Before we dive into the technicalities, let’s take a moment to understand the importance of an audio interface. Simply put, an audio interface is a device that converts analog audio signals from your guitar into digital signals that your computer can process. It provides you with high-quality audio input and output, ensuring that your recordings capture the nuances of your guitar playing.
Sometimes, the built-in audio inputs on your computer may not deliver the desired sound quality, resulting in unwanted noise or latency issues. That’s where an audio interface comes in handy, enabling you to achieve professional-grade recordings and monitor your guitar in real-time with low latency.
Now that we’ve established the significance of an audio interface, let’s gather the necessary equipment to connect your guitar to this powerful device.
Understanding the Audio Interface
Before we dive into the technical details of connecting your guitar to an audio interface, let’s take a moment to understand the components and features of this essential device.
An audio interface is typically a box-like device that connects to your computer via USB, Thunderbolt, or FireWire. It serves as an external sound card specifically designed for recording and playback purposes. Audio interfaces come in various shapes and sizes, offering different input and output options to suit different recording needs.
The most common types of inputs found on audio interfaces are XLR and 1/4″ instrument jacks. XLR inputs are typically used for connecting microphones, while instrument jacks are used for guitars and other instruments. Some audio interfaces may also include additional inputs such as MIDI or digital inputs.
When choosing an audio interface, it’s important to consider the number of inputs and outputs you require. If you’re solely recording your guitar, an interface with at least one instrument input will suffice. However, if you plan on expanding your setup to include microphones, keyboards, or other external devices, you may need an interface with multiple inputs.
Another factor to consider is the audio interface’s sample rate and bit depth. The sample rate refers to the number of audio samples taken per second, while the bit depth determines the resolution of each sample. Higher sample rates and bit depths generally result in better sound quality, but they also require more processing power from your computer.
Audio interfaces also offer various monitoring options. Some interfaces have dedicated headphone outputs for monitoring your guitar in real-time, while others may feature multiple outputs to connect to studio monitors or external speakers.
Many audio interfaces also come bundled with software drivers that allow seamless integration with your recording software. These drivers ensure low latency audio playback and efficient communication between your computer and the audio interface.
Understanding the components and features of an audio interface is crucial for selecting the right device to suit your recording needs. With a firm grasp on this knowledge, let’s move on to the next step: gathering the required equipment to connect your guitar to the audio interface.
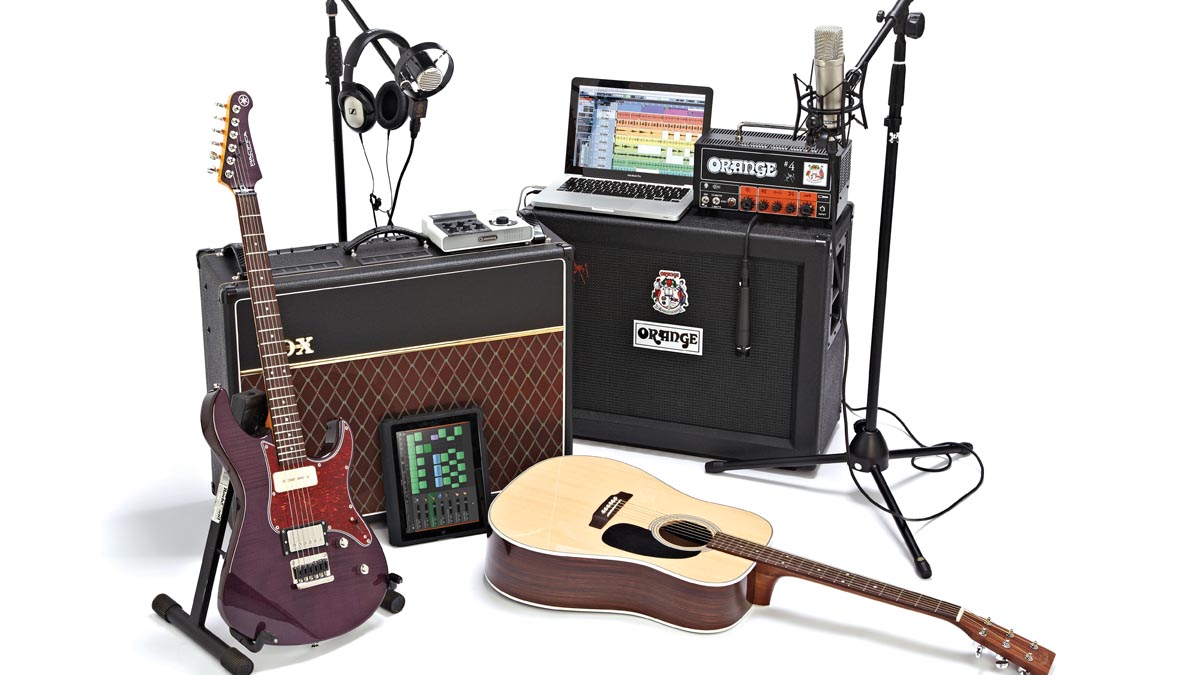
Gathering the Required Equipment
Before we can connect your guitar to an audio interface, let’s make sure we have all the necessary equipment. Here’s a list of items you’ll need:
- Audio Interface: Choose an audio interface that suits your recording needs. Make sure it has at least one instrument input to connect your guitar.
- Guitar Cable: You’ll need a standard 1/4″ guitar cable to connect your guitar to the instrument input on the audio interface. Ensure that the cable is in good condition to avoid any signal loss or interference.
- Guitar: Of course, you’ll need your trusty guitar! Whether you have an electric, acoustic, or bass guitar, the process of connecting it to an audio interface is the same.
- Computer: You’ll need a computer with a USB, Thunderbolt, or FireWire port to connect the audio interface. Ensure that your computer meets the minimum system requirements for the audio interface and your preferred recording software.
- Recording Software: Choose a recording software that suits your needs. There are various options available, ranging from beginner-friendly programs to professional-grade digital audio workstations (DAWs).
- Headphones: While not mandatory, having a pair of headphones is recommended for monitoring your guitar’s sound during recording. Make sure the headphones have a standard audio jack that can be connected to the audio interface’s dedicated headphone output.
It’s important to note that the quality of your equipment will have a significant impact on your recordings. Investing in a reliable audio interface, a good guitar cable, and quality headphones will ensure optimal sound capture during the recording process.
Once you have gathered all the required equipment, you’re one step closer to connecting your guitar to the audio interface. In the next section, we will guide you through the process of actually making the physical connection. Get ready to unleash your guitar’s potential and capture pristine recordings!
Connecting the Guitar to the Audio Interface
Now that we have all the necessary equipment, it’s time to connect your guitar to the audio interface. Follow these steps to ensure a proper connection:
- Power off your computer: Before making any connections, it’s always a good idea to power off your computer to avoid any potential electrical damage.
- Connect the audio interface to your computer: Use the appropriate cable (USB, Thunderbolt, or FireWire) to connect the audio interface to an available port on your computer. Ensure that the cable is securely plugged in on both ends.
- Plug in the guitar cable: Take one end of the guitar cable and insert it into the output jack on your guitar. Make sure it is firmly connected to avoid any accidental disconnection during recording.
- Connect the other end of the guitar cable: Take the other end of the guitar cable and plug it into the instrument input on the audio interface. The instrument input is typically labeled “Guitar” or “Hi-Z”. Ensure that the cable is securely plugged in to maintain a stable connection.
- Turn on the audio interface: Once the connections are made, power on the audio interface. Some interfaces may require the installation of specific drivers or software, so be sure to follow the manufacturer’s instructions to complete the setup.
- Power on your computer: Once the audio interface is powered on, you can turn on your computer. The operating system should recognize the audio interface, and you may receive a notification indicating a new audio device has been connected.
With your guitar now connected to the audio interface, you’re ready to start exploring the endless possibilities of recording and producing music. However, before you start hitting record, it’s crucial to configure the audio interface and set up your recording software to ensure optimal sound quality. In the next section, we will guide you through this important step. Get ready to unlock your creative potential!
Configuring the Audio Interface
After successfully connecting your guitar to the audio interface, it’s time to configure the settings to ensure optimal performance. Here are the key steps to follow:
- Access the audio interface control panel: Most audio interfaces come with software or control panel applications that allow you to adjust various settings. Locate and open the control panel for your specific audio interface.
- Select the appropriate input: In the control panel, choose the input source for your guitar. This will typically be labeled as the instrument input or the specific input channel that you plugged your guitar into.
- Set the input gain: Adjust the input gain knob or slider to set the appropriate input level for your guitar. Start with a low level and gradually increase it until the signal from your guitar is strong and clear, without clipping or distorting.
- Enable phantom power (if using a condenser microphone): If you’re using a condenser microphone, which requires phantom power, make sure to enable this option in the audio interface control panel. Phantom power is necessary to power the microphone and ensure proper functioning.
- Configure the sample rate and buffer size: Set the desired sample rate and buffer size in the audio interface control panel. The sample rate determines the quality of your audio recordings, while the buffer size affects the latency. Adjust these settings based on your specific needs and the capabilities of your computer.
- Enable direct monitoring: Direct monitoring allows you to hear the sound of your guitar directly through the audio interface’s headphone or monitor outputs, without any latency introduced by your recording software. Enable this feature if available in your audio interface control panel.
Each audio interface may have a distinct control panel or software application, so be sure to consult the user manual or manufacturer’s documentation for specific instructions. Take the time to explore the control panel, as it may offer additional customization options to suit your recording preferences.
Once you have configured the audio interface to your liking, it’s time to set up your recording software and start capturing your guitar performances. In the next section, we will guide you through the process of selecting and configuring recording software. Get ready to unleash your creativity and bring your music to life!
Setting up Recording Software
Now that your audio interface is configured, it’s time to set up the recording software on your computer. The recording software, also known as a digital audio workstation (DAW), is where you will record, edit, and mix your guitar tracks. Follow these steps to get started:
- Choose a recording software: There are many options available, ranging from free to paid software. Popular choices include Ableton Live, Pro Tools, Logic Pro, Cubase, and Reaper. Consider your budget, preferred workflow, and the features offered by each software before making a decision.
- Install the software: Download and install the chosen recording software on your computer. Follow the installation instructions provided by the software manufacturer.
- Set up audio preferences: Within the recording software, access the audio preferences or settings. Choose the audio interface as the input and output device. Set the sample rate and buffer size to match the settings you configured in the audio interface’s control panel.
- Create a new project: Start a new project in the recording software. Specify the project settings, such as the sample rate, bit depth, and project tempo.
- Create a new audio track: Within the project, create a new audio track for recording your guitar. Assign the input source to the instrument input of your audio interface. Make sure the track is armed for recording.
- Enable monitoring: Enable monitoring on the audio track to hear the sound of your guitar as you play. This allows you to listen to your performance in real-time, even as the audio is being recorded.
- Adjust recording levels: Watch the input meter on the audio track as you play your guitar. Make sure the levels are neither too low, resulting in a weak signal, nor too high, causing distortion or clipping. Adjust the input gain on your audio interface if needed.
As you become more comfortable with your chosen recording software, you can explore additional features such as plugin effects, virtual instruments, and advanced editing techniques. Practice and experimentation will help you become proficient in recording and producing your guitar tracks.
Remember to save your projects regularly to avoid losing your work and take advantage of the software’s autosave feature if available. With your recording software set up, it’s time to fine-tune the input levels to ensure optimal sound quality. We’ll cover this in the next section.
Adjusting Input Levels
Properly adjusting the input levels on your audio interface is crucial for capturing clear and balanced recordings of your guitar. Follow these steps to achieve optimal input levels:
- Select the track: Ensure that the track you want to record on is selected in your recording software. This ensures that any adjustments you make will be applied to that specific track.
- Play your guitar: Start playing your guitar at the desired volume level. You can play a few chords or notes to get an idea of the sound you want to capture.
- Watch the input meter: Keep an eye on the input meter in your recording software. This meter displays the level of the incoming audio signal from your guitar.
- Avoid clipping: Adjust the input gain on your audio interface to ensure that the input meter stays below the maximum level (0 dB). If the meter reaches or exceeds 0 dB, it indicates clipping, which results in distorted and unpleasant sound. Decrease the input gain until the signal no longer reaches the maximum level.
- Aim for optimal levels: While avoiding clipping, aim to set the input level as high as possible without causing distortion. This allows for a healthy signal-to-noise ratio and ensures that the recorded guitar sound is loud and clear.
- Utilize software meters and plugins: Some recording software and audio plugins offer additional visual meters and tools to help you monitor and adjust input levels. Utilize these tools to fine-tune the input levels and achieve a balanced and professional sound.
- Perform test recordings: Record short test takes and listen back to them to assess the sound quality. If you notice any distortion, clipping, or other issues, make further adjustments to the input levels until you achieve the desired sound.
Remember that input levels may vary based on the style of playing, the type of guitar pickups, and the sound you want to achieve. Experimentation is key to finding the sweet spot for your guitar recordings. As you gain more experience, you will become better at setting the input levels efficiently.
With your input levels properly adjusted, you are now ready to monitor and record your guitar using your audio interface. In the next section, we will guide you on the process of monitoring and recording your guitar tracks. Get ready to capture your musical creativity!
Monitoring and Recording the Guitar
Now that your audio interface is set up and input levels are adjusted, it’s time to monitor and record your guitar tracks. Follow these steps to ensure a smooth monitoring and recording process:
- Put on your headphones: If you haven’t already, put on your headphones and connect them to the dedicated headphone output on your audio interface. This allows you to monitor the sound of your guitar in real-time without any latency.
- Enable monitoring: Within your recording software, make sure that monitoring is enabled for the track you’re recording on. This ensures that you can hear your guitar as you play, even as it’s being recorded.
- Select the appropriate audio input: Double-check that the correct audio input is selected for the track you’re recording on. This ensures that the input signal from your guitar is being captured.
- Arm the track for recording: Arm the track by clicking the record button on the software. This prepares the track to start recording when you’re ready.
- Start recording: Begin playing your guitar or performing your desired musical piece. Click the record button on your recording software to start recording your guitar track.
- Monitor the recording: Keep an eye on the recording meter within your software to ensure that the input levels are within the desired range. Avoid clipping, which can result in distorted sound. If necessary, make adjustments to the input gain or your playing dynamics.
- Monitor the playback: After recording, you can play back the recorded track to listen to your guitar performance. Ensure that the sound is clear and balanced, and make any necessary adjustments to the settings or re-record if needed.
- Repeat the process: If you need to record multiple guitar tracks or different sections of a song, repeat the steps above for each track. This allows you to layer different parts and create multi-dimensional guitar recordings.
During the recording process, it’s important to focus on your performance and deliver your best playing. Take advantage of the real-time monitoring provided by your audio interface to ensure that you can hear your guitar clearly and make any necessary adjustments while recording.
Once you’re satisfied with your recorded guitar tracks, you can proceed to further edit, mix, and enhance them using the various functions and plugins available in your recording software. This allows you to add effects, adjust levels, apply EQ, and create a polished and professional-sounding final mix.
With these monitoring and recording techniques, you’re well-equipped to capture the essence of your guitar playing and bring your musical ideas to life. In the next section, we will provide some troubleshooting tips to help you overcome any common challenges you may encounter along the way.
Troubleshooting Tips
While connecting and recording your guitar through an audio interface is generally a straightforward process, you may encounter some common issues along the way. Here are a few troubleshooting tips to help you overcome these challenges:
- No sound or low sound: If you’re not getting any sound or the sound is too low, check the following:
- Ensure that the guitar cable is securely connected to both your guitar and the audio interface.
- Verify that the input gain on the audio interface is properly adjusted, ensuring it’s not set too low.
- Ensure that the track you’re recording on is armed and set to the correct input source in your recording software.
- Check that your computer’s volume settings are properly configured.
- Crackling or popping noise: If you hear crackling or popping noises during recording or playback, try the following:
- Check your guitar cable for any damage or loose connections.
- Ensure that the audio interface and your computer are connected to the same power source to avoid ground loop issues.
- Adjust the buffer size in your audio interface settings or recording software to see if it reduces the crackling or popping noise.
- Update the drivers for your audio interface to the latest version.
- Latency issues: If you experience latency (delay) between playing your guitar and hearing the sound in your headphones, try the following:
- Reduce the buffer size in your audio interface settings or recording software to decrease the latency, but be mindful of potential audio glitches or performance issues.
- Enable direct monitoring on your audio interface, if available, to hear your guitar without any delay.
- Consider using a dedicated audio interface with low latency performance for improved real-time monitoring.
- Software compatibility: If you’re encountering compatibility issues between your audio interface and recording software, try the following:
- Make sure you have the latest drivers installed for your audio interface, as older versions may not be compatible with newer operating systems or recording software.
- Check the manufacturer’s website or support documentation for any known compatibility issues or software updates.
- Consider using a different recording software that is known to be compatible with your audio interface.
If you’re experiencing persistent issues or if the troubleshooting tips do not resolve the problem, consult the user manual or reach out to the manufacturer’s support for further assistance. They will be able to provide specific guidance based on your audio interface and setup.
Remember, troubleshooting is a normal part of the recording process, and with patience and persistence, you’ll be able to overcome any obstacles and continue creating music with your guitar and audio interface.
Now that you’re equipped with troubleshooting knowledge, you can confidently dive into the world of guitar recording. In the next section, we’ll wrap up the article with some concluding remarks.
Conclusion
Congratulations on successfully connecting your guitar to an audio interface! You now have the tools and knowledge to capture professional-quality guitar recordings and unlock your creative potential. By understanding the audio interface, gathering the necessary equipment, and configuring the settings, you have laid the foundation for seamless guitar recording and production.
We explored the importance of an audio interface in capturing the nuances of your guitar playing and discussed the various components and features to consider when choosing an interface. We also covered the necessary equipment, including the audio interface itself, guitar cables, your trusted guitar, and a computer with recording software.
We then guided you through the process of physically connecting your guitar to the audio interface, ensuring a secure and stable connection. Alongside that, we explored the steps to configure the audio interface settings, including selecting the appropriate input, setting the input gain, and enabling features such as phantom power and direct monitoring.
With the audio interface set up, we moved on to setting up and configuring your recording software to ensure optimal performance. We discussed creating a new project, setting up audio preferences, creating audio tracks, and adjusting input levels to capture a clear and balanced guitar sound.
Monitoring and recording your guitar became the next focus, where we covered the steps to enable real-time monitoring, select the correct audio input source, arm the track for recording, and ensure optimal input levels. We also emphasized the importance of actively monitoring the recording process and making any necessary adjustments to improve the sound quality.
To help troubleshoot common issues, we provided tips on addressing no sound or low sound, crackling or popping noise, latency issues, and software compatibility problems. By following these troubleshooting tips, you can overcome challenges and maintain a smooth recording experience.
In conclusion, connecting your guitar to an audio interface opens up a world of possibilities for recording and producing your guitar playing. With the right equipment, proper configuration, and thoughtful monitoring, you can capture your musical ideas and create professional-sounding guitar tracks.
Now, armed with this knowledge and equipped with your audio interface, it’s time to unleash your creativity and embark on your guitar recording journey. Keep practicing, experimenting, and refining your skills, and have fun as you explore the limitless potential of your guitar and audio interface combination.
Happy recording!


