Home>Production & Technology>Audio Interface>How To Connect A Compressor To Audio Interface

Audio Interface
How To Connect A Compressor To Audio Interface
Published: February 4, 2024
Learn how to connect a compressor to your audio interface and enhance the sound quality of your recordings. Improve your audio production with this step-by-step guide.
(Many of the links in this article redirect to a specific reviewed product. Your purchase of these products through affiliate links helps to generate commission for AudioLover.com, at no extra cost. Learn more)
Table of Contents
Introduction
Welcome to the world of audio interfaces and compressors! If you’re an aspiring musician, podcaster, or audio enthusiast, understanding how to connect a compressor to an audio interface is crucial. A compressor is a powerful tool in the audio world that helps control the dynamic range of a sound signal, ensuring a more balanced and polished output.
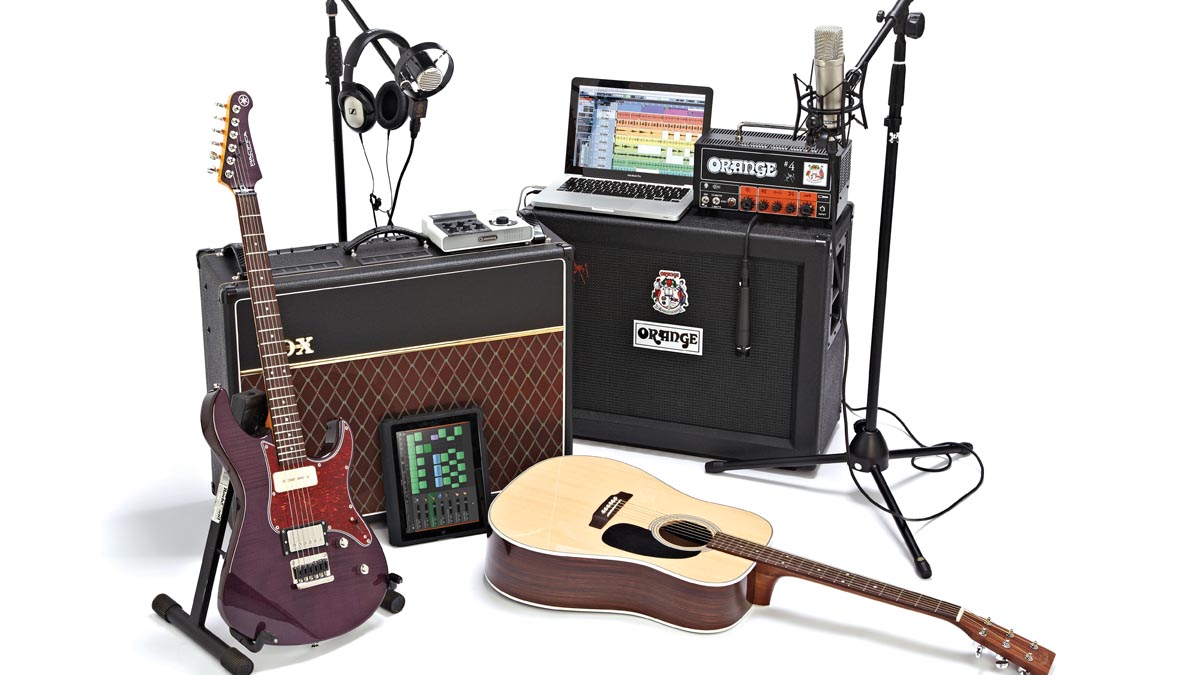
An audio interface, on the other hand, acts as the gateway between your analog audio equipment, such as microphones and instruments, and your computer. It allows you to capture high-quality audio, make recordings, and connect to various devices for professional audio production. Combining the capabilities of an audio interface with a compressor can take your audio recordings to the next level.
In this article, we will guide you through the process of connecting a compressor to an audio interface. Whether you’re a novice or already have some experience in the field, this step-by-step guide will help you navigate through the setup and configuration and get the best out of your audio recordings.
Before we dive into the technical aspects, it’s important to ensure that you have the necessary equipment and a basic understanding of audio interfaces and compressors. Familiarity with your specific audio interface’s features and the functions of a compressor will be beneficial throughout the setup process.
So, let’s embark on this audio journey together and explore the world of compressors and audio interfaces!
Understanding Compressors and Audio Interfaces
Before we proceed with connecting a compressor to an audio interface, let’s take a moment to understand these two vital components of audio production.
A compressor is an audio processing device that controls the dynamic range of a sound signal. Dynamic range refers to the difference between the loudest and softest parts of an audio signal. By reducing the dynamic range, a compressor helps to even out the levels, resulting in a more balanced and consistent sound.
Compressors are commonly used in various audio applications, including music production, podcasting, broadcasting, and live sound engineering. They can help control the volume of vocals, enhance the sustain of instruments, and prevent audio peaks from distorting or clipping. Compressors typically have adjustable settings such as threshold, ratio, attack, release, and makeup gain, which allow users to fine-tune the compression effect to suit their specific needs.
Now, let’s move on to audio interfaces. An audio interface serves as a crucial link between your analog audio equipment and your computer. It allows you to connect microphones, instruments, and other audio devices to your computer for recording, playback, and monitoring purposes.
Audio interfaces come in different shapes and sizes, offering a range of input and output options to accommodate various recording scenarios. They typically connect to your computer via USB, Thunderbolt, or Firewire and offer features like preamps, converters, headphone outputs, and MIDI connectivity.
One of the primary functions of an audio interface is to convert analog audio signals into digital data that can be processed by your computer’s software. Conversely, it also converts digital audio signals from your computer back into analog signals for playback through speakers or headphones. Audio interfaces provide low-latency monitoring, allowing you to hear yourself in real-time while recording and ensuring accurate audio monitoring during playback.
Now that we have a basic understanding of compressors and audio interfaces, let’s move on to the step-by-step process of connecting a compressor to an audio interface.
Step 1: Choosing the Right Compressor
Choosing the right compressor for your audio setup is crucial to achieving the desired sound quality. With a wide variety of compressors available on the market, it’s important to consider a few key factors before making your selection.
Firstly, determine the primary purpose of your compressor. Are you using it for studio recording, live performances, or both? Different compressors may offer specific features tailored for different applications.
Next, consider the number of channels you require. If you’re primarily working with mono or stereo recordings, a single or dual-channel compressor will suffice. However, if you work with multi-track recordings or require independent compression control for multiple sources, a multi-channel compressor may be necessary.
Another factor to consider is the compressor’s control settings. Most compressors offer threshold, ratio, attack, release, and makeup gain controls. Ensure that the compressor you choose has these essential controls and allows for easy adjustment. Additionally, some compressors may offer advanced features like sidechain inputs, variable knee settings, or different compression algorithms. Assess whether these features are relevant to your specific audio needs.
Budget is also an important consideration. Compressors can vary greatly in price, and it’s essential to set a budget and explore options within that range. Remember that expensive doesn’t always mean better, so prioritize your requirements and seek out compressors that offer the best value for your money.
Lastly, gather insights and read reviews from professionals and users who have experience with different compressor models. Their experiences can provide valuable insights into the performance, reliability, and overall sound quality of the compressors you’re considering.
By considering these factors and doing thorough research, you can choose a compressor that best suits your audio setup and meets your specific requirements. Once you’ve selected the right compressor, it’s time to move on to the next step: connecting it to your audio interface.
Step 2: Connecting the Compressor to the Audio Interface
Now that you’ve chosen the perfect compressor for your audio setup, it’s time to connect it to your audio interface. Follow these steps to ensure a proper and seamless connection:
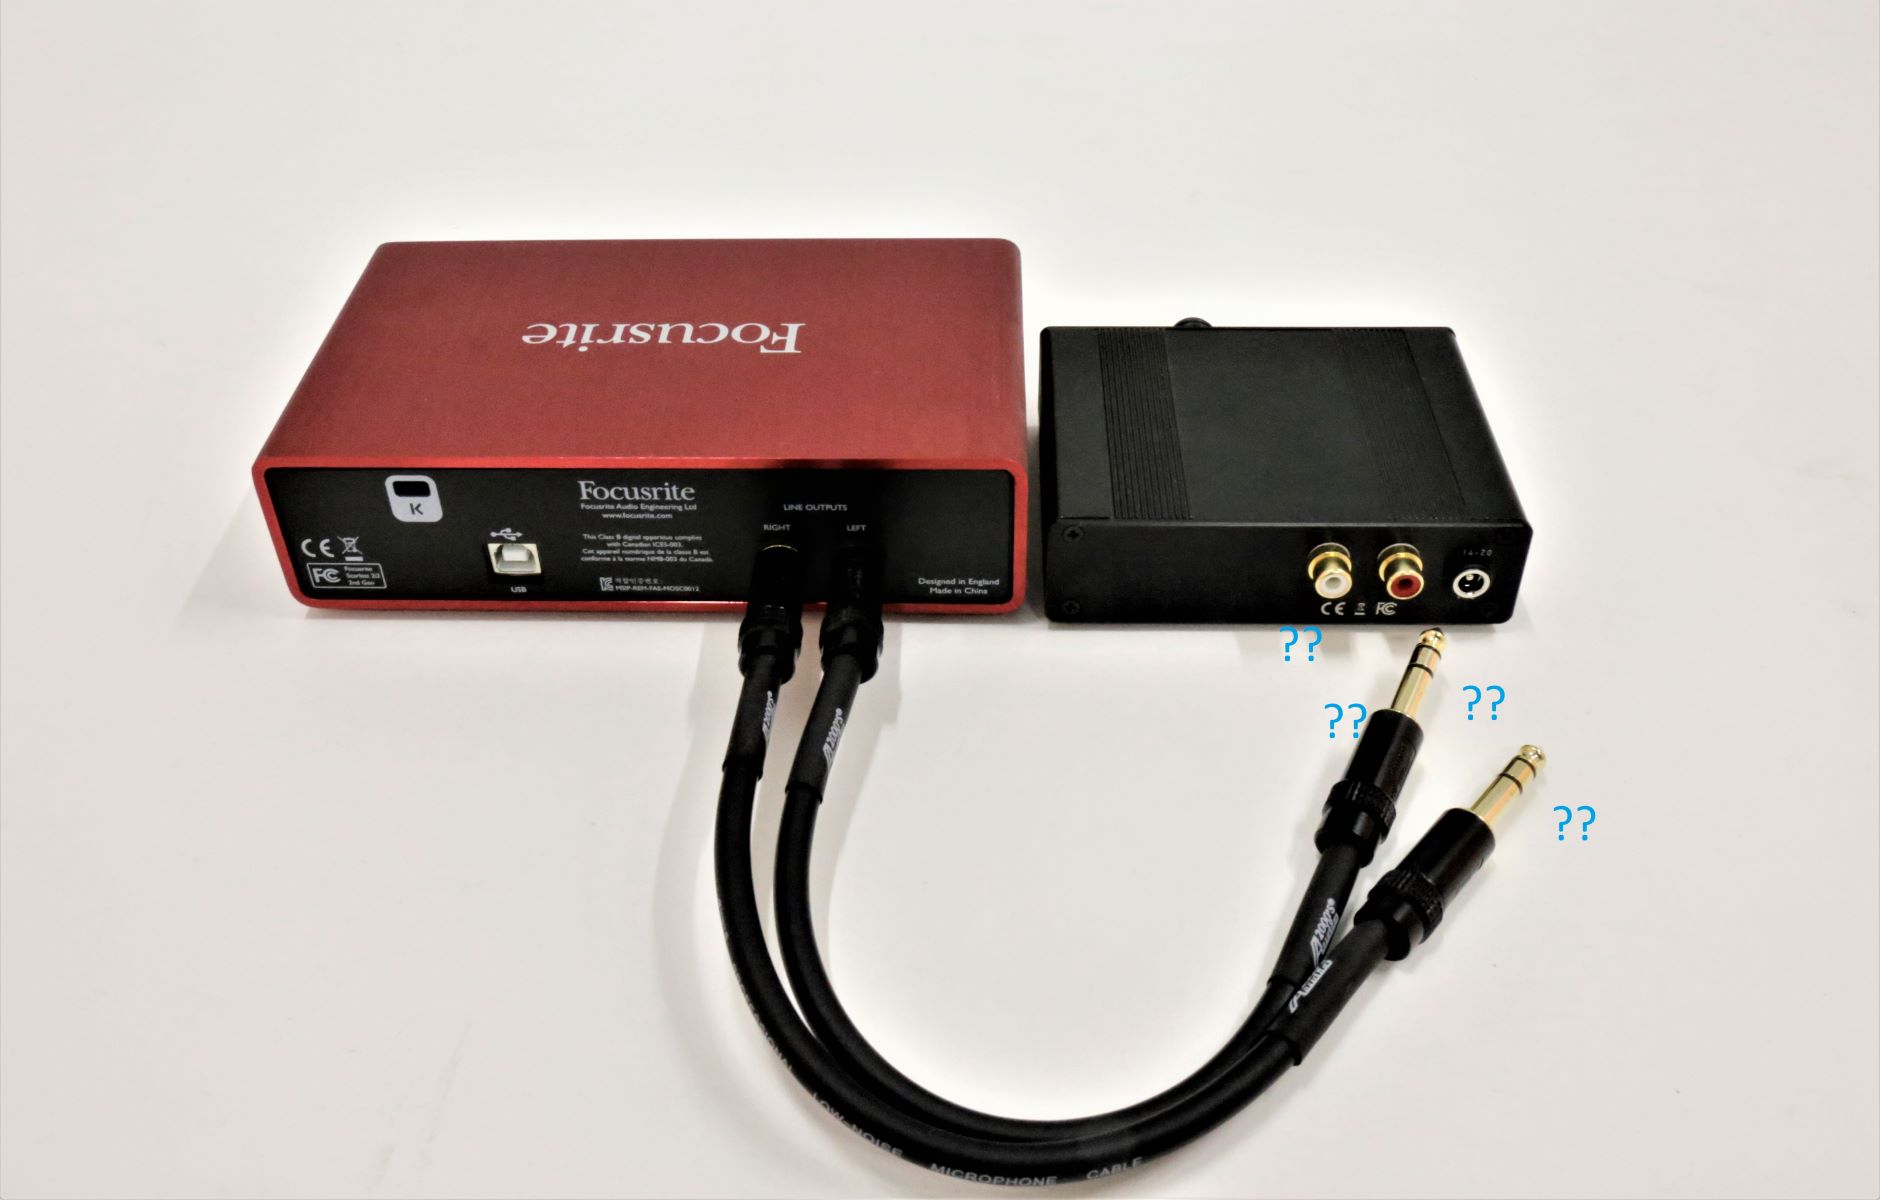
- Locate the audio inputs and outputs on your audio interface. These are typically labeled as “Line In” or “Mic In” for inputs and “Line Out” or “Headphone Out” for outputs. Depending on your compressor and interface, you may need to use different types of cables, such as XLR, TRS, or RCA cables.
- Connect the audio output of your audio interface to the input of the compressor. If you’re using a mono compressor, use a single cable to connect the left or right output of your audio interface to the input of the compressor. For stereo compressors, use two cables to connect both the left and right outputs of your audio interface to the corresponding inputs on the compressor.
- Connect the output of the compressor to the audio input of your audio interface. Again, use the appropriate cables based on the type of compressor and interface you have. For mono compressors, use a single cable to connect the output of the compressor to the audio input of your audio interface. For stereo compressors, use two cables to connect both the left and right outputs of the compressor to the corresponding inputs on the audio interface.
- Ensure that all the connections are secure and tight. Loose connections can lead to unwanted noise or signal interruptions. Double-check the cables and make any necessary adjustments.
- Once the connections are in place, power on your audio interface and compressor. Make sure to follow the manufacturer’s instructions for both devices. Some compressors may require an external power source, while others can be powered by the audio interface itself.
- Finally, adjust the input and output levels on your audio interface to ensure proper signal flow and avoid clipping or distortion. Start with low levels and gradually increase them while monitoring the audio input and output levels on your interface.
By following these steps, you can establish a solid connection between your compressor and audio interface. This connection allows the audio signal to flow through the compressor, where it can be processed and controlled to achieve the desired sound.
Now that the physical connection is complete, it’s time to move on to the next step: setting up the audio interface.
Step 3: Setting Up the Audio Interface
Now that you have connected your compressor to the audio interface, it’s time to set up the audio interface for optimal performance. Follow these steps to ensure a proper setup:
- Install the necessary drivers for your audio interface. Most audio interfaces come with driver software that needs to be installed on your computer. These drivers allow your computer to recognize and communicate with the audio interface properly. Follow the manufacturer’s instructions to install the drivers.
- Once the drivers are installed, connect your audio interface to your computer using the provided USB, Thunderbolt, or Firewire cable. Ensure that the connection is secure.
- Open your audio recording software or digital audio workstation (DAW). Select the audio interface as the default input and output device in the software’s preferences or settings. This ensures that the audio signal is routed through the interface for recording and playback.
- Configure the sample rate and buffer size in your audio software. The sample rate determines the number of samples per second that are captured or played back, while the buffer size affects the latency (delay) between input and output. Choose appropriate settings based on your specific requirements and the capabilities of your computer and audio interface.
- If your audio interface has input gain controls, set the appropriate levels for the connected microphones or instruments. Avoid clipping by ensuring that the input levels stay within a safe range.
- Configure the monitoring settings on your audio interface. This includes options like direct monitoring (allowing you to hear the incoming audio signal without any additional processing) or software monitoring (where the audio signal is processed and then played back through your chosen monitoring system).
- Test the audio interface by playing back audio and monitoring the signal through your headphones or speakers. Ensure that you can hear the audio clearly and that it sounds balanced and free from any glitches or abnormalities.
By following these steps, you can properly set up your audio interface and ensure that it is ready to capture and playback audio with your connected compressor. Having the correct settings and configurations will contribute to a smooth recording and monitoring experience.
Now that your audio interface setup is complete, it’s time to move on to the next step: configuring the compressor settings.
Step 4: Configuring the Compressor Settings
Now that your audio interface is set up, it’s time to configure the settings on your compressor. Follow these steps to properly adjust the compressor settings:
- Begin by setting the threshold. The threshold determines the level at which the compressor starts to reduce the gain of the audio signal. Set the threshold so that the compressor engages when the signal reaches the desired level.
- Next, adjust the ratio. The ratio determines how much the compressor reduces the gain of the audio signal once it exceeds the threshold. Higher ratios result in more aggressive compression. Set the ratio based on the dynamic range you want to achieve for your audio. A lower ratio will yield a more subtle compression effect, while a higher ratio will result in more noticeable compression.
- Set the attack time. The attack time determines how quickly the compressor responds to an audio signal that exceeds the threshold. A shorter attack time allows the compressor to respond quickly, ideal for controlling fast transients like drums or percussive instruments. A longer attack time provides a more transparent and natural compression effect.
- Adjust the release time. The release time determines how quickly the compressor stops reducing the gain once the audio signal falls below the threshold. A shorter release time can create a more punchy and aggressive sound, while a longer release time can result in smoother and more transparent compression.
- Consider adjusting the makeup gain. The makeup gain compensates for the reduction in overall volume caused by compression. Increase the makeup gain to bring the compressed audio signal back to a desired volume level. Be cautious not to overcompensate, as this can lead to distortion or clipping.
- Monitor the audio signal closely while adjusting the settings. Listen for any unwanted artifacts like pumping or breathing caused by excessive compression. Fine-tune the threshold, ratio, attack, release, and makeup gain to achieve the desired sound without sacrificing clarity or dynamics.
- Experiment with different settings and compression techniques to achieve the desired effect for your specific audio material. Remember that the ideal compression settings can vary depending on the source material, genre, and personal preference. Trust your ears and make adjustments accordingly.
By following these steps and meticulously adjusting the compressor settings, you can effectively control the dynamic range of your audio signal and achieve the desired sound for your recordings.
Now that your compressor settings are configured, it’s time to move on to the final step: testing and adjusting the compressor.
Step 5: Testing and Adjusting the Compressor
After configuring the compressor settings, it’s important to test and fine-tune the compressor to ensure optimal results. Follow these steps to properly test and adjust the compressor:
- Start by playing or recording audio through the connected microphones or instruments. Use a variety of audio sources to test the compressor’s performance across different frequencies, dynamics, and styles.
- Listen to the audio playback and pay close attention to the compressed sections. Assess whether the compressor is achieving the desired effect, such as evening out the dynamics, controlling peaks, or adding sustain.
- If necessary, make further adjustments to the threshold, ratio, attack, release, and makeup gain. Fine-tune these settings to ensure that the compressor is effectively controlling the dynamic range without introducing unwanted artifacts or altering the character of the audio signal.
- Experiment with different compression techniques, such as parallel compression or sidechain compression, to enhance the sound further. These techniques can add extra depth, impact, or movement to the audio signal when used appropriately.
- Continuously monitor the audio signal throughout the testing and adjusting process. Use both headphones and monitors to ensure that the compressed audio translates well across different playback systems and accurately represents the intended sound.
- Take breaks and listen to the audio with fresh ears. It’s easy to get caught up in the nuances of compression and lose sight of the overall sound quality. Taking breaks allows you to come back with a fresh perspective and make more objective decisions.
- Make note of the compressor settings that work well for specific audio sources and save them as presets if your compressor supports it. Presets can save you time in future sessions and maintain consistency in your recordings.
By thoroughly testing and adjusting the compressor, you can ensure that it is enhancing your audio recordings in the desired manner. The testing process allows you to fine-tune the settings and tailor the compression effect to suit the specific characteristics of your audio sources.
Remember that every audio source is unique, and what works for one may not work for another. Continuously experiment and refine your compressor settings to achieve the best possible sound for each recording.
Congratulations! You have successfully connected, set up, configured, and tested your compressor with your audio interface. With your newfound knowledge and skills, you can now confidently incorporate compression into your audio recordings, enhancing their impact and professional quality.
As you continue to work with compressors and audio interfaces, don’t hesitate to further explore different techniques, utilize advanced features, and refine your understanding of these powerful audio tools. With practice and experience, you will become more adept at using compressors effectively in your production workflows.
Happy recording and happy compressing!
Conclusion
Connecting a compressor to an audio interface is a significant step towards achieving professional-level sound quality in your recordings. By understanding how compressors and audio interfaces work together and following the steps outlined in this guide, you can effectively harness the power of compression and enhance your audio productions.
We started by understanding the role of compressors in controlling the dynamic range of audio signals and their applications in various fields of audio production. We then explored the functions of audio interfaces and their role in connecting analog audio equipment to your computer for recording and playback.
We delved into the step-by-step process of connecting a compressor to an audio interface, ensuring the proper physical connections and powering up both devices. We then moved on to setting up the audio interface, installing drivers, and configuring settings such as sample rate and buffer size.
With the connections and settings in place, we dove into the world of compressor settings, discussing the threshold, ratio, attack, release, and makeup gain controls. We emphasized the importance of testing and adjusting the compressor to achieve the desired sound, while continuously monitoring and refining the settings.
Finally, we concluded by summarizing the importance of experimentation, taking breaks, and saving presets to refine your compression techniques over time. With practice and experience, you will develop a keen ear for compression and the ability to tailor it to each audio source.
Remember, connecting a compressor to an audio interface is just the beginning of your audio production journey. Continuously honing your skills, exploring new techniques, and staying updated with advancements in technology will lead to even greater audio production achievements.
So, go ahead and start connecting that compressor to your audio interface. Get ready to take your recordings to new heights with the power of compression. Happy producing, and may your audio creations shine!