Home>Production & Technology>Audio Interface>How To Connect Audio Interface To Garageband

Audio Interface
How To Connect Audio Interface To Garageband
Published: February 4, 2024
Learn how to easily connect your audio interface to Garageband and start recording high-quality sound. Improve your music production with this step-by-step guide.
(Many of the links in this article redirect to a specific reviewed product. Your purchase of these products through affiliate links helps to generate commission for AudioLover.com, at no extra cost. Learn more)
Table of Contents
Introduction
Welcome to the world of audio interfaces! If you’re a music enthusiast, podcaster, or content creator, having a reliable audio interface is essential to capture high-quality sound. An audio interface serves as the bridge between your instruments or microphones and your computer, allowing you to record and produce professional-grade audio.
In this article, we will guide you on how to connect your audio interface to Garageband, one of the most popular digital audio workstations (DAW) for Mac users. Garageband provides a user-friendly interface and powerful features, making it an excellent choice for beginners and professionals alike.
Before we dive into the step-by-step process, it’s important to note that not all audio interfaces are compatible with Garageband. Each audio interface has its own drivers and software that need to be installed on your computer to ensure compatibility. We’ll cover this in the upcoming steps.
So, if you’re ready to take your music or podcast recordings to the next level, let’s get started! Follow these instructions to connect your audio interface to Garageband and start creating amazing soundscapes.
Step 1: Check compatibility
Before diving into the process of connecting your audio interface to Garageband, it’s crucial to ensure that your audio interface is compatible with the software. Most audio interfaces are compatible with Garageband, but it’s always a good idea to double-check.
The first step is to visit the manufacturer’s website of your audio interface. Look for a section that specifically mentions compatibility with Garageband or Mac operating systems. If you’re unable to find this information, you can also reach out to the manufacturer’s support team for assistance.
Another important consideration is the version of Garageband you’re using. Make sure you’re using the latest version of Garageband to avoid any compatibility issues. You can check for updates within the Garageband application or by visiting the App Store.
Lastly, it’s essential to ensure that your computer meets the minimum system requirements for running Garageband and the audio interface. Check the specifications of your computer, such as the operating system version, RAM, and available USB ports, to ensure compatibility.
Once you’ve confirmed the compatibility of your audio interface with Garageband and ensured that your computer meets the system requirements, you’re ready to move on to the next step of the connection process.
Step 2: Install drivers
After confirming the compatibility of your audio interface with Garageband, the next step is to install the necessary drivers for your interface. Drivers are software programs that enable communication between your audio interface and your computer’s operating system.
Most audio interfaces come with a driver installation CD or a downloadable driver from the manufacturer’s website. Here’s how you can install the drivers:
- Insert the driver installation CD into your computer or download the driver software from the manufacturer’s website.
- Follow the instructions provided in the driver installation wizard. This usually involves clicking on “Install” or “Next” until the installation is complete.
- Once the installation is finished, restart your computer to ensure that the drivers are properly installed and activated.
If you encounter any issues during the driver installation process, refer to the documentation provided by the manufacturer or contact their support team for assistance. It’s important to note that some audio interfaces may not require the installation of additional drivers, as they are plug-and-play devices.
After installing the drivers and restarting your computer, you’re now ready to connect your audio interface to your computer and Garageband. Let’s move on to the next step.
Step 3: Connect audio interface to computer
Now that you have installed the necessary drivers for your audio interface, it’s time to physically connect it to your computer. Follow these steps to ensure a proper connection:
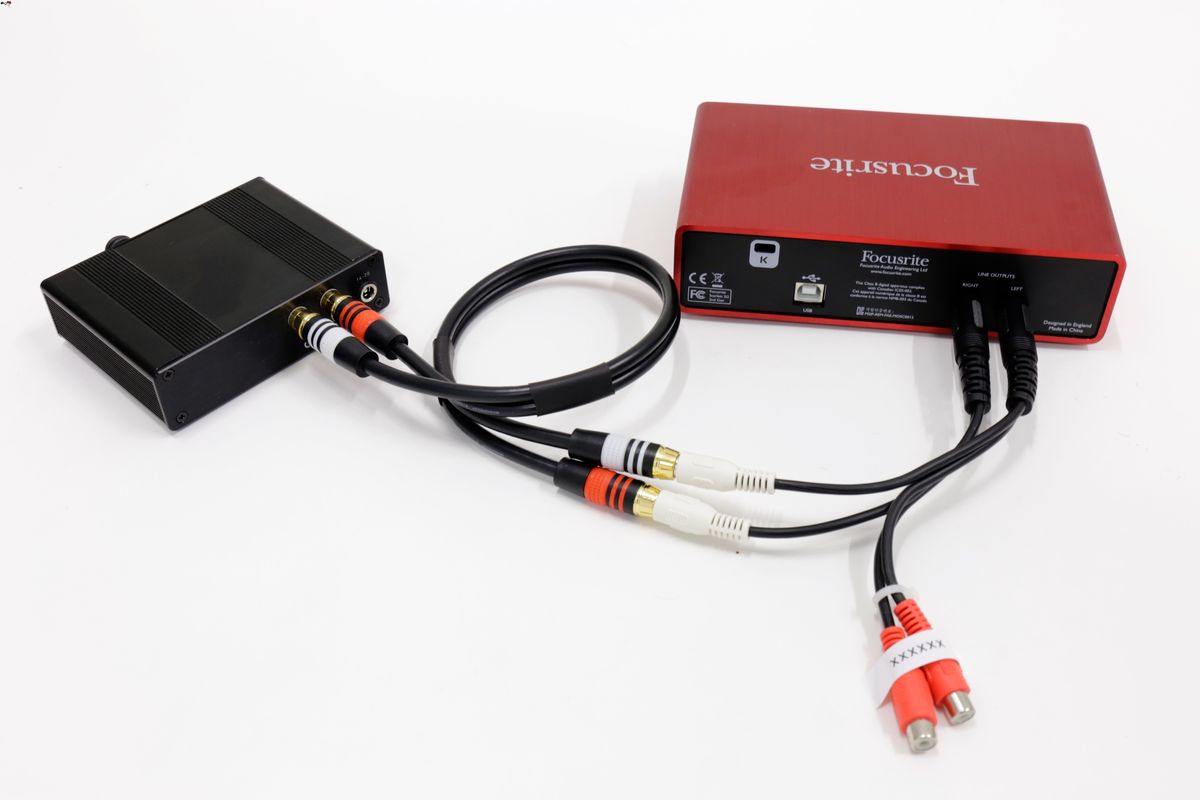
- Locate the USB port on your computer. Most audio interfaces connect via USB, so you’ll need a standard USB cable.
- Take the USB cable and connect one end to the USB port on your computer.
- Connect the other end of the USB cable to the USB port on your audio interface.
- Ensure that the USB connection is secure and snug.
- Some audio interfaces may require an external power source. If applicable, connect the power cable to the audio interface and plug it into a power outlet.
Once the audio interface is connected to your computer, you may notice a notification indicating that a new device has been detected. Your computer may also automatically install additional drivers for the audio interface. Allow the installation process to complete before proceeding.
With the audio interface now physically connected to your computer, it’s time to launch Garageband and configure the audio settings. We’ll cover this in the next step.
Step 4: Launch Garageband
With your audio interface connected to your computer, it’s time to launch Garageband and start configuring the settings for recording and playback. Garageband is a powerful digital audio workstation (DAW) that offers a user-friendly interface and a wide range of features for music production.
To launch Garageband, follow these steps:
- Locate the Garageband application on your computer. It is usually found in the Applications folder on Mac.
- Double-click on the Garageband icon to launch the application.
- Wait for Garageband to load. This may take a few seconds, depending on the speed of your computer.
Once Garageband is open, you’ll be greeted with a welcome screen where you can select the type of project you want to create. You can choose from options such as a keyboard, guitar, voice, or electronic music project. Select the appropriate option based on your recording needs.
After selecting the project type, Garageband will open the main interface with tracks, a mixer, and various editing tools. Now, let’s move on to the next step to configure the audio settings in Garageband to ensure a smooth recording experience.
Step 5: Configure audio settings in Garageband
Configuring the audio settings in Garageband is crucial to ensure that your audio interface is properly recognized and set as the input and output device. Follow these steps to configure the audio settings:
- In Garageband, click on the “Garageband” menu at the top left of the screen and select “Preferences.”
- In the Preferences window, go to the “Audio/MIDI” tab.
- Under the “Audio Output” section, select your audio interface as the output device. This will direct the audio playback from Garageband to your audio interface.
- Under the “Audio Input” section, select your audio interface as the input device. This will allow Garageband to receive audio signals from your audio interface for recording.
- Adjust the input and output levels to an appropriate level. You can check the level meter in Garageband to ensure that the levels are not too low or too high.
- Once you have configured the audio settings, click on “Apply Changes” or “OK” to save the settings.
It’s important to note that the specific options and settings in the Preferences window may vary depending on the version of Garageband you are using. However, the general process of selecting the audio interface as the input and output device remains the same.
With the audio settings in Garageband configured, you’re now ready to test the connection and ensure that your audio interface is working correctly in Garageband. Let’s move on to the next step.
Step 6: Test the connection
After configuring the audio settings in Garageband, it’s essential to test the connection between your audio interface and the software. This will ensure that everything is working properly and that you can start recording or playing back audio seamlessly. Follow these steps to test the connection:
- In Garageband, create a new track by clicking on the “+” button at the bottom left of the screen. Select the type of track you want to create, such as a microphone or instrument track.
- Click on the red record button to start recording. Play or sing into your microphone or instrument connected to the audio interface.
- Observe the level meter in Garageband to see if it detects the audio signal from your audio interface. You should see the level meter moving as you speak or play.
- Click on the stop button to stop the recording. Play the recording back to ensure that the audio is coming through your audio interface and is being played back correctly.
- If the recording and playback are successful, congratulations! Your audio interface is properly connected and working with Garageband.
- If you encounter any issues, such as no audio signal or distorted sound, double-check the connections between your audio interface, computer, and instruments/microphones. You may need to reconfigure the audio settings in Garageband or consult the troubleshooting guide provided by your audio interface manufacturer.
It’s always a good practice to test the connection and audio quality before starting a recording or production session. This ensures that you have a smooth and trouble-free experience with your audio interface and Garageband.
With the connection tested and confirmed, you’re now ready to dive into the world of music creation, podcasting, or any other audio projects you have in mind!
Conclusion
Congratulations! You have successfully learned how to connect your audio interface to Garageband. By following the steps outlined in this guide, you have ensured that your audio interface is compatible, installed the necessary drivers, and configured the audio settings in Garageband.
An audio interface is a vital tool for achieving professional-level sound quality in your recordings. Whether you’re a musician, podcaster, or content creator, having a reliable audio interface opens up a world of opportunities for creativity and expression.
Remember to always check the compatibility of your audio interface with Garageband and ensure that your computer meets the system requirements. Installing the correct drivers and making the proper physical connections are crucial steps in establishing a seamless connection between your audio interface and your computer.
Once your audio interface is connected, launching Garageband and configuring the audio settings will further enhance your recording and production experience. Make sure you set the audio interface as the input and output device, and adjust the levels accordingly.
Finally, don’t forget to test the connection by recording and playing back audio. This will ensure that everything is working as expected and that you’re ready to unleash your creativity in Garageband.
With your audio interface properly connected to Garageband, you’re now equipped to embark on your music-making journey or produce captivating podcasts with professional-grade audio quality. Enjoy the process, experiment with different sounds, and let your creative ideas come to life!