Home>Production & Technology>Audio Interface>How To Setup Mobile Pre Audio Interface
Audio Interface
How To Setup Mobile Pre Audio Interface
Modified: February 17, 2024
Learn how to set up a mobile audio interface with our step-by-step guide. Enhance your sound quality and experience professional audio recording on your mobile devices.
(Many of the links in this article redirect to a specific reviewed product. Your purchase of these products through affiliate links helps to generate commission for AudioLover.com, at no extra cost. Learn more)
Table of Contents
- Introduction
- What is a Mobile Pre Audio Interface?
- Choosing the Right Mobile Pre Audio Interface
- Compatible Devices for Mobile Pre Audio Interfaces
- Setting Up Your Mobile Pre Audio Interface
- Connecting Your Mobile Pre Audio Interface to Your Device
- Installing Drivers and Software
- Configuring Settings on Your Device
- Troubleshooting Common Issues
- Conclusion
Introduction
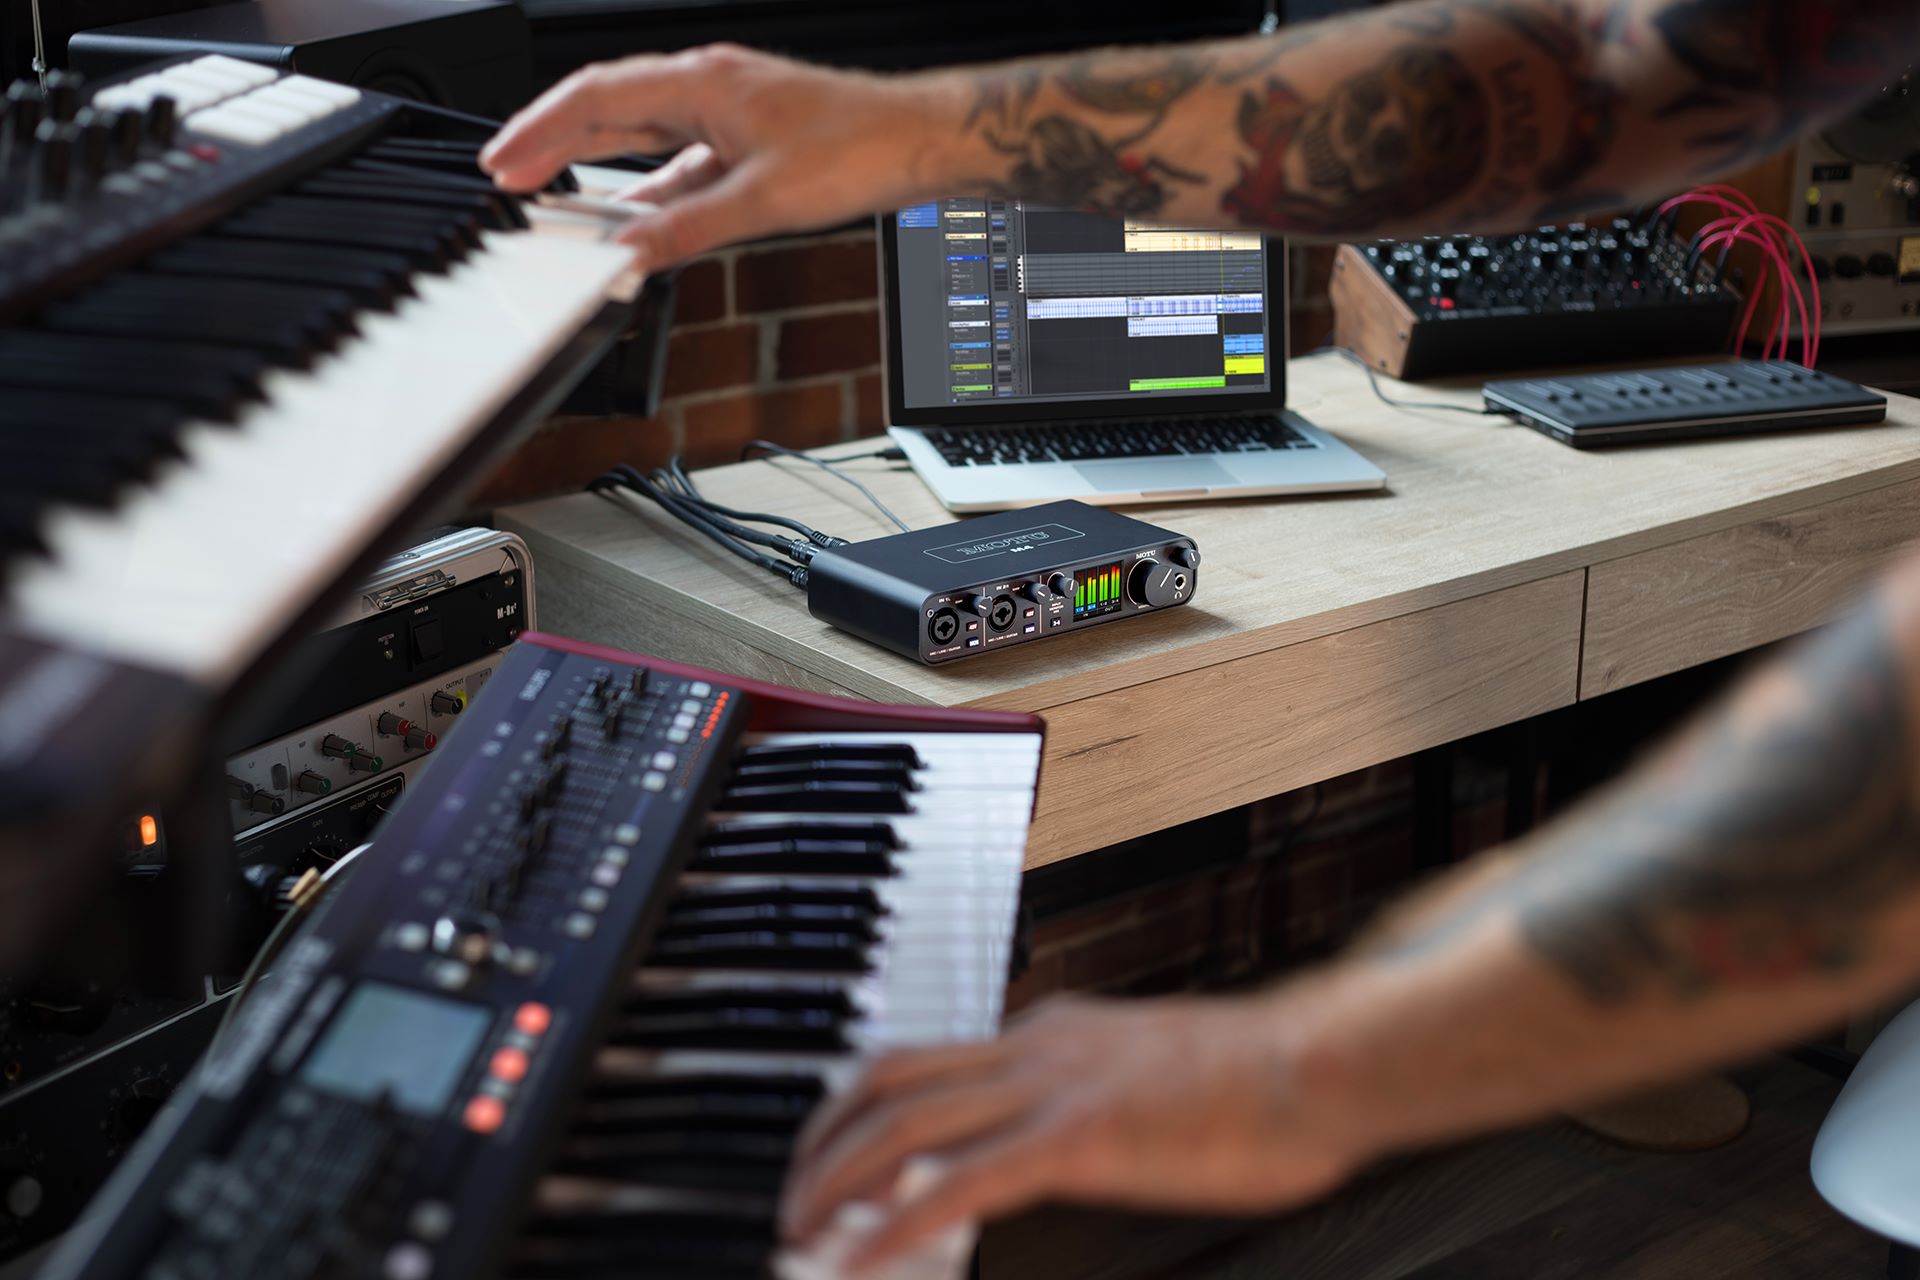
Welcome to the world of mobile recording! In this digital age, the advancement of technology has made it easier than ever to create professional-quality audio recordings on the go. Whether you’re a musician, podcaster, or content creator, having a reliable audio interface is essential for capturing high-quality sound.
So, what exactly is a mobile pre audio interface? Simply put, it is a device that allows you to connect your microphone or instrument to your mobile device or computer, transforming it into a recording studio. A mobile pre audio interface serves as the bridge between your analog audio sources and the digital world, ensuring pristine audio quality and low-latency monitoring.
With the increasing popularity of mobile devices such as smartphones and tablets, mobile pre audio interfaces have become a crucial tool for those who need to record on the go. These interfaces come in various shapes and sizes, offering different features and connectivity options to suit different needs.
In this article, we will guide you through the process of choosing the right mobile pre audio interface, setting it up, and getting started with your mobile recording endeavors. Whether you’re a beginner or a seasoned pro, we’ve got you covered.
What is a Mobile Pre Audio Interface?
A mobile pre audio interface, also known as a portable audio interface, is a device designed to connect audio sources, such as microphones or instruments, to a computer or mobile device for recording or streaming purposes. It serves as a crucial intermediary device that translates analog audio signals into digital data that can be processed by your computer or mobile device.
Traditionally, audio interfaces were large and bulky units used primarily in professional recording studios. However, with the advent of mobile recording and the ever-expanding capabilities of smartphones and tablets, manufacturers began developing compact and portable audio interfaces specifically designed for mobile use.
These mobile pre audio interfaces typically feature a compact and lightweight design, making them easy to carry in a backpack or pocket. They also offer a range of connectivity options, including USB, Thunderbolt, or even direct connection to mobile devices through lightning or USB-C connectors.
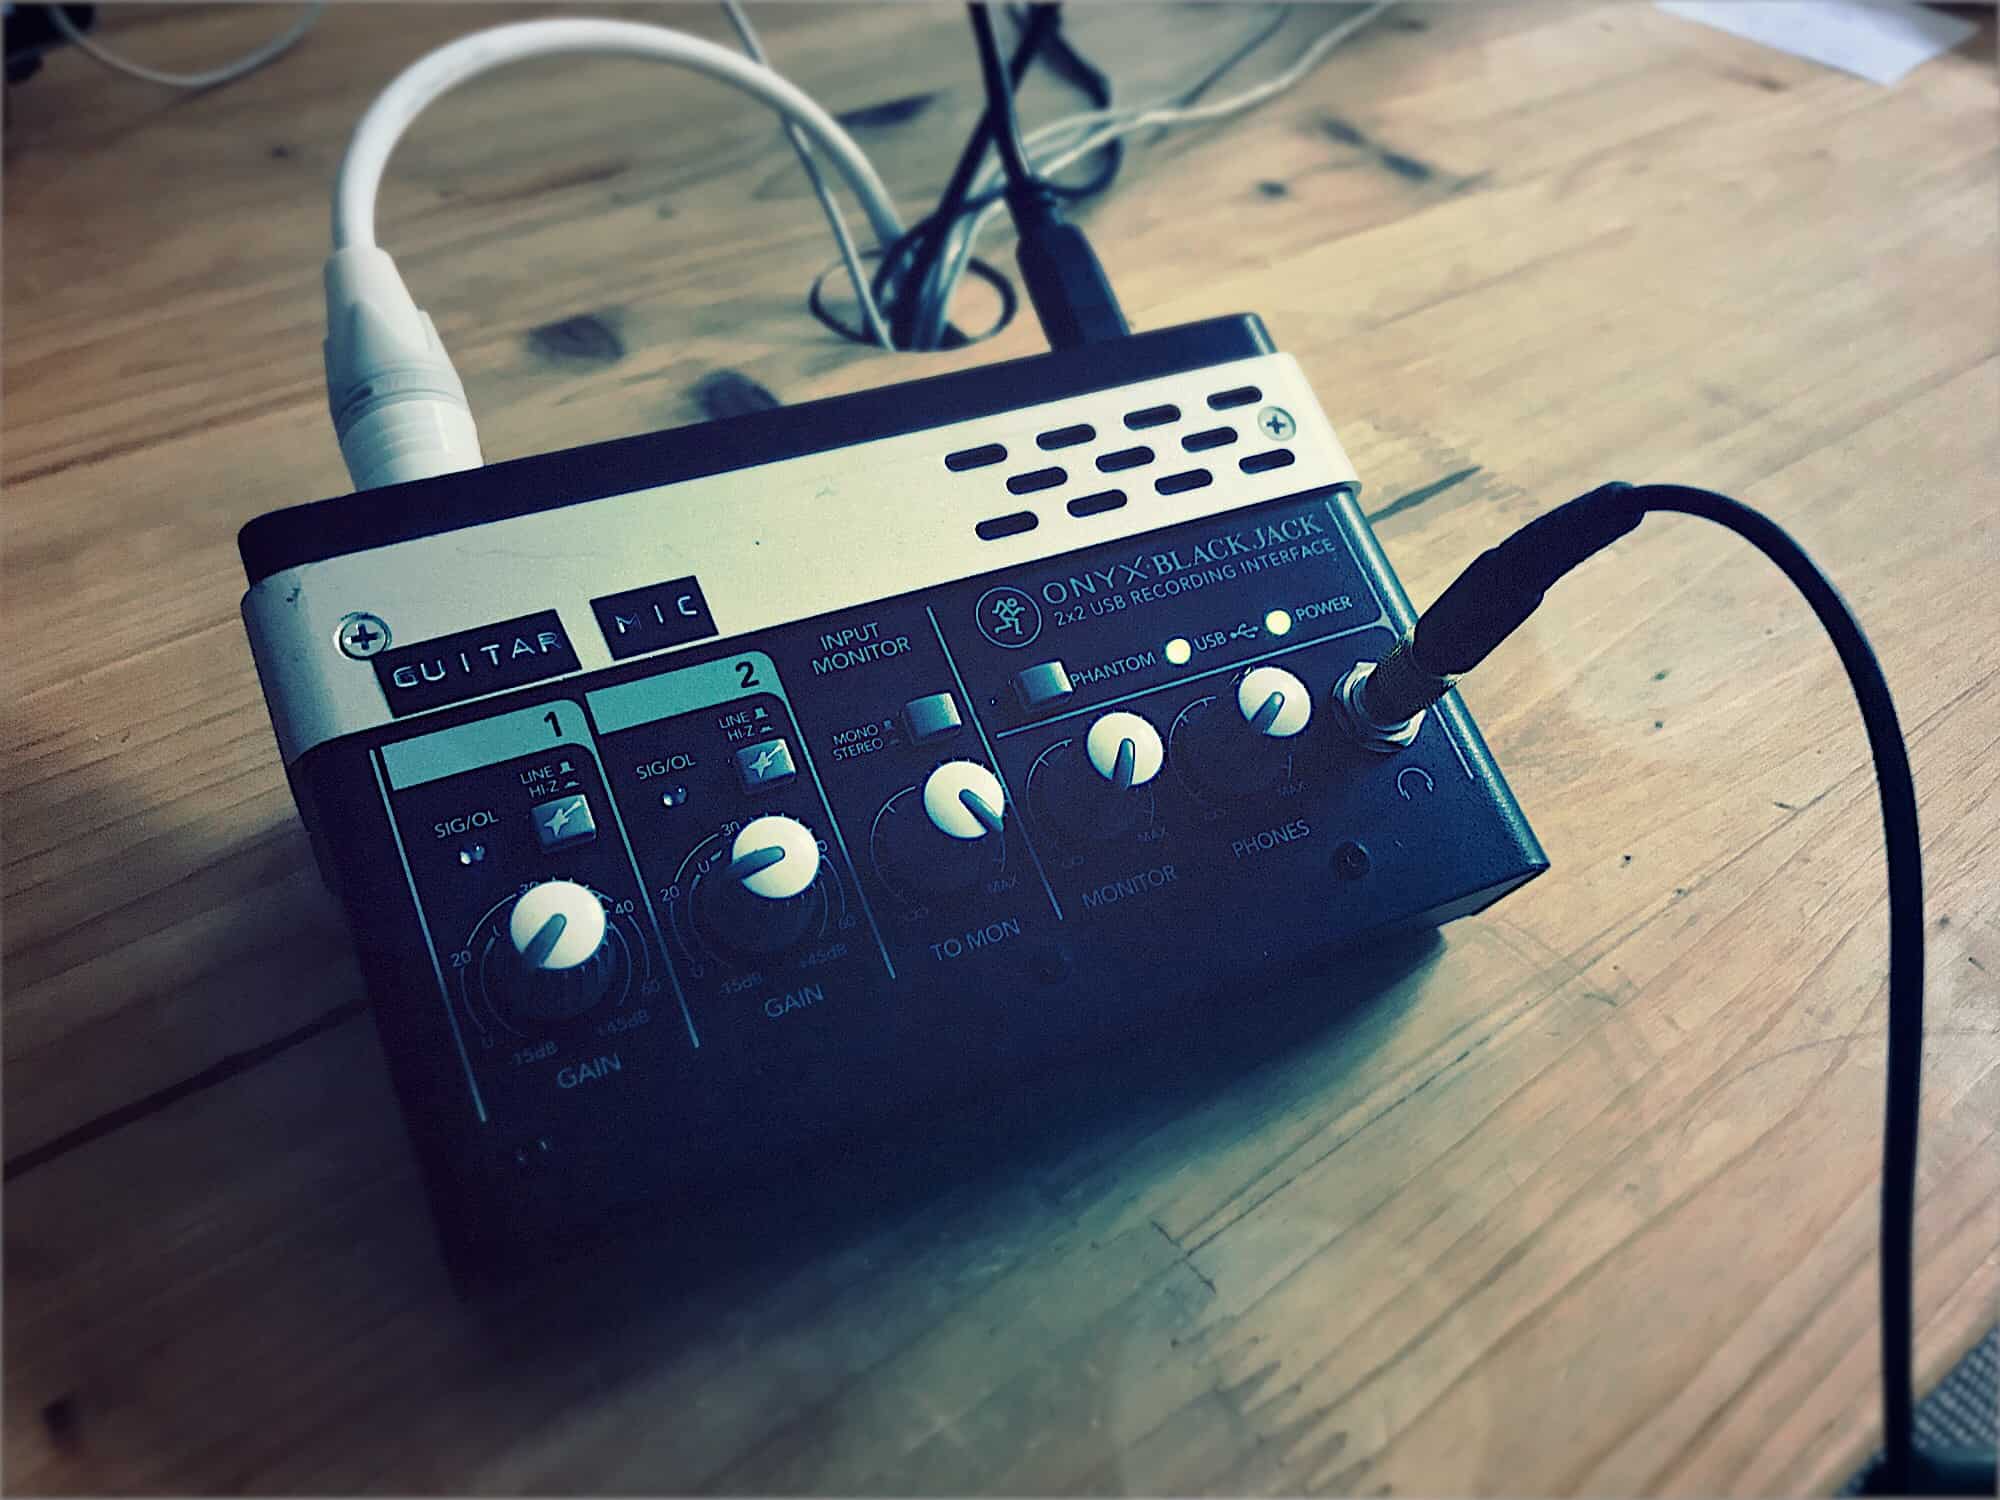
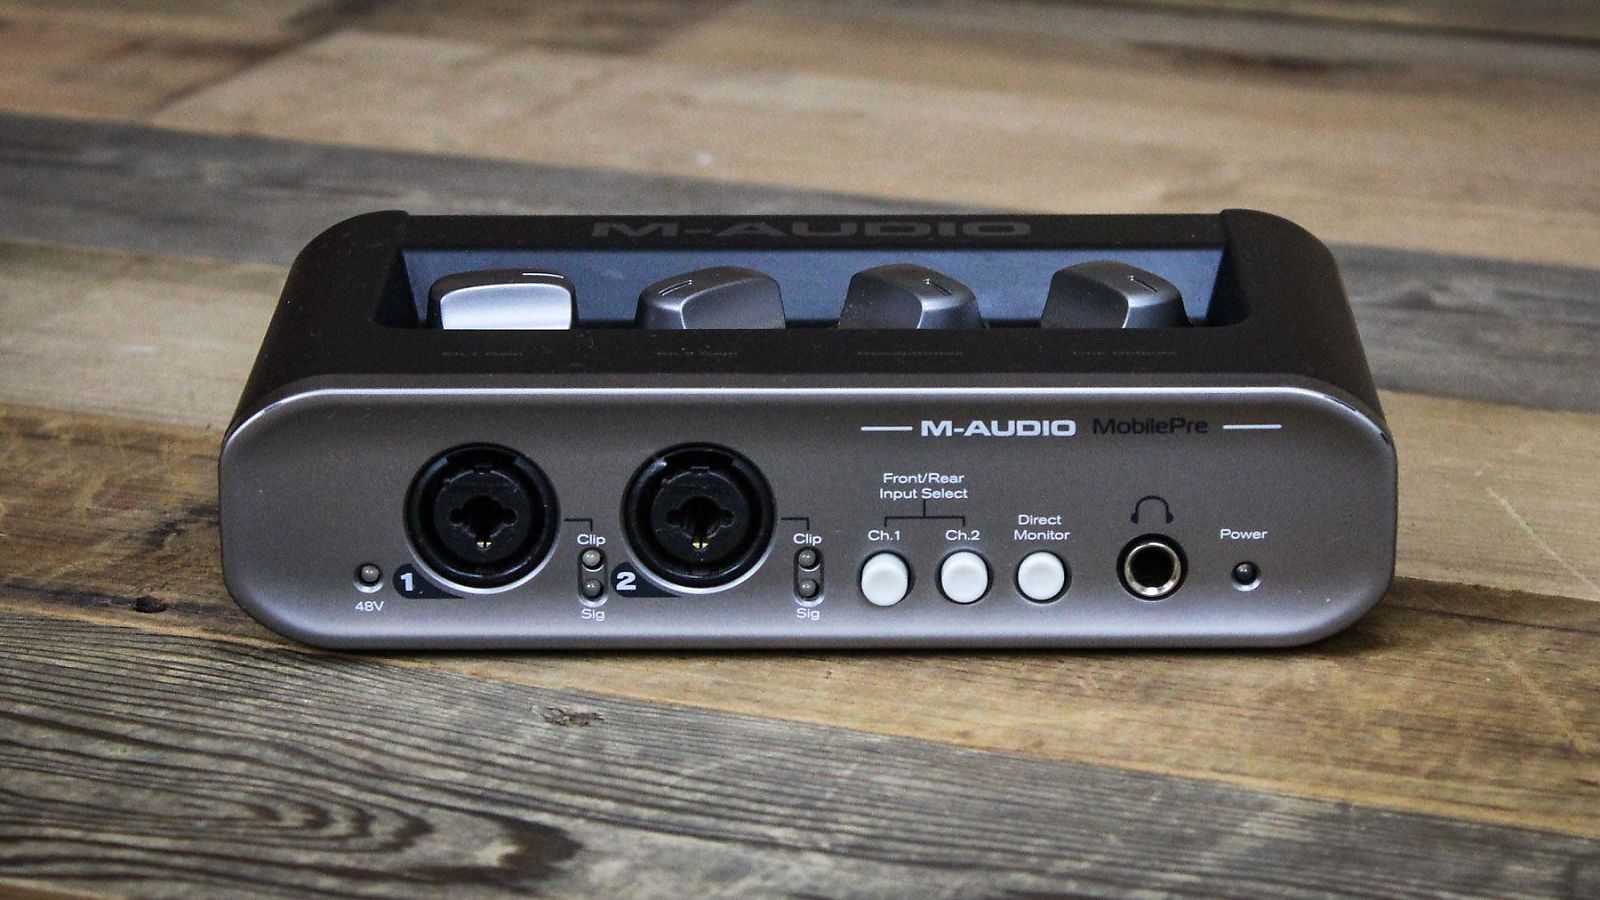
In terms of functionality, mobile pre audio interfaces provide essential features for capturing high-quality audio. They often include preamps, which amplify the weak analog signals from microphones or instruments to an optimal level for recording. Preamps play a crucial role in achieving clean and balanced audio recordings with minimal noise or distortion.
Furthermore, mobile pre audio interfaces offer additional features such as phantom power, which is required for powering condenser microphones, direct monitoring for real-time audio monitoring with zero latency, and adjustable gain controls for precise control over input levels.
With the advancement of technology, many mobile pre audio interfaces now have built-in digital signal processing (DSP) capabilities. This allows you to apply effects, EQ, or compression to your audio signals directly within the interface, reducing the processing load on your computer or mobile device.
In summary, a mobile pre audio interface is an essential tool for capturing professional-quality audio on the go. Whether you’re a musician, podcaster, or content creator, investing in a reliable mobile pre audio interface will greatly enhance the quality and versatility of your recordings.
Choosing the Right Mobile Pre Audio Interface
When it comes to selecting the right mobile pre audio interface, there are a few factors you’ll want to consider. Let’s explore some important aspects to keep in mind:
- Number of Inputs: Determine how many audio sources you plan to connect simultaneously. If you primarily work with a single microphone or instrument, a mobile pre audio interface with one or two inputs will suffice. However, if you frequently record multiple sources or plan to conduct interviews or group recordings, opt for an interface with multiple inputs.
- Connectivity: Assess the type of connection your mobile device or computer supports. USB interfaces are the most common and widely compatible, offering easy plug-and-play functionality. Additionally, check for compatibility with your particular device, ensuring that it supports connections through USB, Thunderbolt, or lightning/USB-C connectors.
- Preamp Quality: Pay close attention to the preamps included in the interface. Look for interfaces with high-quality preamps that offer low noise and excellent signal clarity. This will ensure that your recordings sound professional and free from unwanted artifacts.
- Sampling Rate and Bit Depth: The sampling rate and bit depth determine the quality of your recordings. Higher numbers generally result in better audio quality. Consider interfaces that support at least a 24-bit depth and a sampling rate of 48kHz or higher for optimal audio fidelity.
- Portability: If you plan on taking your mobile pre audio interface on the go, prioritize compact and lightweight models that are designed for portability. Look for interfaces that are durable and have a rugged build quality to withstand the demands of travel.
- Compatibility with Software: Ensure that the interface you choose is compatible with the recording software you plan to use. Most interfaces will work seamlessly with popular Digital Audio Workstations (DAWs) such as Ableton Live, Pro Tools, or Logic Pro. It’s also worth checking if the interface comes bundled with any software or plugins.
Additionally, read reviews from other users and consider their experiences with different models. This can provide valuable insight into the reliability, ease of use, and overall performance of the interface.
By considering these factors and matching them to your specific needs and budget, you’ll be well on your way to selecting the right mobile pre audio interface that meets your recording requirements and delivers exceptional audio quality.
Compatible Devices for Mobile Pre Audio Interfaces
Mobile pre audio interfaces are designed to work with a variety of devices, including mobile devices and computers. Here’s a breakdown of the compatible devices for mobile pre audio interfaces:
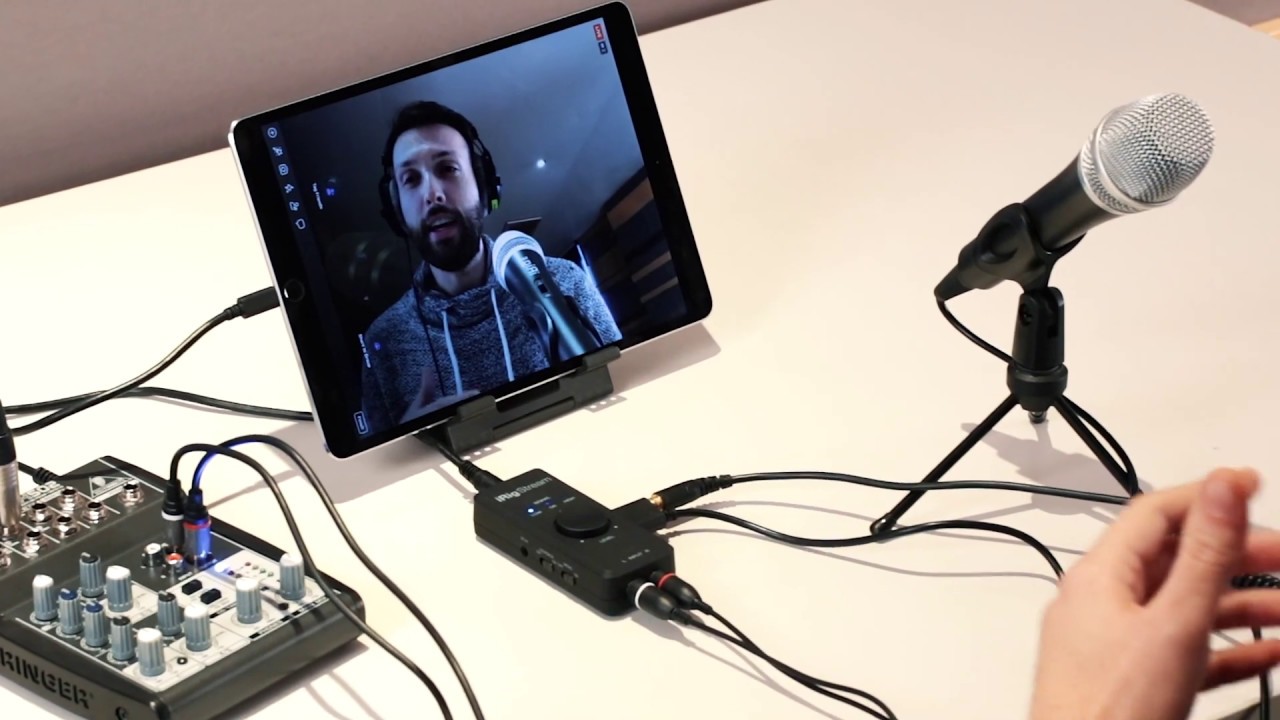
- Smartphones: Mobile pre audio interfaces are compatible with both iOS and Android smartphones. These interfaces typically connect to your smartphone through the lightning or USB-C port, offering a seamless connection for recording high-quality audio on your mobile device.
- Tablets: Whether you’re using an iPad, Android tablet, or Windows tablet, mobile pre audio interfaces can be used to enhance your recording capabilities. They connect to your tablet via USB or other compatible ports, allowing you to capture professional-quality audio while on the go.
- Computers: Mobile pre audio interfaces are also compatible with desktop and laptop computers. They can connect to your computer via USB or Thunderbolt ports, providing a reliable connection for recording or streaming audio. These interfaces are compatible with popular operating systems, including Windows, macOS, and Linux.
- Recording Devices: Some mobile pre audio interfaces are designed to work with standalone recording devices, such as portable recorders or field recorders. These interfaces connect to the recording device via various inputs (e.g., XLR or 1/4″ inputs), allowing you to capture high-quality audio directly into your portable recorder.
It’s essential to ensure compatibility between your chosen mobile pre audio interface and the device you intend to use. Check the specifications and connectivity options of both the interface and your device to ensure they are compatible. Some interfaces may require additional adapters or cables to connect to certain devices, so be sure to double-check compatibility before making a purchase.
Furthermore, consider the processing power and storage capacity of your device, especially when using a mobile pre audio interface with built-in DSP or requiring software applications. Ensure your device meets the minimum requirements to avoid any performance issues during recording or playback.
By understanding the compatible devices for mobile pre audio interfaces and ensuring compatibility with your specific device, you can harness the power of mobile recording and achieve professional-quality audio wherever you go.
Setting Up Your Mobile Pre Audio Interface
Setting up your mobile pre audio interface is a straightforward process that involves a few key steps. Follow these steps to get your interface up and running:
- Read the Manual: Before diving into the setup process, familiarize yourself with the user manual of your specific mobile pre audio interface. It will provide detailed instructions, specific to your interface model, for a hassle-free setup.
- Choose a Location: Select a suitable location for your mobile pre audio interface. Consider factors such as stability, easy access, and proximity to your recording space. A stable surface near your computer or mobile device is ideal.
- Connect the Interface: Connect your mobile pre audio interface to your device using the appropriate cable or connector. Plug one end of the cable into the interface and the other end into the corresponding port on your device (e.g., USB, Thunderbolt, lightning, USB-C).
- Power On: Power on your mobile pre audio interface according to the manufacturer’s instructions. Some interfaces draw power directly from your device, while others require an external power source. Make sure your interface is receiving sufficient power.
- Install Drivers and Software: Visit the manufacturer’s website and download the latest drivers and software for your interface. Follow the instructions provided to install the necessary drivers on your computer or mobile device. This step ensures proper communication between your interface and the device.
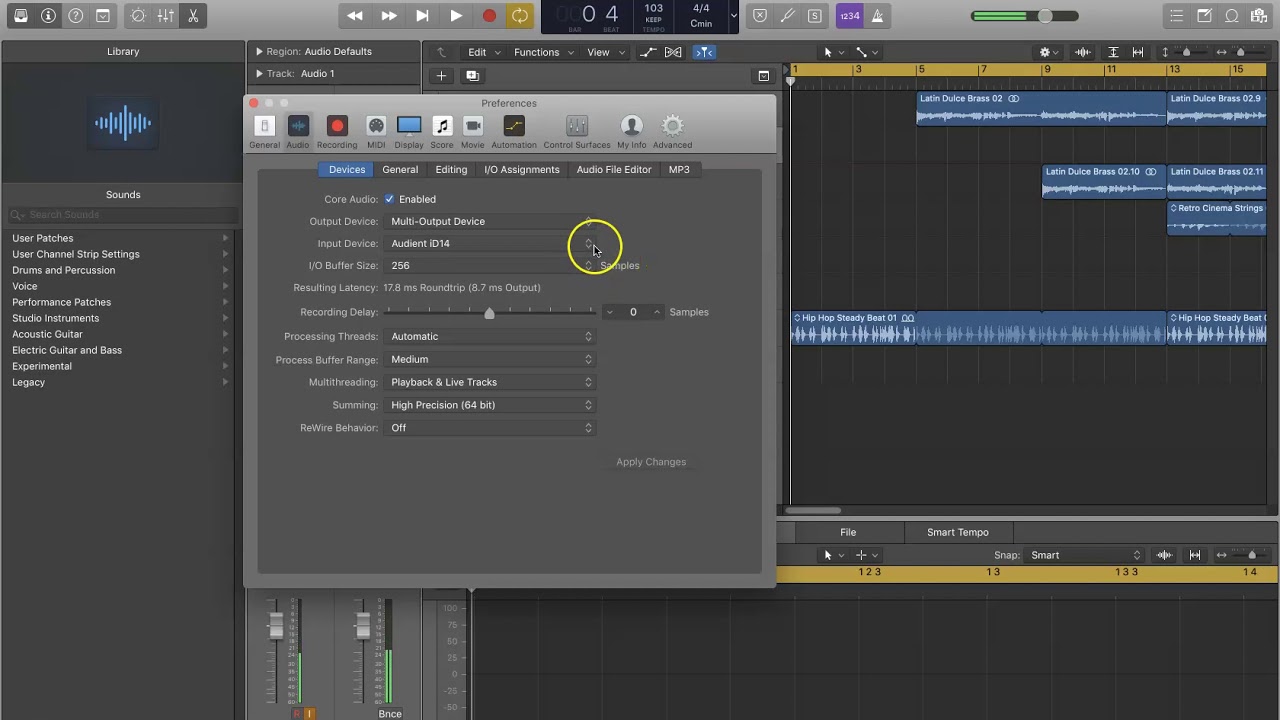
- Configure Settings: Once the drivers and software are installed, open your recording software and configure the settings to recognize and utilize your mobile pre audio interface. Select the interface as your input and output device within the software’s preferences or settings menu.
- Set Input Levels: Adjust the input levels on your mobile pre audio interface to achieve optimal recording levels. Most interfaces have gain control knobs or sliders that allow you to adjust the input sensitivity of your microphones or instruments.
- Test and Monitor: Before you start recording, conduct a test to ensure that your mobile pre audio interface is functioning properly. Monitor the audio signal using headphones or speakers connected to the interface’s output, and check for any unwanted noise or distortion.
Remember to consult your interface’s user manual for any specific setup steps or additional features that may be unique to your model. Taking the time to properly set up your mobile pre audio interface will contribute to smooth and successful recordings.
Connecting Your Mobile Pre Audio Interface to Your Device
Connecting your mobile pre audio interface to your device is a crucial step in the setup process. Follow these steps to ensure a proper connection:
- Select the Connection Type: Determine the type of connection required for your specific mobile pre audio interface. Most interfaces use USB, Thunderbolt, or lightning/USB-C connectors for connecting to your device. Choose the appropriate cable or adapter based on the available ports on your device.
- Plug in the Cable: Connect one end of the cable to the corresponding port on your mobile pre audio interface. Ensure a secure connection by firmly inserting the cable into the port.
- Connect to Your Device: Plug the other end of the cable into the appropriate port on your device, such as a USB or Thunderbolt port. Ensure a secure connection to avoid any interruptions during recording or playback.
- Power on the Interface: Some mobile pre audio interfaces draw power directly from your device, while others require an external power source. Follow the manufacturer’s instructions to power on your interface, ensuring it receives adequate power for operation.
- Check Device Recognition: Once the interface is connected, check if your device recognizes it. This can be done by accessing your device’s audio settings or the recording software you plan to use. Ensure that the interface is listed as an available input/output device.
- Test the Connection: Test the connection by playing audio through your device while monitoring through the mobile pre audio interface. Ensure that the audio signal is properly routed through the interface and that you can hear it through connected headphones or speakers.
- Adjust Input and Output Levels: Make any necessary adjustments to the input and output levels on your interface. Follow your interface’s user manual for instructions on how to control the input gain or output volume. Aim for a balanced and distortion-free signal.
It’s important to note that some mobile pre audio interfaces may require additional drivers or software installation to properly connect to your device. Check the manufacturer’s website for any specific instructions or downloads related to your interface model and operating system.
By following these steps, you’ll be able to successfully connect your mobile pre audio interface to your device, allowing you to capture high-quality audio for your recordings effectively.
Installing Drivers and Software
Installing the proper drivers and software for your mobile pre audio interface is essential for seamless communication between the interface and your device. Follow these steps to ensure a smooth installation process:
- Visit the Manufacturer’s Website: Start by visiting the official website of the mobile pre audio interface manufacturer. Look for a support or downloads section where you can find the latest drivers and software for your specific interface model.
- Download the Latest Drivers: Locate the appropriate drivers for your operating system (such as Windows, macOS, or Linux) and download the latest version available. Some manufacturers also provide specific drivers for different versions of the operating system, so ensure you select the correct one.
- Run the Installer: Once the driver file is downloaded, locate the file and run the installer. Follow the on-screen instructions to complete the installation process. In some cases, you may need to restart your computer after the installation is complete.
- Download Additional Software: Check if the manufacturer provides any additional software or plugins for your mobile pre audio interface. Download and install any recommended software to enhance your recording experience or unlock additional features of the interface.
- Connect and Test: After the drivers and software are installed, connect your mobile pre audio interface to your device (as mentioned in the previous section) and ensure that it is recognized by your device and recording software. This can be verified by accessing the audio settings or preferences within your software.
- Configure the Settings: Open your recording software and configure the settings to properly utilize your mobile pre audio interface. This may involve selecting the interface as the default input and output device and adjusting sample rates, buffer sizes, or other preferences as needed.
- Troubleshoot Any Issues: If you encounter any difficulties during the installation or setup process, refer to the troubleshooting section in the interface’s manual or visit the manufacturer’s support website for assistance. They may have FAQ sections or customer support services available to address common issues.
Keep in mind that updating your drivers and software periodically is recommended to ensure compatibility with the latest operating system updates and improvements in audio performance.
By following these steps and installing the necessary drivers and software, you’ll be ready to fully utilize your mobile pre audio interface and take advantage of its features and functionalities.
Configuring Settings on Your Device
Once you have connected your mobile pre audio interface to your device and installed the necessary drivers and software, it’s time to configure the settings on your device to ensure optimal performance. Follow these steps to get your settings configured correctly:
- Audio Settings: Access the audio settings on your device by navigating to the system preferences or control panel. Look for the audio or sound settings specific to your operating system.
- Select Input and Output Device: Within the audio settings, select your mobile pre audio interface as the default input and output device. This will route the audio signal through the interface for recording and playback.
- Set Sample Rate and Buffer Size: Adjust the sample rate and buffer size settings based on your specific requirements. Higher sample rates deliver better audio quality but require more processing power. Experiment with buffer sizes to find a balance between low latency and sufficient processing power.
- Check Input Levels: Test the input levels for your microphones or instruments by sending an audio signal into the interface. Monitor the input levels on your device to ensure that the signal is not clipping or distorting. Make any necessary adjustments to the gain or input levels on your interface accordingly.
- Configure Monitoring Options: Determine how you want to monitor your audio while recording. Some interfaces offer direct monitoring options, allowing you to hear the input signal in real-time with zero latency. Configure your monitoring preferences to reduce latency and ensure accurate monitoring.
- Enable Phantom Power: If you’re using condenser microphones that require phantom power, ensure that it is enabled on your mobile pre audio interface. This will provide the necessary power to your microphones for proper operation.
- Test and Calibrate: Conduct a test recording to ensure that your settings are calibrated correctly. Monitor the recording for any issues such as noise, distortion, or latency. Make further adjustments to your settings if needed.
- Save and Backup Settings: Once you have configured your settings to your satisfaction, save them as presets or profiles, if available. This will allow you to quickly recall your preferred settings in the future and streamline your recording process.
Refer to the user manual or online resources provided by the manufacturer for more specific instructions on configuring settings for your particular mobile pre audio interface.
By properly configuring the settings on your device, you’ll ensure optimal performance and audio quality when recording with your mobile pre audio interface.
Troubleshooting Common Issues
While mobile pre audio interfaces are generally reliable, you may encounter some common issues along the way. Here are a few troubleshooting steps to help address these issues:
- No Device Recognition: If your device is not recognizing the mobile pre audio interface, ensure that the interface is properly connected and powered on. Try using a different USB or Thunderbolt port on your device, as the port may be malfunctioning. Additionally, check if the drivers and software are installed correctly and up to date.
- Recording Signal Distortion: If you’re experiencing distortion in your recordings, check the input levels on your mobile pre audio interface. Lower the input gain if the signal is too hot or peaking. Additionally, ensure that you’re using appropriate cables and connectors and that they are in good condition.
- No Sound Playback: If you can’t hear any sound when using your mobile pre audio interface, ensure that the output settings on your device are properly configured. Check if the interface is selected as the default audio output device and adjust the volume levels. Also, double-check your connections to ensure they are secure.
- Latency Issues: Latency can be an issue when recording with a mobile pre audio interface. To reduce latency, adjust the buffer size in your device’s audio settings. Lowering the buffer size will decrease latency but may increase the strain on your device’s processing power. You can also try enabling direct monitoring on your interface or using low-latency monitoring options in your recording software.
- No Phantom Power: If your condenser microphone is not receiving phantom power, ensure that it is enabled on your mobile pre audio interface. Check the manual or settings of your interface to verify that phantom power is available and activated. Verify if your microphone requires phantom power and that it is connected correctly.
- Dropped or Unstable Connection: If you’re experiencing a dropped or unstable connection between your mobile pre audio interface and your device, try using a different cable or connector. Some interfaces may be sensitive to certain cables, so switching to a quality cable can help establish a stable connection. Also, avoid using excessively long cables, as they can reduce signal integrity.
- Driver and Software Issues: If you’re encountering issues with the drivers or software, ensure that you have installed the latest versions compatible with your operating system. Check the manufacturer’s website for any available updates or patches. If the issues persist, try uninstalling and reinstalling the drivers and software, making sure to follow the installation instructions carefully.
If you’re still experiencing difficulties, consult the user manual of your mobile pre audio interface or visit the manufacturer’s support website. They may have troubleshooting guides, FAQs, or customer support services to assist you in resolving specific issues.
Remember to approach troubleshooting systematically, addressing one issue at a time. By following these troubleshooting steps, you’ll be able to overcome common issues and ensure a smooth recording experience with your mobile pre audio interface.
Conclusion
Investing in a mobile pre audio interface opens up a world of possibilities for creating professional-quality audio recordings on the go. With the right interface, you can capture pristine sound from microphones or instruments and transform your mobile device or computer into a portable recording studio.
In this article, we explored what a mobile pre audio interface is and why it’s important for mobile recording. We discussed the factors to consider when choosing the right interface, such as the number of inputs, connectivity options, preamp quality, and compatibility with your device and software.
We also provided a step-by-step guide on setting up your mobile pre audio interface, including connecting it to your device, installing drivers and software, configuring settings, and troubleshooting common issues that may arise.
By following these guidelines and selecting the right mobile pre audio interface for your needs, you can unlock the full potential of your mobile recording capabilities. Whether you’re a musician, podcaster, or content creator, a reliable mobile pre audio interface will elevate the quality of your recordings and provide you with the flexibility to create wherever inspiration strikes.
Remember, it’s essential to consult the user manual and manufacturer’s resources for specific instructions tailored to your interface model. Keep exploring and pushing the boundaries of your creativity with the power of a mobile pre audio interface!