Home>Production & Technology>Audio Interface>How To Select Audio Interface In Sonar
Audio Interface
How To Select Audio Interface In Sonar
Modified: February 19, 2024
Learn how to choose the perfect audio interface for use in Sonar. Discover the ideal audio interface for your recording needs and enhance your sound quality.
(Many of the links in this article redirect to a specific reviewed product. Your purchase of these products through affiliate links helps to generate commission for AudioLover.com, at no extra cost. Learn more)
Table of Contents
- Introduction
- Understanding the Importance of Audio Interfaces in Sonar
- Assessing Your Recording Needs
- Compatibility Considerations
- Connection Options
- Sampling Rate and Bit Depth
- Input and Output Counts
- Analog-to-Digital and Digital-to-Analog Converters
- Preamps and Phantom Power
- Software Compatibility and Drivers
- Budget Considerations
- Researching and Comparing Audio Interfaces
- Making an Informed Purchase Decision
- Conclusion
Introduction
Welcome to our guide on selecting the perfect audio interface for your Sonar setup. If you are a musician, producer, or sound engineer, you understand the importance of high-quality audio when recording or producing music. A crucial component in achieving optimal audio performance is a reliable and feature-rich audio interface.
Sonar is a popular digital audio workstation (DAW) that offers powerful recording capabilities, plugin support, and a user-friendly interface. However, to unlock the full potential of Sonar, you need a robust audio interface that can handle the demanding requirements of professional audio production.
In this article, we will guide you through the essential factors to consider when selecting an audio interface for use with Sonar. We will explore topics such as compatibility, connectivity options, sampling rate and bit depth, input and output counts, preamps, software compatibility, and budget considerations. By the end, you will have the knowledge to make an informed decision and choose an audio interface that perfectly complements your Sonar setup.
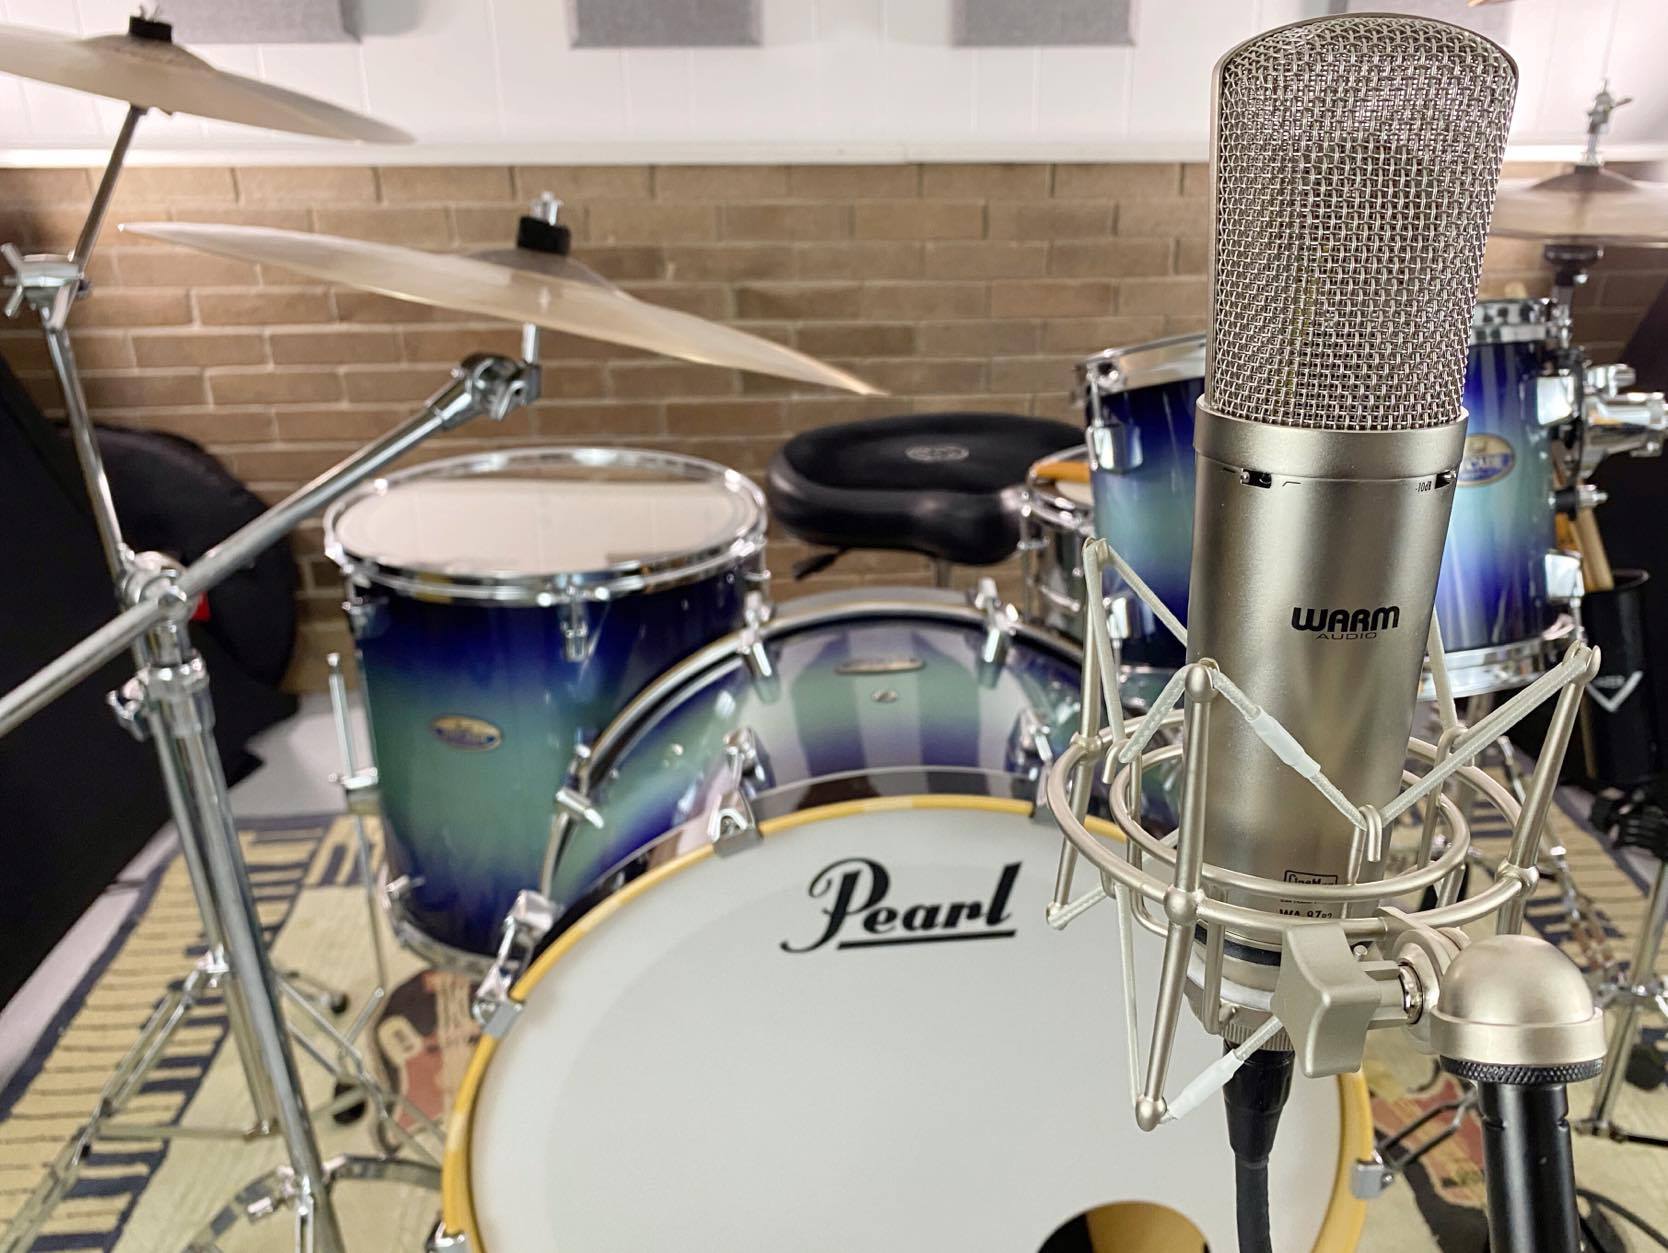
Whether you are recording vocals, instruments, or synthesizers, a high-quality audio interface acts as the bridge between your instruments and your computer. It converts analog signals into digital data that your computer can process and vice versa. Additionally, an audio interface provides essential features such as preamps, phantom power, and monitoring capabilities to ensure accurate and reliable audio capture.
Choosing the right audio interface is crucial to capture the nuances and details of your audio source and deliver pristine, professional-quality recordings. With the myriad of options available in the market, it can be overwhelming to decide which audio interface is best suited for your needs. That’s where this guide comes in, providing you with the necessary knowledge and insights to make an informed decision.
Whether you are a novice in the world of audio interfaces or a seasoned professional looking to upgrade your current setup, this guide will equip you with the information you need to navigate the vast array of options and select a top-quality audio interface that will help you achieve exceptional audio results with Sonar.
Understanding the Importance of Audio Interfaces in Sonar
An audio interface is a vital component in any Sonar setup. It acts as a gateway between your computer and the outside world, enabling you to connect microphones, instruments, and other audio sources to your digital audio workstation. Understanding the importance of audio interfaces in Sonar is crucial for achieving high-quality recordings and optimal performance.
One of the primary functions of an audio interface is to convert analog audio signals from microphones and instruments into digital data that can be processed by your computer. This analog-to-digital conversion process is crucial in capturing the nuances and details of your audio sources accurately. Without a high-quality audio interface, the integrity of your recordings may be compromised, resulting in poor sound quality and a subpar listening experience.
In addition to analog-to-digital conversion, audio interfaces also perform the reverse process of digital-to-analog conversion, taking digital audio data from your computer and converting it back into analog signals. This is necessary for monitoring and playback purposes, ensuring that you can hear your recordings with clarity and accuracy.
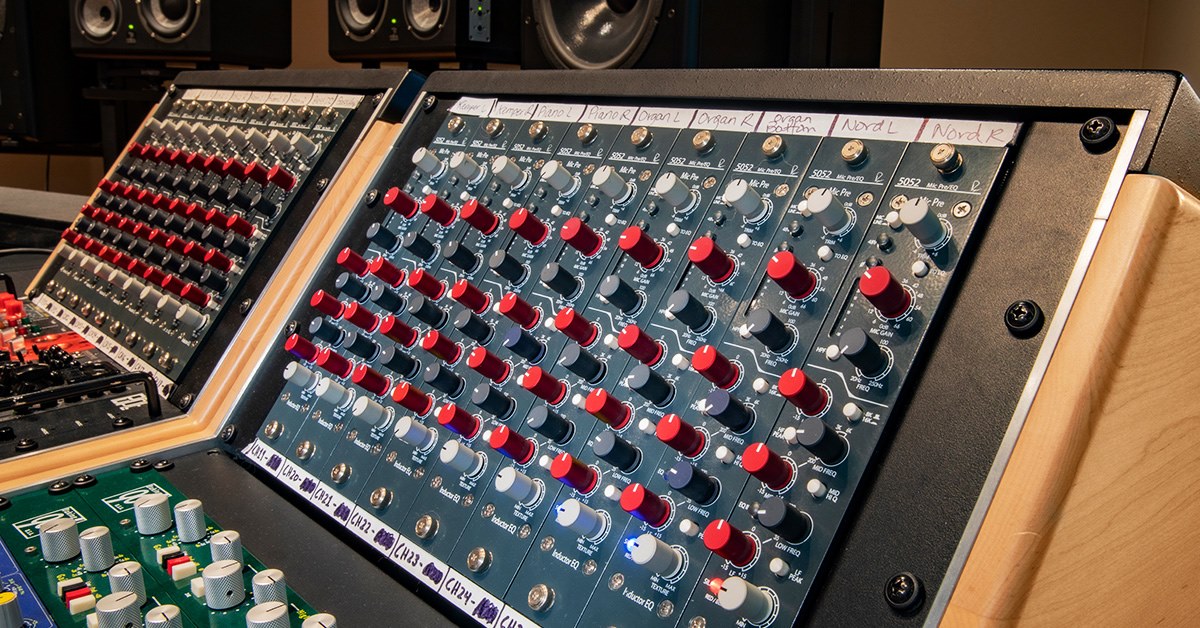
Another essential role of audio interfaces is providing high-quality preamps. Preamps amplify the weak signals from microphones and instruments, allowing them to be recorded at optimal levels. Having clean and transparent preamps in your audio interface ensures that the original character of your audio sources is preserved, resulting in pristine recordings.
Many audio interfaces also offer phantom power, which is essential for condenser microphones that require external power to function. Phantom power allows you to capture the full frequency range and sensitivity of condenser microphones, adding versatility and flexibility to your recording options.
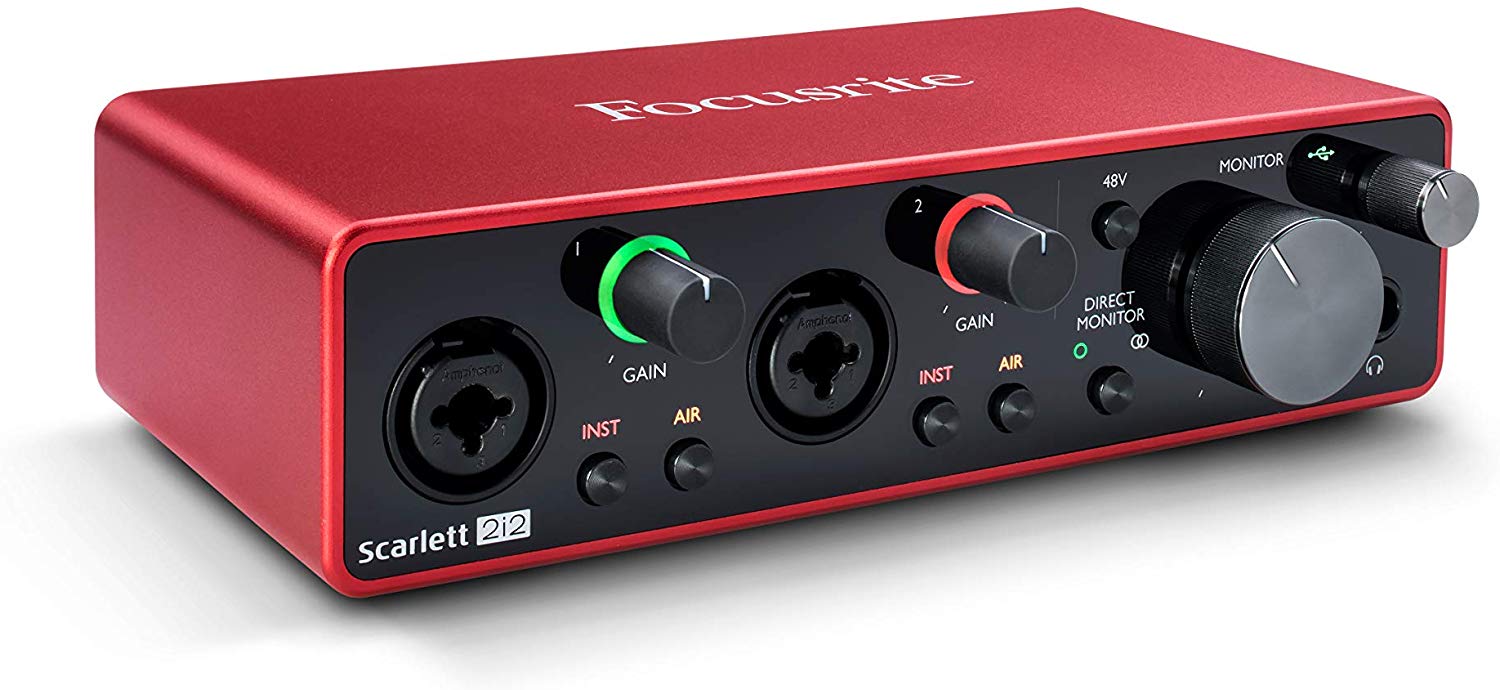
Furthermore, audio interfaces provide various connectivity options, such as XLR, TRS, and MIDI ports, allowing you to connect a wide range of audio devices and controllers to your Sonar setup. This versatility ensures that you can integrate your favorite microphones, instruments, and MIDI controllers seamlessly into your recording sessions, enhancing your creative possibilities.
Overall, the importance of audio interfaces in Sonar cannot be underestimated. They play a critical role in capturing, processing, and reproducing audio signals with exceptional quality and fidelity. A well-chosen audio interface will provide you with the necessary tools and capabilities to unlock the full potential of Sonar, allowing you to create professional-sounding recordings and mixes.
In the following sections, we will delve deeper into the factors you should consider when selecting an audio interface for your Sonar setup. By understanding these factors, you will be better equipped to make an informed decision that matches your specific recording needs and budget.
Assessing Your Recording Needs
Before diving into the vast array of audio interfaces available, it’s essential to assess your specific recording needs. Understanding the nature of your projects and the types of audio sources you’ll be working with will help you narrow down your options and find an audio interface that fits your requirements.
Consider the following questions to help assess your recording needs:
- What types of audio sources will you be recording? Will you primarily be recording vocals, instruments, or a combination of both? Different audio interfaces may excel in capturing specific types of sources, so it’s important to determine your primary focus.
- How many simultaneous recordings will you need to make? If you plan to record multiple sources simultaneously, you’ll need an audio interface with enough input channels to accommodate your needs. Keep in mind that future expansion may also be a consideration.
- What is your desired recording quality? Consider the sampling rate and bit depth that you prefer. Higher sampling rates and bit depths capture more detail, but they also consume more storage space.
- What is your recording environment like? If you are working in a home studio or a small space, you may need an audio interface with low latency and robust noise cancellation features to ensure clean and accurate recordings.
- Will you require additional features such as MIDI connectivity or built-in effects? Depending on your workflow and the equipment you are using, you may need an audio interface that offers these additional capabilities.
- What is your budget? Understanding your budget constraints will help you prioritize the features and functionality that are most important to you.
By carefully considering these factors, you can create a list of specifications and requirements that will guide your search for the ideal audio interface. This will help you avoid being overwhelmed by the numerous options available and ensure that you choose an interface that is tailored to your specific needs.
Once you have a clear understanding of your recording needs, you can move forward in the selection process. The following sections will explore various factors and considerations, such as compatibility, connectivity options, sampling rate and bit depth, and more, to help you make an informed decision when choosing an audio interface for Sonar.
Compatibility Considerations
When selecting an audio interface for your Sonar setup, compatibility is a crucial factor to consider. Ensuring that the interface is compatible with both your computer system and your digital audio workstation is essential for seamless integration and optimal performance.
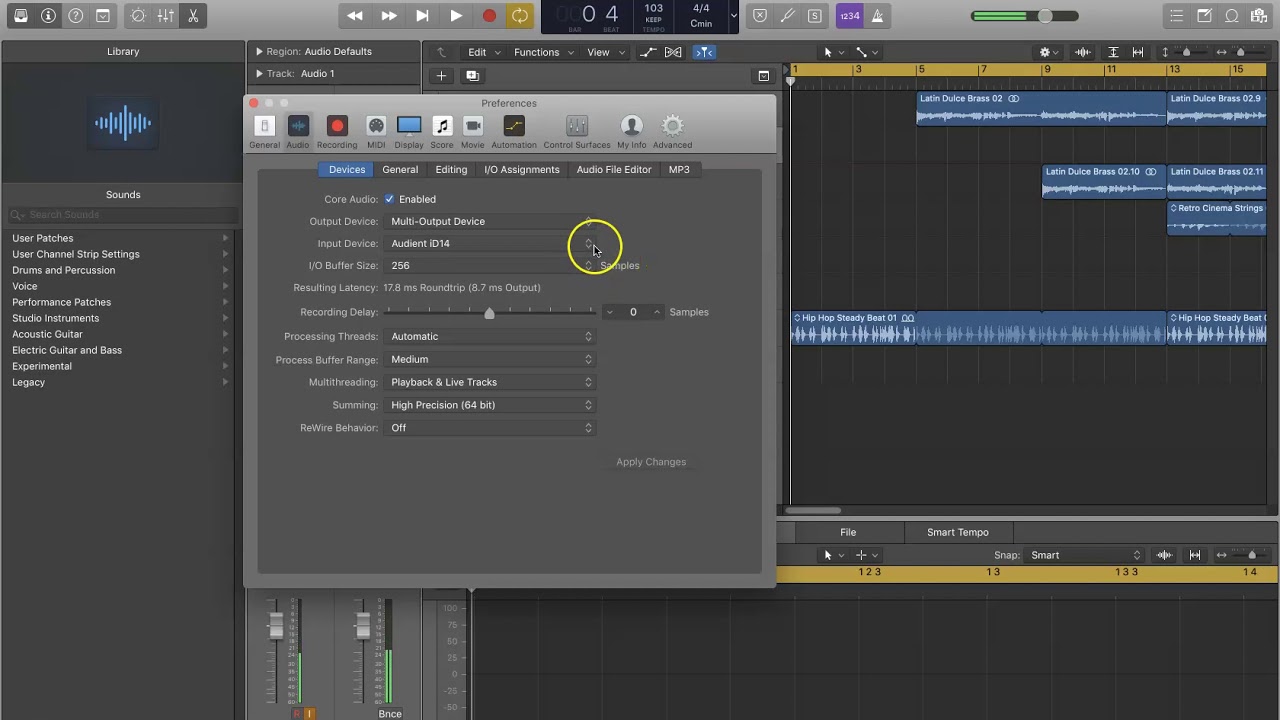
The first compatibility aspect to consider is the operating system of your computer. Make sure that the audio interface you choose is compatible with your specific operating system, whether it’s Windows, macOS, or Linux. Check the manufacturer’s website or product documentation for system requirements to ensure compatibility.
Next, consider the interface’s compatibility with your chosen digital audio workstation, Sonar. While most audio interfaces are compatible with major DAWs, it’s always a good idea to verify their compatibility with Sonar specifically. Visit the manufacturer’s website or read user reviews to confirm that the interface works well with Sonar and has any necessary drivers or software updates available.
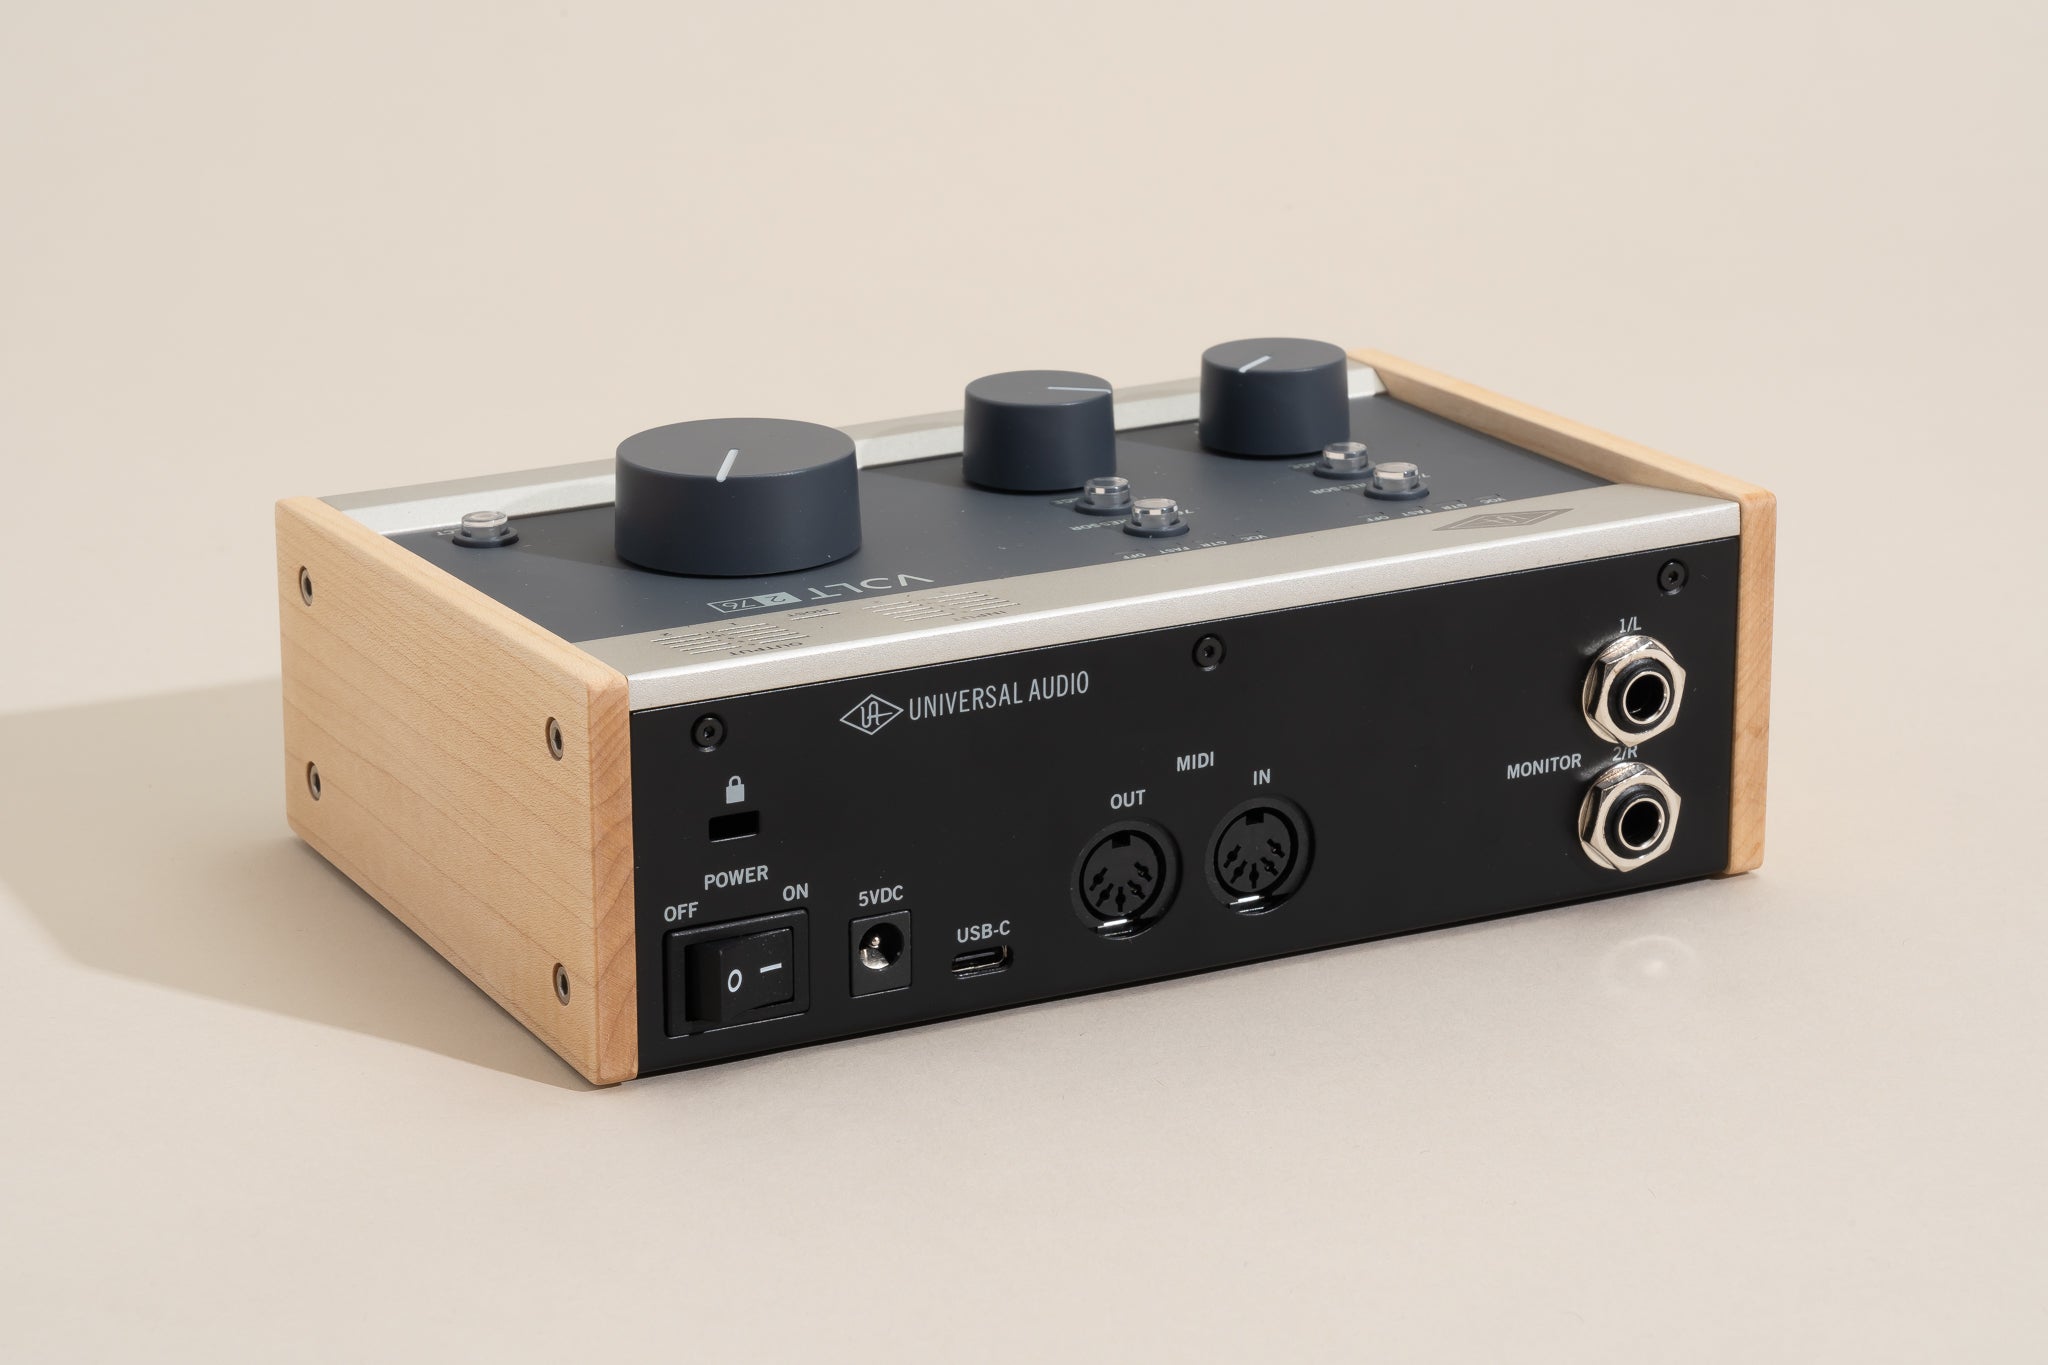
Additionally, consider the connection protocol of the audio interface. USB is the most common connection type, but there are also interfaces that use Thunderbolt, Firewire, or PCIe connections. Ensure that your computer has the necessary ports or expansion capabilities to support the chosen interface.
It’s important to note that some interfaces may require additional power or firmware updates for full compatibility. Research user experiences and consult the manufacturer’s documentation to minimize potential compatibility issues.
Lastly, consider any additional hardware or software requirements that may be necessary for the audio interface to function properly. Some interfaces may require external power supplies, while others may come bundled with software plugins or drivers. Assess these requirements to ensure that you have everything you need for a smooth and hassle-free recording experience.
By considering compatibility factors such as operating system compatibility, Sonar compatibility, connection protocols, power requirements, and additional software or hardware needs, you can ensure that your chosen audio interface seamlessly integrates with your computer system and Sonar, allowing you to focus on your recordings without any compatibility-related interruptions.
Next, we will explore the different connection options available for audio interfaces and discuss their implications for your Sonar setup.
Connection Options
When selecting an audio interface for your Sonar setup, it’s essential to consider the available connection options. The connection type of your audio interface determines how it connects to your computer and other audio devices, and it plays a significant role in the overall performance and flexibility of your recording setup.
USB is the most common connection option for audio interfaces due to its widespread compatibility and ease of use. USB interfaces are typically plug-and-play, requiring no additional hardware or drivers. They provide reliable and fast data transfer rates, making them suitable for most recording applications.
Another popular connection option is Thunderbolt, which offers high-speed data transfer rates and low latency. Thunderbolt interfaces are commonly used in professional recording studios, as they can handle large projects with numerous tracks and plugins without compromising performance.
Firewire is another connection option that provides fast data transfer rates and low latency. Although Firewire interfaces are less common nowadays, they can still be a viable option if you have a Firewire-equipped computer or if you prefer the stability and reliability of this connection type.
PCIe interfaces are internal sound cards that connect directly to your computer’s motherboard via a PCI Express slot. These interfaces offer excellent performance and low latency, making them ideal for professional audio production. However, they require installation and are generally more suitable for desktop computers.
Aside from the connection type, consider the number and type of input and output ports available on the audio interface. Common input options include XLR, TRS, and MIDI ports, allowing you to connect microphones, instruments, and MIDI devices. On the output side, look for options such as balanced TRS or XLR outputs for connecting studio monitors or headphones.
It’s important to choose an audio interface that has the right combination of input and output ports for your specific recording needs. Consider the number of simultaneous recordings you’ll be making and the types of audio sources you’ll be using. Ensure that the interface has enough inputs and outputs to accommodate your requirements and any potential future expansion.
When choosing a connection option and considering input/output options, it’s crucial to balance performance, convenience, and compatibility. USB is the most versatile and widely supported option, while Thunderbolt and PCIe offer higher performance at a potentially higher price point and more limited compatibility.
By carefully considering the connection options and input/output capabilities of audio interfaces, you can ensure that your Sonar setup is well-suited to your specific recording requirements and provides the necessary flexibility to connect and capture a wide range of audio sources.
Next, we will explore the importance of sampling rate and bit depth in audio interfaces and their impact on your Sonar recordings.
Sampling Rate and Bit Depth
When selecting an audio interface for your Sonar setup, it’s crucial to consider the sampling rate and bit depth capabilities of the interface. Sampling rate and bit depth affect the quality and accuracy of your recordings, as well as the amount of storage space required for the audio files.
The sampling rate refers to the number of samples taken per second during the analog-to-digital conversion process. It is typically measured in kilohertz (kHz). Common sampling rates for audio interfaces are 44.1 kHz, 48 kHz, 88.2 kHz, and 96 kHz. Higher sampling rates capture more audio detail and frequencies, resulting in more accurate and realistic recordings. However, higher sampling rates also require more processing power and storage space.
The bit depth determines the resolution at which the audio is recorded and processed. It refers to the number of bits used to represent each audio sample. Common bit depths are 16-bit and 24-bit. A higher bit depth allows for a greater dynamic range and more precise representation of audio, resulting in higher audio fidelity. Professional audio interfaces may offer even higher bit depths, such as 32-bit floating-point.
It’s important to note that the sampling rate and bit depth of your audio interface should match the capabilities of your recording environment and the requirements of your projects. Choosing a higher sampling rate and bit depth can improve the clarity and fidelity of your recordings, but it also increases the demands on your computer’s processing power and storage capacity.
For most music production purposes, a sampling rate of 44.1 kHz or 48 kHz at a bit depth of 24-bit is sufficient to achieve high-quality results. These are the standard rates used in audio CDs and digital audio distribution. However, if you work in audio post-production or require the utmost audio precision, higher sampling rates and bit depths may be worth considering.
When selecting an audio interface, make sure it supports the sampling rate and bit depth you desire. Verify the compatibility with your recording software, including Sonar, and ensure that your computer can handle the increased computational requirements if you choose higher sampling rates and bit depths.
It’s worth mentioning that the sampling rate and bit depth can often be adjusted within your recording software, allowing you to choose different settings for different projects. This flexibility allows you to adapt to specific recording needs without the need for a separate audio interface for each scenario.
By considering the sampling rate and bit depth capabilities of your audio interface, you can ensure that your Sonar recordings meet the necessary quality standards and match your specific project requirements.
Next, we will explore the importance of input and output counts in audio interfaces and how they impact your recording capabilities.
Input and Output Counts
When selecting an audio interface for your Sonar setup, it’s important to consider the number of input and output ports the interface offers. The input and output counts determine how many audio sources you can connect to the interface and how many simultaneous recordings you can make, directly impacting the flexibility and functionality of your recording setup.
Inputs refer to the number of audio sources you can connect to the audio interface. Common inputs include XLR and TRS ports for connecting microphones and instruments. Some interfaces may also have MIDI inputs for connecting MIDI controllers or devices. The number of inputs varies among audio interfaces, ranging from a few inputs to larger interfaces that offer multiple inputs to accommodate complex recording setups.
Outputs, on the other hand, determine the number of audio destinations or playback options available. They are crucial for connecting studio monitors, headphones, or other audio devices for monitoring and playback purposes. Similar to inputs, the number of outputs can vary, so make sure the interface has sufficient outputs to match your monitoring needs.
Consider your specific recording requirements when assessing the input and output counts of an audio interface. If you predominantly work with solo instruments or vocals, a smaller interface with two or four inputs may suffice. However, if you regularly record larger ensembles, bands, or live performances, you may need an interface with more inputs to accommodate multiple sources simultaneously.
Moreover, the number of outputs is vital for monitoring and routing options. If you require multiple headphone outputs for artists or need to connect studio monitors or external processors, ensure that the interface has the necessary output counts to support your setup. Keep in mind that future expansion may also be a consideration.
When assessing input and output counts, also consider the type of connections available. Look for well-balanced XLR or TRS connections that offer good signal quality and noise rejection. MIDI connectivity can also be beneficial if you work with MIDI-equipped instruments or controllers.
It’s worth noting that some audio interfaces offer additional digital inputs and outputs, such as ADAT or S/PDIF, which allow for expansion with external converters or digital audio devices. These options can provide more flexibility and scalability for your recording setup.
By carefully considering the input and output counts of an audio interface, you can ensure that it matches your specific recording needs, providing you with the flexibility and capability to connect and capture the necessary number of audio sources simultaneously.
Next, we will explore the importance of analog-to-digital and digital-to-analog converters in audio interfaces and their impact on the overall sound quality of your Sonar recordings.
Analog-to-Digital and Digital-to-Analog Converters
Analog-to-digital converters (ADC) and digital-to-analog converters (DAC) are crucial components within audio interfaces that play a significant role in the overall sound quality and fidelity of your Sonar recordings. These converters facilitate the transition between analog and digital audio signals, ensuring accurate capture and reproduction of your audio sources.
Analog-to-digital converters are responsible for converting the analog signals from microphones and instruments into digital data that your computer can process. The quality and precision of this conversion process directly affect the accuracy and detail of your recordings. Higher-end audio interfaces typically feature higher-quality ADCs, resulting in more precise and faithful reproduction of your audio sources.
Digital-to-analog converters, on the other hand, convert the digital audio data from your computer back into analog signals for monitoring and playback purposes. Again, the quality of these converters is paramount in accurately reproducing the recorded audio with clarity and fidelity. Higher-quality DACs provide smoother and more accurate conversion, resulting in a more transparent and immersive listening experience.
It’s important to note that the quality of the ADCs and DACs in an audio interface can vary significantly between different models and price points. Higher-end interfaces often feature superior converters that capture and reproduce audio with greater precision and transparency.
In addition to the quality of the converters, it’s important to consider the resolution or bit depth at which these conversions occur. Higher bit depths allow for a greater dynamic range and more accurate representation of audio, resulting in higher fidelity recordings and playback.
When selecting an audio interface for Sonar, it’s advisable to choose one that offers high-quality analog-to-digital and digital-to-analog converters. Consider the reputation of the manufacturer, read reviews, and listen to audio samples if possible to assess the quality of the converters in a particular interface.
Furthermore, it’s important to ensure that the converters in your chosen interface are capable of handling the sampling rate and bit depth that you intend to work with. Ensure that they can handle the desired resolution and capture the full potential of your audio sources.
By choosing an audio interface with high-quality analog-to-digital and digital-to-analog converters, you can ensure that your Sonar recordings preserve the fidelity and nuances of your audio sources, leading to professional-grade results that accurately represent your creative vision.
Next, we will delve into the importance of preamps and phantom power in audio interfaces, and their impact on the quality of your recorded audio.
Preamps and Phantom Power
Preamps and phantom power are essential features in audio interfaces that directly impact the quality and versatility of your recorded audio in Sonar. Understanding the role of preamps and the necessity of phantom power is crucial for capturing professional-grade recordings.
Preamps are built-in amplifiers that boost the low-level signals from microphones or instruments to a line level that is suitable for recording. They play a critical role in capturing the nuances and details of your audio sources accurately. High-quality preamps ensure clean, transparent amplification, preserving the original character and tonal qualities of your recordings.
When selecting an audio interface, consider the quality and reputation of the preamps it offers. Top-tier interfaces often feature high-quality preamps that deliver superior sound performance and low noise levels. This is particularly important when working with sensitive microphones or recording instruments with low output levels.
Phantom power is another critical feature found in many audio interfaces. It provides the necessary power for condenser microphones to function properly. Condenser microphones require external power to operate their internal electronics and capture sound accurately across a wide frequency range.
Ensure that the audio interface you choose has phantom power capabilities. Most interfaces offer 48V phantom power, which is the standard requirement for condenser microphones.
When working with dynamic microphones or other audio sources that do not require phantom power, it’s important to note that the phantom power feature can be switched off to avoid any potential issues.
Having preamps and phantom power in your audio interface ensures that you can capture a wide range of audio sources with optimal clarity and performance. It broadens your creative possibilities, allowing you to work with a variety of microphones and instruments without sacrificing sound quality.
It’s worth mentioning that some audio interfaces offer the option to expand your preamp capabilities by using external preamps or by connecting outboard gear through the interface’s line inputs. This can provide additional tonal options and sonic characteristics to your recordings.
By selecting an audio interface with high-quality preamps and the necessary phantom power capability, you can ensure that your Sonar recordings capture the true essence and fidelity of your audio sources.
Next, we will explore the importance of software compatibility and drivers when choosing an audio interface for Sonar.
Software Compatibility and Drivers
When selecting an audio interface for use with Sonar, it’s essential to consider software compatibility and the availability of stable drivers. Compatibility with your chosen recording software ensures that the interface will work seamlessly within your Sonar environment, allowing you to focus on your creative process without any technical hurdles.
Begin by checking if the audio interface is officially supported by Sonar. Visit the manufacturer’s website or consult Sonar’s documentation to verify compatibility. This information will help ensure that the interface is optimized for use with Sonar, minimizing any potential compatibility issues.
Additionally, check for the availability of stable drivers for your operating system. Drivers are essential software components that allow your computer to communicate with the audio interface. Outdated or unstable drivers may result in audio glitches, latency issues, or even complete system failures. Ensure that the manufacturer provides up-to-date drivers for your specific operating system, whether it’s Windows, macOS, or Linux.
Research user reviews and forums to gauge the stability and reliability of the drivers provided by the audio interface manufacturer. Feedback from other users can provide valuable insights into the performance and compatibility of the interface with Sonar and other software applications.
It’s also worth noting that some audio interfaces allow for direct integration with Sonar through specialized software protocols, such as ASIO (Audio Stream Input/Output) or AAX (Avid Audio eXtension). These protocols ensure low-latency performance and tight integration with Sonar, offering a seamless recording experience. However, not all interfaces support these protocols, so consider your workflow preferences and requirements when choosing an interface.
Moreover, keep an eye out for firmware updates provided by the manufacturer. Firmware updates can bring improvements, bug fixes, and additional features to your audio interface. Timely updates demonstrate the manufacturer’s commitment to providing a stable and optimized experience for their customers.
Lastly, consider the compatibility of any additional software or plug-ins that come bundled with the audio interface. Some interfaces include software packages that enhance functionality, offer virtual mixing consoles, or provide virtual instrument libraries. Assess the compatibility of these extras with Sonar to determine if they align with your specific workflow and recording needs.
By ensuring software compatibility and the availability of stable drivers, you can minimize any compatibility issues and ensure that your audio interface works seamlessly with Sonar, allowing you to focus on your creativity and produce high-quality recordings.
Next, we will discuss budget considerations and how to find the right balance between your recording needs and your financial constraints.
Budget Considerations
Budget is an important factor to consider when selecting an audio interface for your Sonar setup. The price range for audio interfaces varies widely, and it’s essential to find the right balance between your recording needs and your financial constraints.
Begin by determining your budget for an audio interface. Consider how much you are willing to spend on this essential piece of equipment. Keep in mind that the price of an audio interface often reflects its quality, features, and performance level. Higher-priced interfaces typically offer better sound quality, more advanced features, and more robust build quality.
However, don’t overlook the fact that even lower-priced interfaces can still deliver excellent results, especially if you are just starting out or have more modest recording requirements. It’s important to assess your specific needs and determine what features and functionalities are essential for your projects.
Remember that an audio interface is an investment in your music production or recording endeavors. Consider your long-term goals and the level of professionalism you want to achieve. If you plan to work on commercial projects or professionally collaborate with other musicians, it may be worthwhile to invest in a higher-end audio interface that provides top-tier sound quality and advanced features.
It’s also worth noting that there is often a trade-off between the number of input and output channels and the price of an audio interface. If you have a limited budget, prioritize getting an interface with good sound quality and necessary input/output counts for your specific needs, even if it means compromising on the number of channels.
Research extensively and read reviews to find audio interfaces that offer a good balance between price and performance. Consider shopping during sales or looking for used or refurbished options to stretch your budget further.
Ultimately, the key is to find an audio interface that meets your recording goals and fits within your financial capabilities. Assess your requirements, consider the long-term value of the interface, and make an informed decision that aligns with your budget.
Next, we will explore how to research and compare different audio interfaces to ensure you make the right purchase decision for your Sonar setup.
Researching and Comparing Audio Interfaces
Researching and comparing different audio interfaces is vital to ensure that you make an informed purchase decision for your Sonar setup. With a plethora of options available, it’s crucial to gather relevant information and compare features, specifications, and user reviews to determine which interface best aligns with your recording needs.
Here are some key steps to help you in your research:
- Start by identifying your specific recording requirements and budget constraints. Knowing what you need and how much you can spend will help narrow down your options.
- Read professional reviews and articles to gain a general understanding of the top audio interfaces on the market. Look for recommendations from reputable sources that have hands-on experience and in-depth knowledge of audio interfaces.
- Utilize online forums and communities dedicated to music production and audio engineering. Engage in discussions and seek advice from experienced users who can provide insights and recommendations based on their own experiences.
- Visit manufacturer websites and explore their product lineups. Take note of the specifications, features, and compatibility information provided. Many manufacturers offer detailed documentation and frequently asked questions (FAQs) sections that can provide valuable information.
- Read user reviews and testimonials. Look for feedback from actual users who have used the particular audio interfaces you are interested in. Pay attention to their experiences with sound quality, drivers, software compatibility, and reliability.
- Consider the reputation of the manufacturer. Look for brands that are known for producing reliable and high-quality audio interfaces. Established companies with a track record in the industry are more likely to provide good customer support and regular firmware updates.
- Compare the specifications and features of multiple audio interfaces side by side. Take note of important factors such as input/output counts, connectivity options, preamp quality, phantom power availability, and compatibility with Sonar and your operating system.
- Take advantage of demo units or trial periods when available. Test the interfaces yourself, using your own audio sources and setup if possible, to get a firsthand experience of their sound quality, ease of use, and compatibility with your existing gear.
By conducting thorough research and comparing different audio interfaces, you will gain valuable insights into their performance, features, and suitability for your Sonar setup. This will empower you to make an educated and informed purchase decision that meets your recording needs and budget constraints.
Next, we will discuss how to make a final, informed purchase decision for your audio interface in the context of your Sonar setup.
Making an Informed Purchase Decision
After conducting thorough research and comparing different audio interfaces, it’s time to make an informed purchase decision that suits your Sonar setup. By considering key factors such as your recording needs, compatibility, budget, and user reviews, you can confidently select an audio interface that will enhance your music production and recording capabilities.
Here are some important steps to guide you in making your final purchase decision:
- Review your recording needs and priorities. Consider the type and number of audio sources you will be working with, the input/output counts required, and any specific features or functionalities that are essential to your workflow.
- Ensure compatibility with your computer and Sonar. Verify that the audio interface is compatible with your operating system and has stable drivers available for hassle-free integration with Sonar.
- Consider the reputation and reliability of the manufacturer. Look for a company with a track record of producing high-quality and durable audio interfaces. A reputable manufacturer is more likely to provide good customer support and regular software updates.
- Take your budget into account. Determine how much you are willing to spend and find a balance between cost and the features and performance level required for your recording needs.
- Read user reviews and testimonials. Pay attention to feedback regarding sound quality, ease of use, stability, customer support, and overall satisfaction with the audio interface. Real-world experiences from other users can offer valuable insights.
- Consider options for expansion and future scalability. Evaluate whether the audio interface allows for future growth, such as the ability to add external preamps or connect additional devices.
- If possible, test the audio interface yourself. Take advantage of demo units or trial periods to experience the interface firsthand and verify its compatibility with your existing gear. Use your own audio sources to gauge the sound quality and usability.
- Make the final purchase decision based on all of the gathered information. Select the audio interface that best aligns with your recording needs, offers good value for the price, and has positive user feedback.
Remember that your chosen audio interface will be a critical component in your music production and recording workflow. It’s worth investing the time and effort in making an informed purchase decision that will enhance your creative process and elevate the quality of your recordings.
Once you have made your purchase, take the time to set up the audio interface correctly, install the necessary drivers and software updates, and test its functionality within Sonar. This will ensure that you are ready to capture high-quality audio and make the most of your new audio interface.
By following these steps, you will be equipped to make a confident and informed purchase decision, choosing an audio interface that will seamlessly integrate with Sonar and help you achieve outstanding results in your music production and recording endeavors.
Finally, we’ll conclude with a brief recap of the key points discussed in this guide.
Conclusion
Selecting the right audio interface for your Sonar setup is a crucial decision that can significantly impact the quality and effectiveness of your music production and recording projects. By considering factors such as compatibility, sampling rate and bit depth, input and output counts, preamps, phantom power, software compatibility, and budget considerations, you can make an informed purchase decision that meets your specific needs and requirements.
An audio interface serves as the gateway between your instruments or microphones and your computer, allowing you to capture, process, and reproduce audio with precision and accuracy. High-quality analog-to-digital and digital-to-analog converters, as well as reliable preamps and phantom power capabilities, play a crucial role in delivering professional-grade recordings.
Take the time to research and compare different audio interfaces, considering user reviews, manufacturer reputation, and compatibility with Sonar and your operating system. Assess your recording needs and prioritize the features required for your specific projects. Balance your budget considerations with the desired performance level and longevity of the audio interface.
Remember to test the audio interface yourself whenever possible, either through demo units or trial periods, to ensure compatibility and sound quality. The interface should seamlessly integrate into your Sonar setup and enhance your workflow, providing the necessary flexibility, stability, and sonic capabilities required for your creative endeavors.
By making an informed purchase decision and selecting the right audio interface, you are investing in the foundation of your music production and recording setup. With the right interface, you can unlock the full potential of Sonar, capturing and reproducing audio with exceptional clarity, fidelity, and creativity.
Now that you have the knowledge and insights to choose the perfect audio interface for your Sonar setup, it’s time to embark on your recording journey with confidence. Invest in an audio interface that will empower you to turn your musical ideas into reality, unleashing your true artistic potential.
Wishing you the best of luck in your search for the perfect audio interface and success in your future music production and recording endeavors!