Home>Production & Technology>Stereo>How To Hook Stereo Speakers To TV

Stereo
How To Hook Stereo Speakers To TV
Modified: January 22, 2024
Learn how to easily connect stereo speakers to your TV and enhance your audio experience. Follow our step-by-step guide and enjoy high-quality sound.
(Many of the links in this article redirect to a specific reviewed product. Your purchase of these products through affiliate links helps to generate commission for AudioLover.com, at no extra cost. Learn more)
Table of Contents
- Introduction
- Step 1: Determine the audio output options on your TV
- Step 2: Check the specifications of your TV and speakers
- Step 3: Connect the speakers using a wired connection
- Step 4: Connect the speakers using a wireless connection
- Step 5: Adjust the audio settings on your TV
- Step 6: Test the audio output from your TV through the stereo speakers
- Conclusion
Introduction
In today’s modern home entertainment setups, having a high-quality audio experience is just as important as having a stunning visual display. While most TVs come with built-in speakers, their sound quality may not always meet our expectations. This is where stereo speakers come into play. By connecting stereo speakers to your TV, you can elevate your viewing experience and immerse yourself in rich, immersive sound.
In this article, we will guide you through the process of connecting stereo speakers to your TV. Whether you prefer a wired or wireless setup, we’ll provide you with step-by-step instructions to ensure a seamless and hassle-free connection. So, grab your speakers, dust off those cables, and let’s get started!
Before we dive into the steps, it’s important to note that the specific methods for connecting stereo speakers may vary depending on the make and model of your TV and speakers. Always refer to the user manuals for detailed instructions tailored to your specific devices.
Are you ready to enhance your audio experience? Let’s begin by determining the audio output options on your TV.
Step 1: Determine the audio output options on your TV
Before you can connect stereo speakers to your TV, it’s essential to identify the available audio output options on your TV. This will vary depending on the make and model of your TV, but here are some common audio output options:
- Audio Line-Out: Some TVs have an audio line-out port, typically labeled as “Audio Out” or “Line Out.” This port allows you to connect external speakers using an RCA cable or a 3.5mm audio cable.
- HDMI ARC: If your TV supports HDMI ARC (Audio Return Channel), you can use this feature to connect your stereo speakers. HDMI ARC allows for both audio input and output through a single HDMI cable, eliminating the need for additional audio cables.
- Optical Audio Output: Another common audio output option is the optical audio output. This port uses a fiber optic cable to transmit digital audio signals. To connect stereo speakers using optical audio, you’ll need an optical cable compatible with both your TV and speakers.
- Bluetooth: Some modern TVs come equipped with built-in Bluetooth functionality. This allows you to wirelessly connect Bluetooth-enabled stereo speakers to your TV. Keep in mind that both your TV and speakers need to support Bluetooth for this method to work.
Once you’ve identified the audio output options on your TV, you’ll have a clear idea of how to proceed with the connection process. If your TV has multiple audio output options, choose the one that best suits your speaker setup and desired audio quality.
Now that you know the audio output options on your TV, it’s time to move on to the next step: checking the specifications of your TV and speakers.
Step 2: Check the specifications of your TV and speakers
Before connecting your stereo speakers to your TV, it’s crucial to ensure compatibility between your TV and speakers. Checking the specifications of both devices will help you determine the most suitable connection method.
Here’s what you need to consider:
- Audio Output Compatibility: Verify that the audio output options on your TV are compatible with the input options on your stereo speakers. For example, if your TV has an audio line-out port, make sure your speakers have an appropriate input to connect to it.
- Power Requirements: Take note of the power requirements of both your TV and speakers. Ensure that your speakers are powered appropriately and that your TV can provide sufficient power to drive them, especially if they are high-end or larger speakers.
- Impedance Matching: Check the speaker impedance (expressed in ohms) and ensure that it is compatible with your TV’s audio output. Mismatched impedance can result in poor audio quality or damage to your devices. Consult the user manuals of your TV and speakers for guidance on impedance matching.
- Wireless Connectivity: If you plan on using a wireless connection method, confirm that both your TV and speakers support the same wireless technology, such as Bluetooth or Wi-Fi.
- Additional Features: Consider any additional features that may enhance your audio experience, such as surround sound capabilities or advanced sound processing options. Confirm that your TV and speakers support these features and can work together seamlessly.
By thoroughly checking the specifications of your TV and speakers, you can ensure a compatible and reliable connection. This will optimize the audio performance and prevent any potential compatibility issues or damage to your devices.
Once you have verified the specifications, it’s time to move on to the next step: connecting the speakers to your TV using a wired connection.
Step 3: Connect the speakers using a wired connection
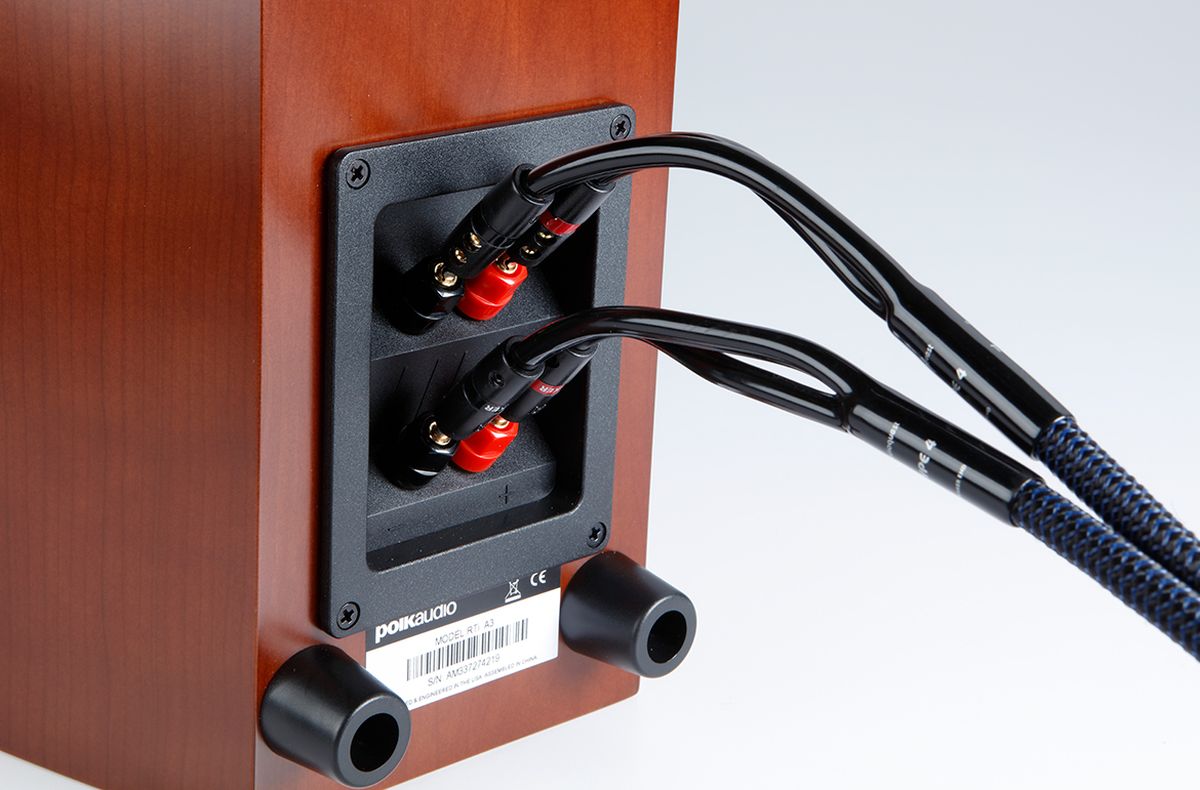
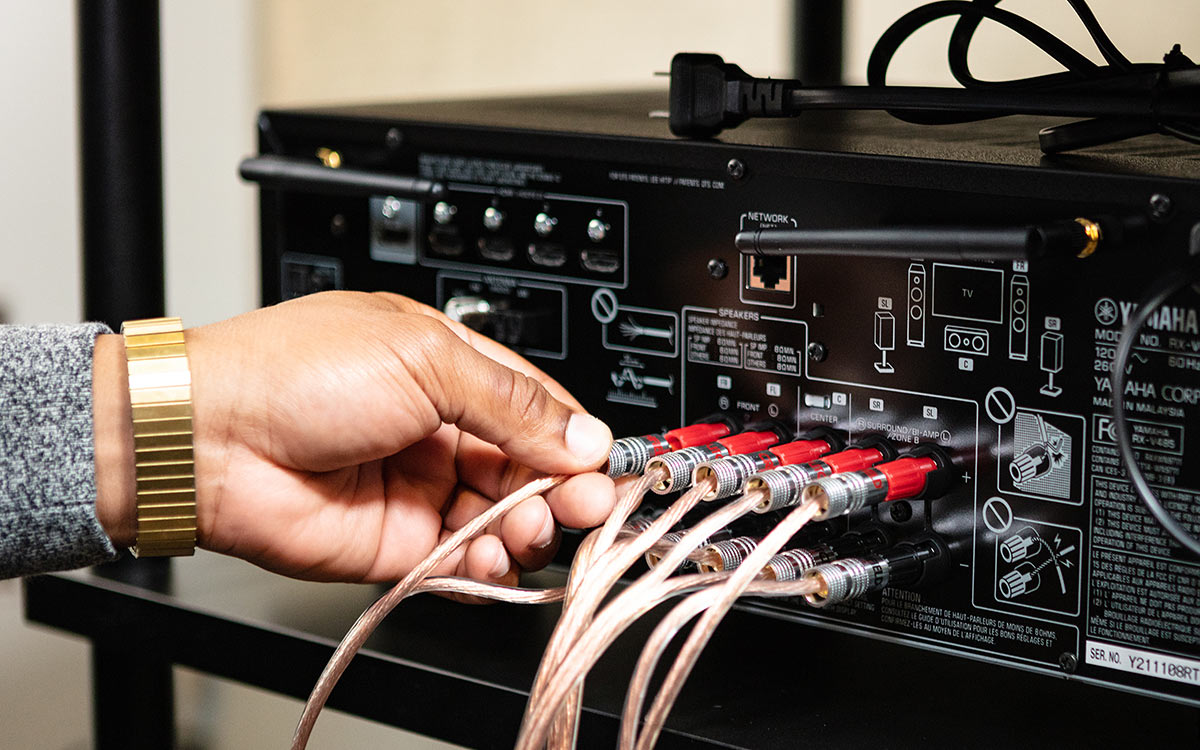
Connecting stereo speakers to your TV using a wired connection is a straightforward process. Here’s how to do it:
- Gather the necessary cables: Depending on the audio output options on your TV and the input options on your speakers, you may need an RCA cable, a 3.5mm audio cable, or an optical cable. Make sure you have the appropriate cables on hand.
- Locate the audio output port on your TV: Refer to the user manual for your TV to find the audio output port. Commonly, it is labeled as “Audio Out,” “Line Out,” or “Optical Out.” Plug in one end of the cable into this port.
- Connect the other end of the cable to the input on your speakers: Depending on the type of cable, connect the other end to the corresponding input on your stereo speakers. For RCA or 3.5mm cables, match the colors of the plugs with the corresponding jacks on the speakers. For optical cables, insert the plug into the optical input.
- Secure the connections: Ensure that the cables are securely plugged in on both the TV and the speakers. Loose connections can result in distorted audio or intermittent sound.
- Power on the speakers: If your stereo speakers are self-powered or require a power source, make sure they are turned on or connected to an outlet. Follow the manufacturer’s instructions for powering on the speakers.
- Adjust the audio settings: Access the audio settings menu on your TV and select the appropriate audio output. This may be labeled as “External Speakers” or “Audio Output.” Choose the output corresponding to the connection you made.
Once you have completed these steps, your stereo speakers should be successfully connected to your TV using a wired connection. Enjoy the enhanced audio experience as you watch your favorite movies or listen to music!
If you prefer a wireless connection method, don’t worry! The next step will guide you through connecting your speakers wirelessly to your TV.
Step 4: Connect the speakers using a wireless connection
If you prefer a cable-free setup, you can connect your stereo speakers to your TV using a wireless connection. Here’s how:
- Check for Bluetooth or Wi-Fi connectivity: Ensure that both your TV and your stereo speakers have built-in Bluetooth or Wi-Fi capabilities. This is necessary for establishing a wireless connection. Refer to the user manuals or specifications of your devices to confirm their wireless capabilities.
- Enable pairing mode on your speakers: If your speakers have a dedicated pairing button or option, enable it to enter pairing mode. This allows your TV to discover and connect to the speakers wirelessly.
- Enable Bluetooth or Wi-Fi on your TV: Access the settings menu of your TV and navigate to the Bluetooth or Wi-Fi settings. Enable the respective wireless technology and wait for your TV to scan for available devices.
- Select your stereo speakers: Once your TV has discovered your stereo speakers, it should display them in the list of available devices. Select your speakers from the list to initiate the pairing process.
- Complete the pairing process: Follow any on-screen prompts or enter a passcode if required to complete the pairing process. Once the pairing is successful, your TV should establish a wireless connection with your stereo speakers.
- Adjust the audio settings: Access the audio settings menu on your TV and select the appropriate audio output. Choose the wireless audio output or the specific name of your stereo speakers to direct the audio wirelessly to them.
After completing these steps, you should have successfully connected your stereo speakers to your TV using a wireless connection. Enjoy the freedom of wire-free audio as you indulge in your favorite content.
Keep in mind that the range of your wireless connection may vary depending on the capabilities of your devices. For optimal performance, it’s recommended to keep the speakers within a reasonable distance from the TV.
With your speakers now connected wirelessly, it’s time to move on to the next step: adjusting the audio settings on your TV for the best audio experience.
Step 5: Adjust the audio settings on your TV
Now that your stereo speakers are connected to your TV, it’s important to fine-tune the audio settings to optimize your listening experience. Here are some key adjustments you can make:
- Audio Output Selection: Access the audio settings menu on your TV and ensure that the correct audio output is selected. Choose the option that corresponds to the connected stereo speakers. This will ensure that the audio is directed to the speakers instead of the TV’s built-in speakers.
- Sound Mode: Many modern TVs offer various sound modes that can enhance your audio experience. Experiment with different modes, such as Movie, Music, or Custom, to find the one that suits your preferences. You may also be able to adjust settings like bass, treble, and balance.
- Surround Sound: If your stereo speakers support surround sound, explore the options to enable this feature. Surround sound can create a more immersive audio experience, perfect for movies or gaming.
- Volume Leveling: Some TVs have a feature called volume leveling or automatic volume control. This helps maintain a consistent volume level across different content, preventing sudden jumps in volume during commercials or quiet movie scenes.
- Audio Delay: If there’s a noticeable delay between the video and audio, you can adjust the audio delay settings to synchronize the sound with the on-screen action. This is especially useful when connecting wireless speakers, as there may be a brief delay in sound transmission.
Take some time to experiment with these settings and find the configuration that provides the best audio quality and suits your personal preferences. Remember to refer to your TV’s user manual for detailed instructions on accessing and adjusting audio settings specific to your model.
With the audio settings properly adjusted, it’s time for the final step: testing the audio output from your TV through the stereo speakers.
Step 6: Test the audio output from your TV through the stereo speakers
After connecting and adjusting the audio settings, it’s crucial to test the audio output from your TV through the stereo speakers to ensure everything is working correctly. Here’s how you can do it:
- Select an audio source: Choose a source that emits sound, such as a TV show, movie, or music. Play the content on your TV.
- Listen for audio: Pay attention to the audio output from your stereo speakers. Ensure that the sound is clear, balanced, and free from any distortion. Adjust the volume as needed to achieve your preferred listening level.
- Check audio synchronization: Monitor the synchronization between the audio and video. If you notice any noticeable delays or a lack of synchronization, you may need to adjust the audio delay settings on your TV. Consult the user manual for specific instructions on adjusting audio delay, as the process may vary depending on your TV model.
- Test different content: Try playing various types of content to further evaluate the audio performance. This can include movies with dynamic sound effects, music with different genres, or TV shows with dialogue-heavy scenes. By testing different content, you can ensure that your stereo speakers provide an immersive audio experience across various media.
- Make additional adjustments: If you’re not satisfied with the audio output, you can further refine the settings on your TV and speakers. Experiment with different sound modes, equalizer presets, or positioning of the speakers to achieve the desired audio quality.
By thoroughly testing the audio output, you can confirm that your stereo speakers are correctly connected to your TV and that they deliver the desired audio experience. If any issues arise, refer back to the previous steps to troubleshoot and ensure proper connections and settings.
Congratulations! You’ve successfully connected your stereo speakers to your TV and optimized the audio settings. Now you can sit back, relax, and enjoy your favorite movies, shows, and music with enhanced sound quality.
As a final note, remember that the specific steps and instructions may vary depending on the make and model of your TV and speakers. Always refer to the user manuals provided with your devices for detailed guidance tailored to your specific setup.
Happy listening!
Conclusion
Connecting stereo speakers to your TV can greatly enhance your audio experience and bring a new level of immersion to your entertainment setup. Whether through a wired or wireless connection, the process of integration is relatively straightforward, and the benefits are well worth it.
In this article, we’ve discussed the steps involved in hooking up stereo speakers to your TV. We began by determining the audio output options on your TV and checking the specifications of both your TV and speakers to ensure compatibility. We then explored connecting the speakers using both wired and wireless methods, followed by adjusting the audio settings on your TV for optimal performance. Finally, we emphasized the importance of testing the audio output to ensure a seamless and immersive listening experience.
Remember, as technology continues to advance, the specific methods and options for connecting stereo speakers may vary. It’s important to consult the user manuals for your TV and speakers to ensure accurate and up-to-date instructions tailored to your specific devices.
Now that you have the knowledge and understanding to successfully integrate your stereo speakers, you can transform your home entertainment system into a true audio powerhouse. Enjoy the remarkable sound quality as you watch movies, play games, or listen to your favorite music.
So, don’t wait any longer—grab your speakers, follow the steps outlined in this article, and embark on a journey of exceptional audio immersion. Elevate your TV viewing experience with the power and richness of stereo speakers!

