Home>Production & Technology>Surround Sound>How To Connect PC To Surround Sound Receiver

Surround Sound
How To Connect PC To Surround Sound Receiver
Modified: January 22, 2024
Learn how to connect your PC to a surround sound receiver and enjoy immersive audio experience. Get step-by-step instructions for easy setup and optimize your sound system.
(Many of the links in this article redirect to a specific reviewed product. Your purchase of these products through affiliate links helps to generate commission for AudioLover.com, at no extra cost. Learn more)
Table of Contents
- Introduction
- Step 1: Check your PC ports
- Step 2: Identify the audio output options
- Step 3: Determine the connection method
- Step 4: Connect the PC to the receiver using HDMI
- Step 5: Connect the PC to the receiver using optical cable
- Step 6: Connect the PC to the receiver using analog cables
- Step 7: Adjust audio settings on your PC
- Conclusion
Introduction
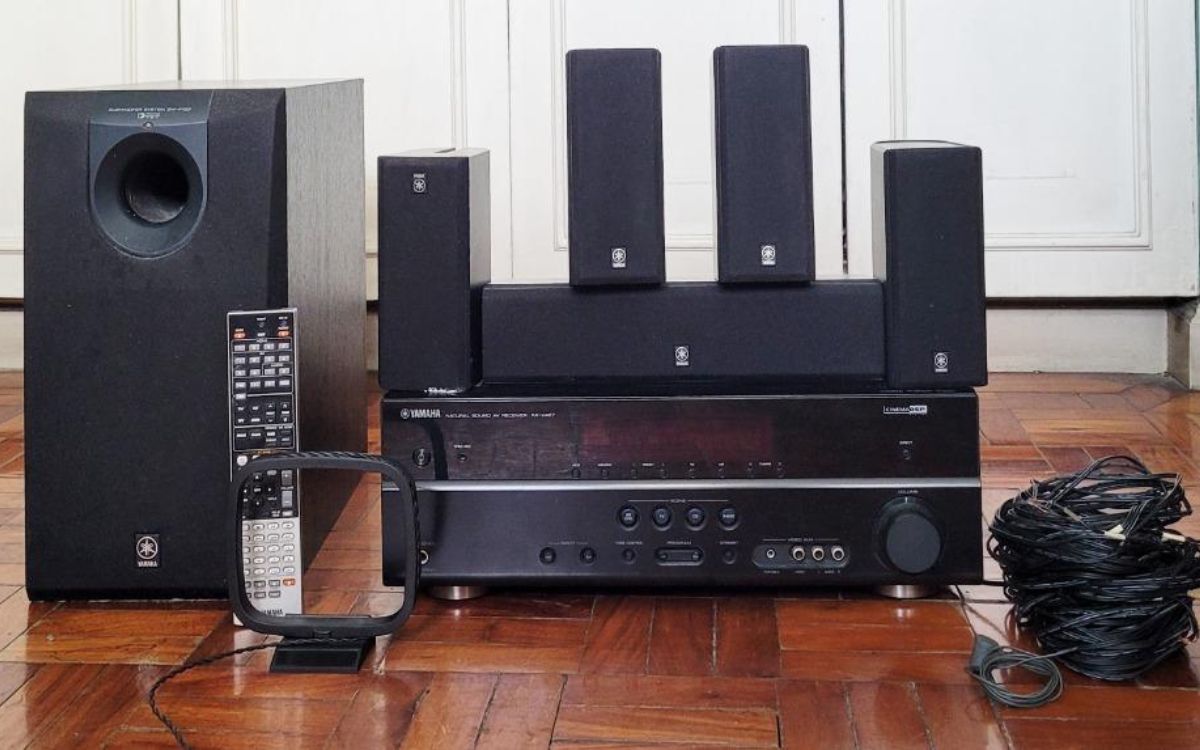
Surround sound systems have revolutionized the way we experience audio. Whether you’re watching movies, playing games, or enjoying your favorite music, a surround sound setup can take your audio immersion to the next level. However, connecting your PC to a surround sound receiver may seem like a daunting task for some. The good news is that it’s actually quite straightforward, and in this article, we’ll guide you through the steps to do it successfully.
Before we dive into the technical details, it’s important to understand the benefits of connecting your PC to a surround sound receiver. Firstly, it allows you to enjoy high-quality audio output, delivering rich, immersive sound that can make your entertainment experience truly exceptional. Additionally, it enables you to take advantage of the multiple speakers and channels in your surround sound system to create a realistic and captivating audio environment.
Whether you’re a gamer looking to enhance the realism of your gameplay, a movie enthusiast wanting to recreate the cinema experience at home, or just a music lover who appreciates the finer details in songs, connecting your PC to a surround sound receiver is the key to unlocking the full potential of your audio setup.
Now, let’s get started with the step-by-step process of connecting your PC to a surround sound receiver. But first, make sure you check the ports available on your PC, as this will play a crucial role in determining the connection method we’ll be using.
Step 1: Check your PC ports
The first step in connecting your PC to a surround sound receiver is to check the available ports on your computer. Different PCs may have different port options, so it’s essential to confirm what ports you have before proceeding with the connection.
Most modern PCs come with a variety of audio output ports, including HDMI, optical, and analog (3.5mm or RCA) ports. These ports allow you to connect your PC to external devices, such as monitors, speakers, and, of course, surround sound receivers.
To determine the available ports on your PC, you can refer to the user manual or check the back or sides of your computer tower or laptop. Look for ports labeled with audio symbols or names, such as “HDMI,” “Optical,” or “Line Out.”
If you’re using a laptop, the ports might be located on the sides or back of the device and may require you to open a cover or slide a panel to access them. Make sure to verify the specific ports available on your laptop model.
Once you’ve identified the audio output ports on your PC, you’re ready to move on to the next step, where we will explore the different audio output options and decide which one is suitable for your setup.
Step 2: Identify the audio output options
After checking the available ports on your PC, the next step is to identify the audio output options. As mentioned earlier, most PCs offer different types of audio output ports, each with its own advantages and limitations. Understanding these options will help you determine the best method to connect your PC to the surround sound receiver.
Here are the most common audio output options found on PCs:
- HDMI (High-Definition Multimedia Interface): HDMI ports are becoming increasingly prevalent on modern PCs. They support both high-definition video and audio signals, making them a convenient choice for connecting your PC to a surround sound receiver. HDMI carries audio in a digital format, resulting in high-quality sound transmission. It’s worth noting that HDMI can transmit surround sound formats such as Dolby Digital and DTS, making it a popular choice for home theater setups.
- Optical (TOSLINK/SPDIF): Optical ports use fiber optic cables to transmit audio signals in a digital format. This option is ideal if your PC and receiver support optical connections. Although optical cables don’t support as high-quality audio as HDMI, they still provide excellent sound reproduction and are capable of transmitting surround sound formats.
- Analog (3.5mm or RCA): Analog ports are the traditional headphone or speaker jacks commonly found on PCs. They can be either 3.5mm (TRS) or RCA (red and white) connections. Analog audio is transmitted in an analog format, so there may be some loss in audio quality. However, most speakers and surround sound receivers still support analog connections, making it a viable option if the other methods are not available.
By identifying the audio output options on your PC, you can now choose the appropriate method for connecting your PC to the surround sound receiver. In the next step, we will explore these connection methods in more detail and guide you through the setup process.
Step 3: Determine the connection method
Now that you’ve checked the available ports on your PC and identified the audio output options, it’s time to determine the best connection method for your setup. The connection method will depend on the ports available on your PC and the ports on your surround sound receiver.
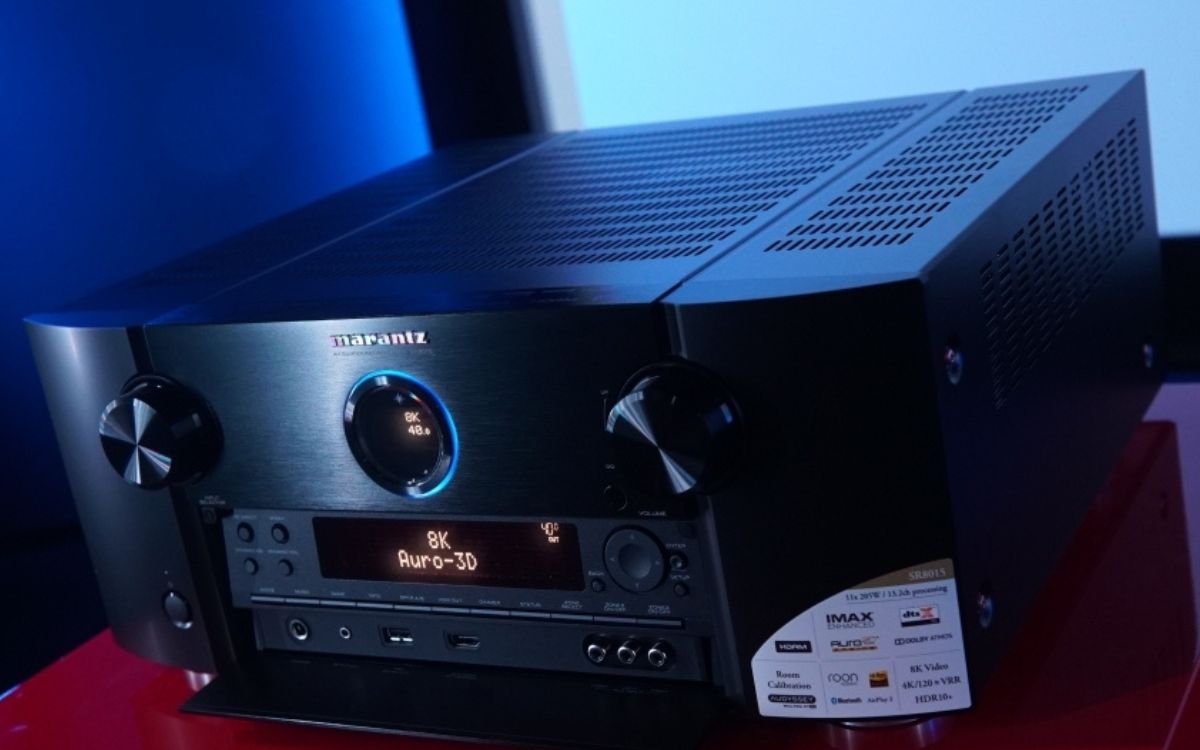
If your PC and surround sound receiver both have HDMI ports, this is usually the most straightforward and recommended option. HDMI offers both high-definition video and audio transmission in a single cable, making it convenient and efficient. It can carry surround sound formats, ensuring an immersive audio experience. Simply connect one end of the HDMI cable to the HDMI output port on your PC and the other end to an HDMI input on your receiver.
If your PC doesn’t have an HDMI port or if you prefer to use other audio output options, you can consider using an optical cable or analog cables.
To use an optical cable, ensure that both your PC and receiver have optical (TOSLINK or SPDIF) ports. Connect the optical cable to the optical output port on your PC and the corresponding input port on your receiver. Remember to remove the protective caps from the optical cable ends before connecting.
If your PC only has analog audio output ports, such as a 3.5mm (TRS) or RCA jacks, you can connect them to the analog audio input ports on your surround sound receiver. Use a suitable cable, such as a 3.5mm to RCA cable or RCA to RCA cable, depending on the ports available on your PC and receiver.
Before proceeding with the connection, it’s essential to ensure that you have the necessary cables and adapters matching the ports on your PC and receiver. If needed, you can consult an electronics store or online retailer to purchase the appropriate cables.
Once you’ve determined the connection method and gathered the required cables, you’re ready to proceed with connecting your PC to the surround sound receiver. In the next step, we will guide you through the specific steps for each connection method.
Step 4: Connect the PC to the receiver using HDMI
If both your PC and surround sound receiver have HDMI ports, connecting them using an HDMI cable is the most convenient and recommended method. Here’s a step-by-step guide on how to do it:
- Locate the HDMI output port on your PC. It is usually labeled as “HDMI Out” or depicted with an HDMI symbol.
- Connect one end of the HDMI cable to the HDMI output port on your PC.
- Locate an available HDMI input port on your surround sound receiver. These ports are typically labeled with “HDMI In” or have an HDMI symbol as well.
- Connect the other end of the HDMI cable to the HDMI input port on your receiver.
- Once the HDMI cable is securely connected, turn on your PC and surround sound receiver.
- Select the appropriate HDMI input on your receiver. Most receivers have multiple HDMI inputs, so choose the one where you connected your PC.
- On your PC, go to the audio settings and make sure the audio is being output through the HDMI connection. You can usually find this option in the Sound settings of your PC’s control panel or system preferences.
- Test the audio playback to ensure it’s coming through the surround sound system. Play some music or a video with audio and adjust the volume on your receiver accordingly.
That’s it! You have successfully connected your PC to the surround sound receiver using an HDMI cable. Enjoy the immersive audio experience provided by your surround sound system.
If you encounter any issues with the audio playback or the HDMI connection, double-check the HDMI cable connections and ensure that your PC’s audio settings are configured properly. If the problem persists, consult the user manuals of your PC and receiver for troubleshooting tips.
If your PC or receiver doesn’t have HDMI ports, don’t worry. In the next steps, we will explore how to connect your PC to the surround sound receiver using alternative methods such as optical cables and analog connections.
Step 5: Connect the PC to the receiver using optical cable
If your PC and surround sound receiver have optical (TOSLINK or SPDIF) ports, connecting them using an optical cable is a viable and straightforward option. Here’s a step-by-step guide on how to do it:
- Locate the optical output port on your PC. It is usually labeled as “S/PDIF,” “Optical Out,” or depicted with a TOSLINK symbol.
- Remove the protective caps from the ends of the optical cable.
- Connect one end of the optical cable to the optical output port on your PC.
- Locate an available optical input port on your surround sound receiver. These ports are typically labeled as “S/PDIF,” “Optical In,” or have a TOSLINK symbol.
- Connect the other end of the optical cable to the optical input port on your receiver.
- Ensure the optical cable is securely connected to both the PC and receiver.
- Turn on your PC and surround sound receiver.
- Select the optical input on your receiver that corresponds to the connection you made.
- On your PC, go to the audio settings and make sure the audio is being output through the optical connection. You can usually find this option in the Sound settings of your PC’s control panel or system preferences.
- Test the audio playback to ensure it’s coming through the surround sound system. Play some music or a video with audio and adjust the volume on your receiver accordingly.
That’s it! You have successfully connected your PC to the surround sound receiver using an optical cable. Enjoy the enhanced audio experience provided by your surround sound system.
If you encounter any issues with the audio playback or the optical connection, double-check the optical cable connections and ensure that your PC’s audio settings are configured properly. If the problem persists, consult the user manuals of your PC and receiver for troubleshooting tips.
If neither HDMI nor optical connections are available on your PC or receiver, don’t worry. In the next step, we will explore how to connect your PC to the surround sound receiver using analog cables.
Step 6: Connect the PC to the receiver using analog cables
If your PC or surround sound receiver doesn’t have HDMI or optical ports, you can still connect them using analog cables. While analog connections may not provide the same level of audio quality as digital connections, they are still a viable option. Here’s a step-by-step guide on how to connect your PC to the surround sound receiver using analog cables:
- Check if your PC has analog audio output ports. These are typically 3.5mm (TRS) jacks or RCA (red and white) ports. Depending on your PC’s design, they may be labeled as “Line Out,” “Audio Out,” or “Headphone Jack.”
- If your PC has a 3.5mm analog output port, use a 3.5mm to RCA cable. Connect the 3.5mm end into the PC’s audio output port, and connect the RCA ends into the corresponding analog input ports on your receiver. The red RCA cable goes into the right audio input, and the white (or black) RCA cable goes into the left audio input.
- If your PC has RCA analog output ports, use RCA to RCA cables. Connect one end of the RCA cables into the PC’s audio output ports (matching the color codes), and connect the other end into the corresponding analog input ports on the receiver.
- Ensure that the analog cables are securely connected to both the PC and the receiver.
- Turn on your PC and surround sound receiver.
- On your receiver, select the input that corresponds to the analog connection you made.
- On your PC, go to the audio settings and ensure that the audio is being output through the analog connection. You can usually find this option in the Sound settings of your PC’s control panel or system preferences.
- Test the audio playback by playing some music or a video with audio. Adjust the volume on your receiver accordingly.
That’s it! You have successfully connected your PC to the surround sound receiver using analog cables. While the audio quality may not be as high as with digital connections, you can still enjoy an enhanced audio experience with your surround sound system.
If you encounter any issues with the audio playback or the analog connection, double-check the cable connections and ensure that your PC’s audio settings are configured properly. If the problem persists, consult the user manuals of your PC and receiver for troubleshooting tips.
Now that you have successfully connected your PC to the surround sound receiver using either HDMI, optical, or analog cables, you can proceed to the next step to adjust the audio settings on your PC to optimize the audio playback.
Step 7: Adjust audio settings on your PC
After connecting your PC to the surround sound receiver, it’s essential to adjust the audio settings on your PC to ensure optimal audio playback through your surround sound system. Here are some steps to help you do that:
- Go to the audio settings on your PC. You can typically access these settings through the Sound or Audio section in your PC’s control panel or system preferences.
- Locate the playback devices section. This is where you can select the output device for audio playback.
- Choose your surround sound receiver from the list of available playback devices. It might be listed as the receiver model or as the specific audio port, such as HDMI, optical, or analog.
- Set the audio output format to match the capabilities of your surround sound system. You can usually choose from options like stereo, 5.1 surround, or 7.1 surround. Select the appropriate option based on your setup.
- Adjust the volume levels. Use the volume control on your PC to set the desired volume level, and use the receiver’s volume control for further adjustment.
- Test the audio playback to ensure that it’s balanced and all speakers are functioning correctly. You can use various online audio or video tests to check the audio output from each speaker.
- Customize the audio settings according to your preference. Many PC audio settings allow you to fine-tune the audio experience by adjusting settings like bass, treble, surround sound levels, and more. Experiment with these settings to achieve the desired audio quality.
By adjusting the audio settings on your PC, you can optimize the audio playback through your surround sound system, ensuring a rich and immersive audio experience.
If you encounter any issues with the audio settings or the audio playback, double-check the connections between your PC and the surround sound receiver. Ensure that the cables are correctly connected and securely plugged into the respective ports. Additionally, consult the user manuals of your PC and receiver for troubleshooting tips specific to your setup.
Congratulations! You have successfully connected your PC to the surround sound receiver and adjusted the audio settings on your PC. Now you can sit back, relax, and enjoy a truly immersive audio experience while watching movies, playing games, or listening to music.
Remember to regularly check and update your PC’s audio drivers to ensure compatibility and optimal performance with your surround sound system.
Conclusion
Connecting your PC to a surround sound receiver opens up a world of immersive audio experiences for your movies, games, and music. Whether you use an HDMI, optical, or analog connection, the process can be straightforward and rewarding. By following the steps outlined in this guide, you can successfully connect your PC to a surround sound receiver and enjoy enhanced audio quality and spatial immersion.
Start by checking the available ports on your PC and identifying the audio output options. Determine the connection method based on the ports available on your PC and the receiver. HDMI is the most convenient option if both devices support it, as it provides high-quality audio and video transmission in a single cable. If HDMI is not an option, you can use optical cables if available, or analog cables as a fallback.
Once connected, adjusting the audio settings on your PC is crucial to optimize the audio experience. Select the appropriate playback device, set the output format to match your surround sound system, and fine-tune the volume levels and other audio settings for the best results.
Remember to test the audio playback to ensure that it’s balanced and all speakers are functioning correctly. Online audio or video tests can help you verify the audio output from each speaker and make any necessary adjustments.
Connecting your PC to a surround sound receiver transforms your audio experience, providing a new level of immersion and realism. Whether you’re enjoying the explosive sounds of an action movie or the intricacies of a symphony, the surround sound system will enhance your enjoyment and bring your entertainment to life.
In conclusion, with the right cables, ports, and settings, you can seamlessly connect your PC to a surround sound receiver and unleash the full potential of your audio setup. So, go ahead and embark on your audio adventure with surround sound, and prepare to be amazed by the rich and immersive audio experience that awaits you.