Home>Devices & Equipment>Music Box>How To Make Paper Strip Music Box
Music Box
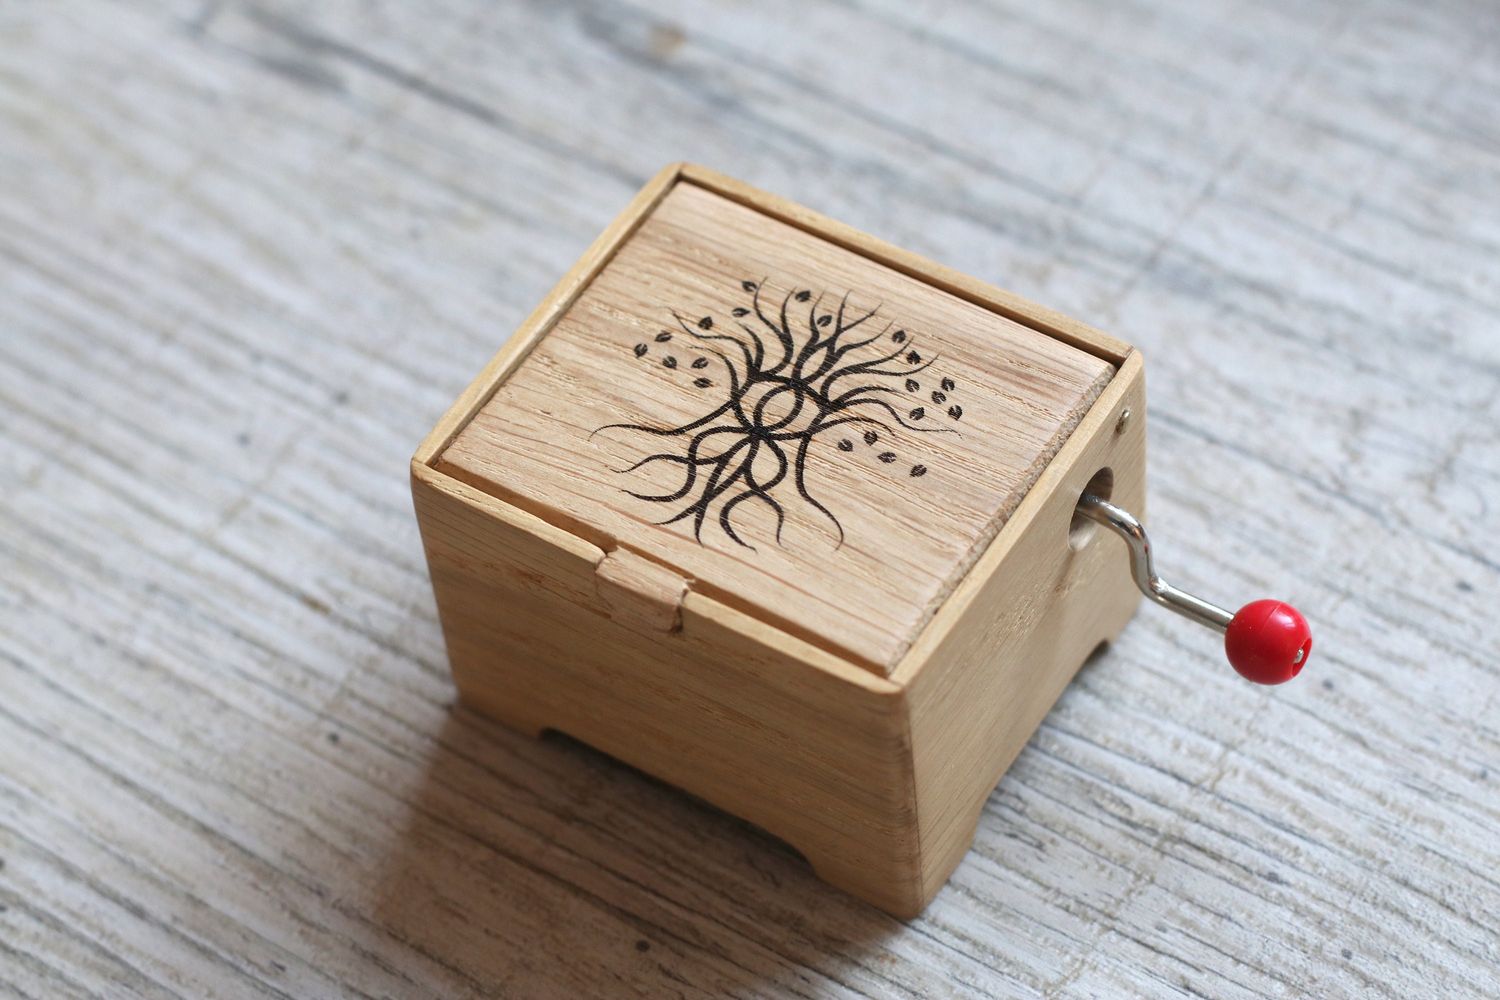
How To Make Paper Strip Music Box
Published: January 11, 2024
Learn how to create a beautiful music box using paper strips. This step-by-step tutorial will guide you through the process of making your own unique music box.
(Many of the links in this article redirect to a specific reviewed product. Your purchase of these products through affiliate links helps to generate commission for AudioLover.com, at no extra cost. Learn more)
Table of Contents
Introduction
Welcome to the wonderful world of music boxes! These enchanting little contraptions have been captivating people for centuries with their beautiful melodies and intricate designs. Whether you’re a music enthusiast or simply looking for a creative and engaging DIY project, making your own paper strip music box can be a rewarding and enjoyable experience.
Music boxes work by using a series of metal pins on a rotating cylinder or disk to pluck the teeth of a metal comb. This creates the magical sound that we all associate with music boxes. Traditionally, music boxes were made with wooden cases and mechanical movements. However, this DIY project focuses on creating a simpler version using paper strips.
Not only is making a paper strip music box a great way to explore your creativity, but it also allows you to personalize your music box with your favorite tunes. You can choose any song you love and turn it into a beautiful melody that will bring joy to your heart.
In this article, we will guide you through the steps of making your own paper strip music box. We will cover the materials you’ll need, the process of cutting the paper strips, creating the music box base, attaching the paper strips, adding the music mechanism, customizing the music box, and testing and fine-tuning the final product. So, let’s get started on this musical journey!
Materials Needed
Before you embark on your paper strip music box project, it’s important to gather all the necessary materials. Here’s a list of what you’ll need:
- Thick cardstock or cardboard: This will serve as the base for your music box.
- Patterned or decorative paper: Choose paper that matches your style and preferences. This will be used to create the paper strips.
- Music box mechanism: You can easily find these online or at craft stores. Make sure to choose one that matches the size and shape of your music box base.
- Scissors or craft knife: These will be used to cut the cardstock, paper strips, and any other necessary materials.
- Glue or double-sided tape: You’ll need this to attach the paper strips to the music box base.
- Hole puncher: This will be used to punch holes in the paper strips to match the pins on the music box mechanism.
- Pencil or pen: You’ll need this to mark the position of the holes on the paper strips.
- Decorative elements: Optional, but you can choose to add embellishments such as stickers, gems, or ribbons to personalize your music box.
- Optional: Ruler, cutting mat, and cutting blade for more precise cutting of the materials.
Make sure to gather all the materials before you begin the project. This will help ensure a smooth and uninterrupted creative process. Additionally, having everything ready will allow you to fully immerse yourself in the joy of crafting your own paper strip music box.
Step 1: Gathering Supplies
Before diving into the exciting process of creating your paper strip music box, it’s essential to gather all the necessary supplies. This step will ensure that you have everything you need at hand, allowing for a smooth and uninterrupted crafting experience. Here’s what you’ll need:
- Thick cardstock or cardboard: The base of your music box needs to be sturdy, so opt for a thick cardstock or cardboard material. This will provide a solid foundation for your music box.
- Patterned or decorative paper: Choose paper with appealing patterns and designs to create the paper strips. The patterns will add a touch of visual interest to your music box.
- Music box mechanism: This is the heart of your music box, responsible for producing the enchanting melodies. You can find music box mechanisms online or at craft stores. Make sure to select one that matches the size and shape of your music box base.
- Scissors or craft knife: These tools will be used to cut the cardstock, paper strips, and any other materials as needed. Make sure they are sharp and suitable for precise cutting.
- Glue or double-sided tape: You’ll need adhesive to attach the paper strips to the music box base. Choose an adhesive that is strong enough to hold the strips securely in place.
- Hole puncher: This tool is essential for creating holes in the paper strips. The holes will correspond to the pins on the music box mechanism, allowing it to play the desired tunes.
- Pencil or pen: Use a pencil or pen to mark the position of the holes on the paper strips. This will help ensure accuracy during the hole-punching process.
- Decorative elements: While optional, adding decorative elements can enhance the overall aesthetic of your music box. Consider using stickers, gems, ribbons, or other embellishments that align with your personal style.
- Optional: Ruler, cutting mat, and cutting blade: If you want to achieve precise cutting, these tools will come in handy. A ruler helps in measuring and creating straight lines, while a cutting mat and blade provide a stable and safe surface for cutting.
By gathering all the necessary supplies beforehand, you’ll be fully prepared to embark on your paper strip music box journey. So, let’s move on to the next step and start creating your very own music box!
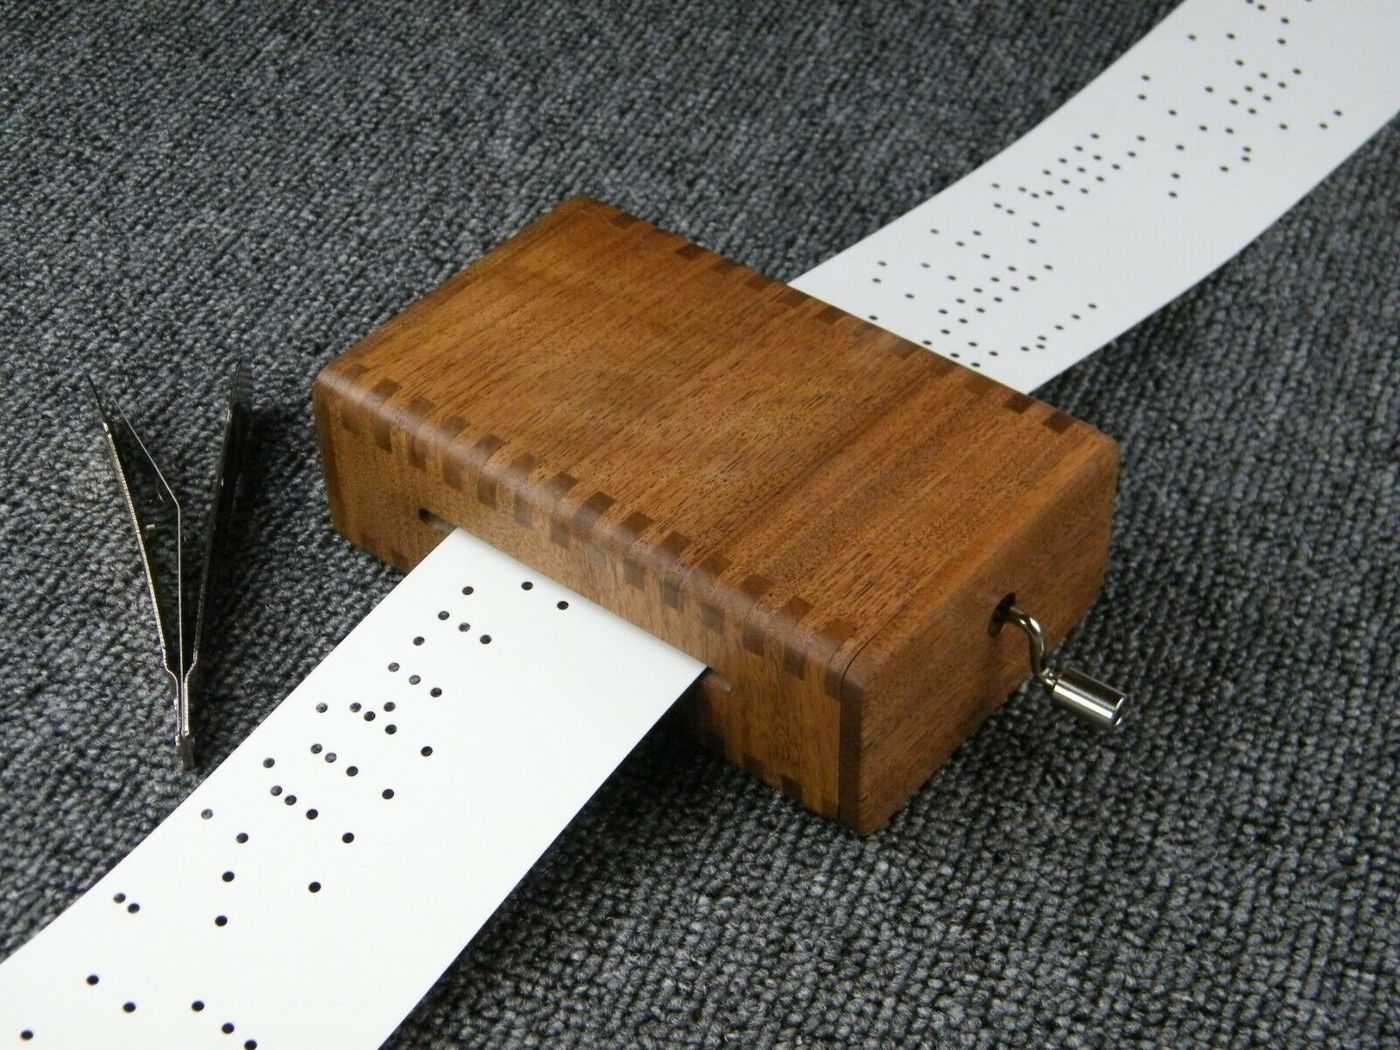
Step 2: Cutting the Paper Strips
Now that you have gathered all your supplies, it’s time to move on to the fun part – cutting the paper strips for your music box. These strips will be the key component that produces the melodic tunes. Here’s how to do it:
- Measure and mark: Take your patterned or decorative paper and use a ruler to measure and mark the width of the paper strips. Aim for a width of around 1-2 centimeters (0.4-0.8 inches), but you can adjust it according to your preference.
- Cut the strips: Once you have marked the width, use scissors or a craft knife to carefully cut along the marked lines. Take your time and ensure that the strips are cut straight and even.
- Length of the strips: The length of the paper strips will depend on the length of the music that you want to play. Measure and cut the strips to match the desired length of your chosen melody. Keep in mind that longer songs will require longer paper strips.
- Multiple strips for different notes: If you want to incorporate different notes or chords in your music box, cut additional paper strips using the same process. Each strip will represent a different note, allowing you to create more complex melodies.
- Consider decorative edges: For an added touch of visual appeal, you can experiment with different edge designs for your paper strips. Use decorative scissors or punches to create patterns along the edges of the strips.
It’s important to ensure that your paper strips are cut accurately and neatly to produce the desired musical outcome. Take your time during this step, as precision will greatly impact the final result of your paper strip music box. With the paper strips ready, you’re now one step closer to hearing the magical melodies of your creation.
Step 3: Creating the Music Box Base
With the paper strips cut and ready, it’s time to create the base for your music box. The base will serve as the foundation on which the paper strips and music box mechanism will be attached. Follow these steps to create your music box base:
- Prepare the cardstock or cardboard: Take the thick cardstock or cardboard and decide on the size and shape of your music box base. You can choose a square, rectangle, or any other shape that appeals to you.
- Measure and cut: Use a ruler to measure the desired dimensions for your base and mark the measurements on the cardstock or cardboard. Ensure that your measurements are accurate and aligned.
- Cut the base: Using scissors or a craft knife, carefully cut along the marked lines to create the music box base. Take your time and make precise cuts to ensure a clean and professional finish.
- Smooth the edges: After cutting the base, use sandpaper or a file to smooth out any rough edges. This will give your music box base a polished look and prevent any accidental cuts or snags.
- Personalize the base: This step is optional but can add a personal touch to your music box. You can decorate the base with paint, markers, or decorative paper to match your style and preferences.
Once you have created the music box base, take a moment to admire your handiwork. The base provides a solid and stable surface to build upon and will be an integral part of your paper strip music box. Now, let’s move on to the next step and start attaching the paper strips to the base.
Step 4: Attaching the Paper Strips
Now that you have your music box base ready, it’s time to attach the paper strips that will create the beautiful melodies. Follow these steps to securely attach the paper strips to the base:
- Choose your starting point: Decide where you want to begin attaching the paper strips on the music box base. You can choose any corner or side that suits your preference.
- Apply adhesive: Take your glue or double-sided tape and apply a small amount to one end of the first paper strip. Be careful not to use too much adhesive, as it may result in a messy appearance.
- Align and press: Carefully align the glued end of the paper strip with the starting point on the music box base. Press down firmly to ensure that the strip is securely attached.
- Continue adding strips: Take the next paper strip and repeat the process by applying adhesive to one end and attaching it to the base, slightly overlapping the previous strip. Continue this pattern until all the paper strips are attached.
- Space the strips evenly: Ensure that the paper strips are evenly spaced on the music box base. This will help in aligning the holes in the strips with the pins on the music box mechanism.
- Trim excess length: Once all the paper strips are attached, check if any of them are longer than the desired length. Use scissors or a craft knife to carefully trim off any excess length.
As you attach the paper strips, take your time to ensure that they are straight and aligned. The proper attachment of the paper strips is crucial for the mechanism to pluck the teeth and produce the desired melodies. With the paper strips securely in place, let’s move on to the next step and add the music box mechanism.
Step 5: Adding the Music Mechanism
With the paper strips attached to the base, it’s time to add the crucial component that brings your music box to life – the music box mechanism. Follow these steps to add the mechanism to your paper strip music box:
- Prepare the music box mechanism: Take your music box mechanism and carefully examine it. Familiarize yourself with its components, including the rotating cylinder or disk, pins, and comb.
- Position the mechanism: Decide on the placement of the music box mechanism on your base. Ensure that it aligns with the paper strips and is positioned correctly for easy winding and activation.
- Mark the holes: Take a pencil or pen and mark the position of the pins on the paper strips. These marks will indicate where you need to create corresponding holes for the pins to go through.
- Create the holes: Using a hole puncher, carefully punch holes at the marked positions on the paper strips. Make sure the holes are clean and align with the pins on the music box mechanism.
- Attach the mechanism: Apply adhesive to the underside of the music box mechanism and carefully position it on the base, aligning it with the paper strips and the corresponding holes.
- Press down gently: Once the mechanism is in place, press down gently to ensure that it adheres securely to the base. Take care not to put too much pressure to prevent damaging the mechanism or the paper strips.
Adding the music box mechanism is a crucial step in the construction of your paper strip music box. Take your time and ensure that the mechanism is properly aligned and securely attached. Once completed, you’re ready to move on to the next step and add your personal touch to the music box.
Step 6: Customizing the Music Box
Now that the foundation of your paper strip music box is complete, it’s time to unleash your creativity and add a personal touch. Here are some ideas for customizing your music box:
- Decorate the base: Use paint, markers, or decorative paper to embellish the music box base. Add intricate designs, patterns, or even a personalized message to make it uniquely yours.
- Add embellishments: Consider adding decorative elements such as stickers, gems, ribbons, or small trinkets to enhance the visual appeal of your music box. Choose items that reflect your style and create a captivating look.
- Create a theme: Give your music box a theme by incorporating elements that represent your favorite hobbies, interests, or memorable moments. For example, if you love nature, add miniature flowers or leaves to create a nature-themed music box.
- Personalize the paper strips: Write meaningful lyrics, motivational quotes, or personal messages on the paper strips. This adds a special touch and makes your music box even more meaningful.
- Add a clear cover: Consider adding a clear cover to protect the mechanism and paper strips while still allowing you to enjoy the visual appeal of your creation. This can be made from plastic or glass, depending on your preference.
- Experiment with lighting: If you want to take your customization to the next level, incorporate small LED lights inside the music box base. This will create a magical ambiance and add an extra layer of visual charm.
- Use different materials: Explore using different materials for the base, such as wooden or acrylic panels, to add a unique texture and aesthetic to your music box.
Remember, the customization options are endless and entirely up to your imagination. Let your creativity run wild and transform your paper strip music box into a one-of-a-kind masterpiece that reflects your personality and style.
Step 7: Testing and Fine-tuning
After all the hard work and creativity you’ve invested in your paper strip music box, it’s time to test and fine-tune your creation. This step is crucial to ensure that your music box produces beautiful melodies and operates smoothly. Here’s what you need to do:
- Wind up the mechanism: Using the designated winding key or mechanism, carefully wind up the music box. Make sure to follow the instructions provided with the specific music box mechanism you chose.
- Activate the music box: With the music box wound up, gently activate the mechanism to start playing the melodies. Observe the movement of the paper strips and listen to the sounds produced by the comb and pins.
- Check for alignment and playability: While the music box is playing, pay attention to the alignment of the paper strips and the movement of the pins. Ensure that the paper strips are properly aligned with the pins and that they are plucked smoothly to produce clear notes.
- Fine-tune the position: If you notice any misalignment or if a particular note doesn’t sound as expected, gently adjust the position of the paper strips or the pins to improve the playability. This may require some trial and error to achieve the desired result.
- Test different songs: Experiment with different paper strips and melodies to test the versatility and sound quality of your music box. This will allow you to explore different tunes and ensure that your music box is capable of playing a variety of melodies.
- Make adjustments if needed: If you encounter any issues or room for improvement, such as uneven notes or inconsistent playability, make the necessary adjustments by repositioning the pins or modifying the paper strips. Keep refining until you are satisfied with the results.
- Enjoy the final product: Once you are happy with the performance of your music box, sit back and enjoy the harmonious melodies it produces. Take pride in your creation and share the joy with others.
Remember, testing and fine-tuning are iterative processes, so don’t hesitate to make adjustments as needed. The goal is to achieve a well-functioning and melodious music box that brings delight and enchantment to both yourself and those around you.
Conclusion
Congratulations on completing your paper strip music box! Throughout this journey, you’ve learned how to gather the necessary supplies, cut the paper strips, create the music box base, attach the paper strips, add the music mechanism, customize the music box, and test and fine-tune your creation.
Making a paper strip music box is not only a fun and creative DIY project but also a wonderful way to express your love for music. By carefully crafting each element and personalizing your music box, you’ve crafted a unique piece of art that brings joy and harmony into your life.
Remember to share your creation with others and let the melodies from your music box captivate and delight those around you. Whether it’s a gift for a loved one or a cherished item for yourself, your paper strip music box serves as a testament to your creativity and passion.
Feel free to explore different tunes, experiment with new designs, or even challenge yourself to create more complex melodies. The possibilities are endless, and your paper strip music box has the potential to evolve and grow with your creativity.
So, the next time you find yourself captivated by the enchanting sound of a music box, remember that you have the skills to create your own magical melodies. With a little imagination and a few simple materials, you can embark on a musical journey filled with joy and wonder.
Enjoy the harmonious tunes of your paper strip music box and let your creativity continue to inspire and uplift you. Happy crafting!