Home>Devices & Equipment>Yamaha>How To Connect Yamaha DTX Drums To Computer
Yamaha
How To Connect Yamaha DTX Drums To Computer
Modified: February 22, 2024
Learn how to easily connect your Yamaha DTX drums to your computer for recording and virtual instrument use. Step-by-step guide for Yamaha DTX drums connection.
(Many of the links in this article redirect to a specific reviewed product. Your purchase of these products through affiliate links helps to generate commission for AudioLover.com, at no extra cost. Learn more)
Table of Contents
Introduction
Yamaha is a renowned brand in the world of musical instruments, known for its quality and innovation. One of their popular products, the Yamaha DTX Drums, offers drummers a digital percussion experience like no other. With its advanced features and realistic sound, the DTX Drum Kit has become a favorite among drummers of all levels.
But did you know that you can connect your Yamaha DTX Drums to a computer? This opens up a whole new world of possibilities for recording, editing, and even practicing drums using various software programs.
In this article, we will guide you through the process of connecting your Yamaha DTX Drums to a computer. Whether you’re a professional musician or an aspiring drummer, this step-by-step guide will help you make the most out of your DTX Drum Kit.
Before we dive into the technical details, it’s important to note that the process may vary slightly depending on your specific model and the computer system you are using. However, the underlying principles remain the same, so you can adapt the steps accordingly.
So, if you’re ready to unlock the full potential of your Yamaha DTX Drums, let’s get started!
Requirements for Connecting Yamaha DTX Drums to a Computer
Before you begin the process of connecting your Yamaha DTX Drums to a computer, there are a few essential requirements you need to fulfill. These requirements ensure a smooth and successful connection between your drum kit and the computer. Here’s what you’ll need:
- Yamaha DTX Drum Kit: Of course, you’ll need a Yamaha DTX Drum Kit. The specific model may vary, but as long as you have a DTX Drum Kit, you’re good to go.
- A Computer: You’ll need a computer to connect your DTX Drum Kit. It can be a desktop computer or a laptop, as long as it has USB ports and meets the minimum system requirements for the DTX Drum Trigger Module driver and any accompanying software you plan to use.
- USB Cable: You will need a USB cable to connect your DTX Drum Kit to the computer. Most DTX Drum Kits come with a USB cable included in the package. Ensure that the USB cable is in good condition and has a standard USB connector on one end and the appropriate connector for your DTX Drum Kit on the other end.
- DTX Drum Trigger Module Driver: To establish the connection between your DTX Drum Kit and the computer, you’ll need to install the DTX Drum Trigger Module driver. This driver allows your computer to recognize the DTX Drum Kit as a MIDI device and facilitates communication between the two.
- Software: Depending on your needs and preferences, you may want to have software applications for recording, editing, and playing back your drum performances. There are numerous options available, such as digital audio workstations (DAWs) like Ableton Live, Logic Pro, or GarageBand, as well as drum-specific software like Superior Drummer or EZdrummer.
- Headphones or Speakers: Finally, you’ll need a reliable pair of headphones or speakers to listen to your drum sounds while connected to the computer. This will allow you to hear the playback of your drum performances or any software-generated sounds.
Once you have all these requirements in place, you’re ready to proceed with connecting your Yamaha DTX Drums to the computer. In the next section, we will guide you through the step-by-step process of installing the DTX Drum Trigger Module driver.
Step 1: Installing the Yamaha DTX Drum Trigger Module Driver
Before you can connect your Yamaha DTX Drums to your computer, you need to install the necessary driver software for the DTX Drum Trigger Module. The driver allows your computer to recognize and communicate with the drum kit effectively. Here’s how to install the driver:
- Check for Updates: Visit the official Yamaha website to ensure you have the latest version of the DTX Drum Trigger Module driver. Look for the Downloads or Support section of the website, and search for your specific model of the DTX Drum Kit. Download the appropriate driver for your operating system.
- Run the Installer: Locate the downloaded driver file on your computer and double-click it to launch the installer. Follow the on-screen instructions to begin the installation process.
- Accept the License Agreement: During the installation process, you will be presented with a license agreement. Read through the agreement carefully and if you agree, check the box that confirms your acceptance. Then, click on the “Next” or “Install” button to proceed.
- Choose Installation Destination: The installer will prompt you to choose the location where you want to install the driver. The default location is usually fine, but if you prefer a different directory, you can specify it here. After selecting the installation destination, click “Next” or “Install” to continue.
- Wait for the Installation: The installation process may take a few moments. Be patient and wait for it to complete. Avoid interrupting the process or shutting down your computer during installation.
- Finish the Installation: Once the installation is complete, you will see a confirmation message. Click on the “Finish” button to exit the installer.
Now that you have successfully installed the DTX Drum Trigger Module driver, you’re one step closer to connecting your Yamaha DTX Drums to your computer. In the next section, we will guide you through the process of physically connecting your drum kit to the computer.
Step 2: Connecting the DTX Drum Kit to the Computer
Now that you have installed the Yamaha DTX Drum Trigger Module driver, it’s time to physically connect your DTX Drum Kit to your computer. Follow these steps to establish the connection:
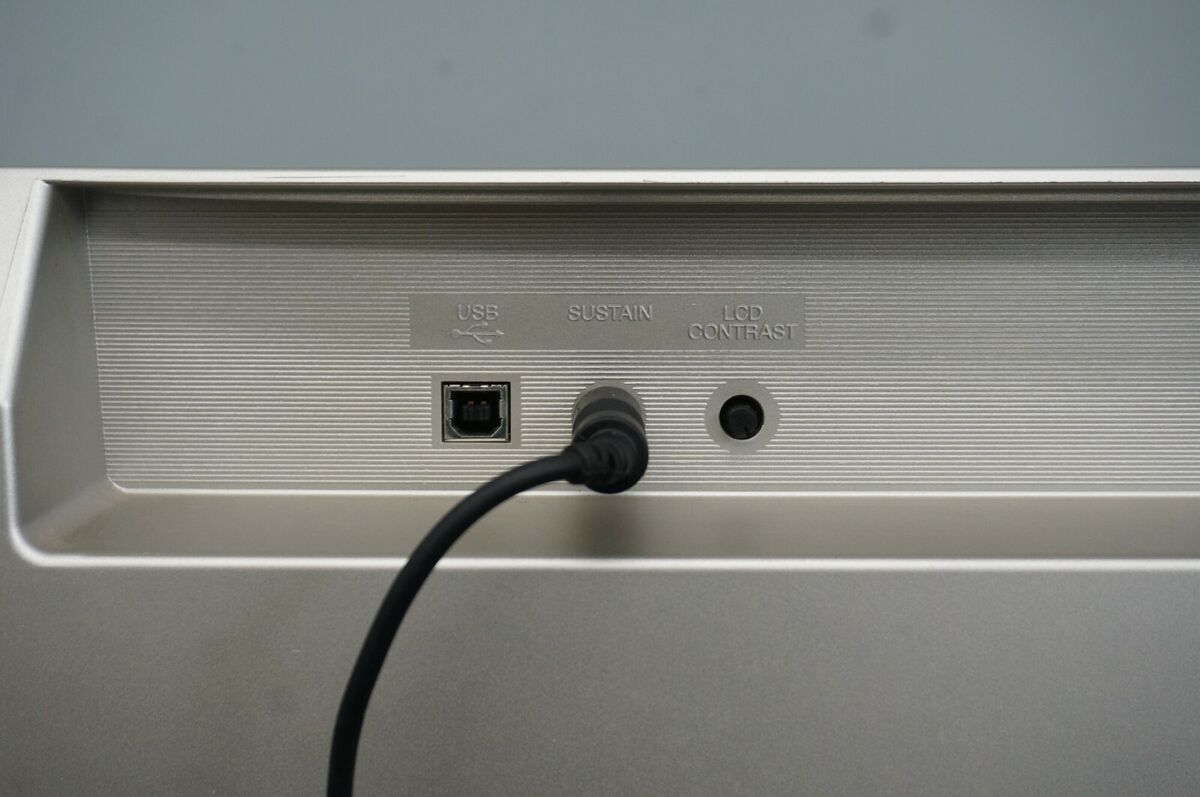
- Locate the USB Port: Look for the USB port on your DTX Drum Kit. It is typically located on the backside of the drum module. Plug in one end of the USB cable into the USB port.
- Connect to the Computer: Locate an available USB port on your computer and plug in the other end of the USB cable into the computer’s USB port. Ensure a secure connection on both ends.
- Power On the DTX Drum Kit: Turn on your DTX Drum Kit by pressing the power button. The drum module should now be powered and ready to communicate with the computer.
At this point, your DTX Drum Kit is physically connected to your computer. The next step is to configure the necessary settings on your computer to ensure it recognizes the drum kit properly. Let’s move on to the next section to learn how to configure the settings.
Step 3: Configuring Settings on the Computer
After connecting your Yamaha DTX Drum Kit to your computer, it’s important to configure the necessary settings to ensure that the computer recognizes the drum kit and that you can use it seamlessly. Follow these steps to configure the settings:
- Open System Preferences/Control Panel: On your computer, open the System Preferences if you are using a Mac or the Control Panel if you are using Windows. You can usually find these options in the main menu or by searching in the start menu.
- Find the MIDI Devices or Audio/MIDI Settings: In the System Preferences or Control Panel, look for the option that allows you to manage MIDI devices or audio/MIDI settings. This may be labeled differently depending on your operating system.
- Locate the DTX Drum Kit: Once you are in the MIDI devices or audio/MIDI settings section, locate the Yamaha DTX Drum Kit in the list of available devices. It should be listed with its model name or a similar identifier.
- Enable the DTX Drum Kit: Enable or activate the Yamaha DTX Drum Kit by checking the box next to its name or selecting it from the list. This ensures that your computer recognizes the drum kit as a MIDI device and can receive input from it.
- Configure MIDI Channels (Optional): If you want to use multiple MIDI channels with your DTX Drum Kit or if you want to assign specific sounds or instruments to different MIDI channels, you can configure the MIDI channels in this section. Refer to your DTX Drum Kit’s manual for more information on MIDI channel configuration.
- Save and Apply Settings: After adjusting the necessary settings, save the changes and apply them. This will ensure that the computer recognizes and communicates with your Yamaha DTX Drum Kit correctly.
Congratulations! You have successfully configured the settings on your computer to recognize your DTX Drum Kit. In the next step, we will test the connection to ensure that everything is working properly. Let’s move on!
Step 4: Testing the Connection
Now that you have connected your Yamaha DTX Drum Kit to your computer and configured the necessary settings, it’s time to test the connection and ensure that everything is working as expected. Follow these steps to test the connection:
- Launch a Music Production Software: Open your preferred music production software, such as Ableton Live, Logic Pro, or any other DAW or drum-specific software that you have installed on your computer.
- Create a New Project: Create a new project or session within the music production software. This will serve as your workspace for recording, editing, and playing back your drum performances.
- Select the DTX Drum Kit as MIDI Input: Within the software, locate the MIDI input settings or preferences. In this section, choose the Yamaha DTX Drum Kit as the MIDI input device. This ensures that the software receives the MIDI signals from your drum kit.
- Test the Trigger Response: Play your DTX Drum Kit and observe if the software registers the drum hits accurately. Each drum and cymbal on your kit should correspond to a specific MIDI note or trigger, and these triggers should be reflected in the software’s interface, such as visual feedback or MIDI notes playback.
- Play Along with Software Sounds: Load a drum sound or drum kit within the software and start playing along. You should hear the software-generated drum sounds through your headphones or speakers while playing your DTX Drum Kit.
- Check for Latency: Pay attention to the responsiveness of the software. Ensure that there is minimal or no noticeable latency between striking the drums and hearing the sound from the software. Adjust the buffer size or latency settings in the software’s audio preferences if necessary.
- Record and Playback: Finally, record a short drum performance using your DTX Drum Kit and the music production software. Once you’ve recorded, play it back to ensure that the software accurately captures and reproduces your drumming.
If everything is working smoothly during the testing phase, congratulations! You have successfully connected your Yamaha DTX Drum Kit to your computer and can now take advantage of the extensive features and capabilities that digital drumming offers. Enjoy exploring and creating music with your DTX Drum Kit and the power of your computer.
If you encounter any issues or need further assistance, consult the documentation of your DTX Drum Kit, the manual of your music production software, or reach out to Yamaha’s customer support for guidance.
Happy drumming!
Conclusion
Connecting your Yamaha DTX Drums to your computer opens up an array of possibilities for recording, editing, and refining your drumming skills. With the right connections, settings, and software, you can create and play back drum performances with professional-level sound quality. In this article, we’ve guided you through the step-by-step process of connecting your DTX Drum Kit to your computer, from installing the necessary driver to testing the connection.
By following the outlined steps, you can now take advantage of the numerous software options available to enhance your drumming experience. Whether you’re looking to record your performances, experiment with different sounds and effects, or practice along with backing tracks, connecting your DTX Drum Kit to your computer provides a whole new level of versatility.
Remember to always refer to the documentation of your specific model of the DTX Drum Kit and the user manual of your music production software for detailed instructions and troubleshooting. If you encounter any difficulties, don’t hesitate to reach out to Yamaha’s customer support or online communities for assistance.
Now, it’s time to unleash your creativity and make the most of your Yamaha DTX Drums connected to your computer. Experiment with different software, explore new drumming techniques, and enjoy the endless possibilities that digital drumming offers. Whether you’re a professional musician or an aspiring drummer, the combination of the DTX Drum Kit and your computer will undoubtedly enhance your musical journey. So, grab your drumsticks, sit behind the kit, and let your imagination soar!