Home>Devices & Equipment>Yamaha>How To Hook Up A Yamaha Surround Sound System To TV
Yamaha
How To Hook Up A Yamaha Surround Sound System To TV
Published: February 6, 2024
Learn how to easily hook up your Yamaha surround sound system to your TV for an immersive audio experience. Step-by-step instructions and tips to optimize your Yamaha speakers for the best sound quality.
(Many of the links in this article redirect to a specific reviewed product. Your purchase of these products through affiliate links helps to generate commission for AudioLover.com, at no extra cost. Learn more)
Table of Contents
Introduction
Welcome to the world of immersive audio experience with Yamaha surround sound systems. Yamaha has been a prominent name in the audio industry, known for its high-quality sound reproduction and innovative technologies. Whether you’re a movie enthusiast, a music lover, or a gaming fanatic, a Yamaha surround sound system can take your audio experience to the next level.
Connecting your Yamaha surround sound system to your TV is the first step in creating a cinematic sound setup in your home. By doing so, you can enjoy rich and dynamic sound that complements the stunning visuals on your TV screen.
In this article, we will guide you through the process of how to hook up a Yamaha surround sound system to your TV. We will cover everything you need to know, from gathering the necessary equipment to testing and making adjustments to ensure optimal audio performance.
Before we dive into the step-by-step instructions, it’s important to note that the specific process may vary depending on the model of your Yamaha surround sound system and the type of TV you own. However, the general principles and concepts discussed in this article should be applicable to most setups.
Now, let’s get started on the journey to achieving an immersive audio experience with your Yamaha surround sound system and TV!
Step 1: Gather the necessary equipment
Before you begin setting up your Yamaha surround sound system with your TV, it’s crucial to gather all the necessary equipment. Here’s a checklist of what you’ll need:
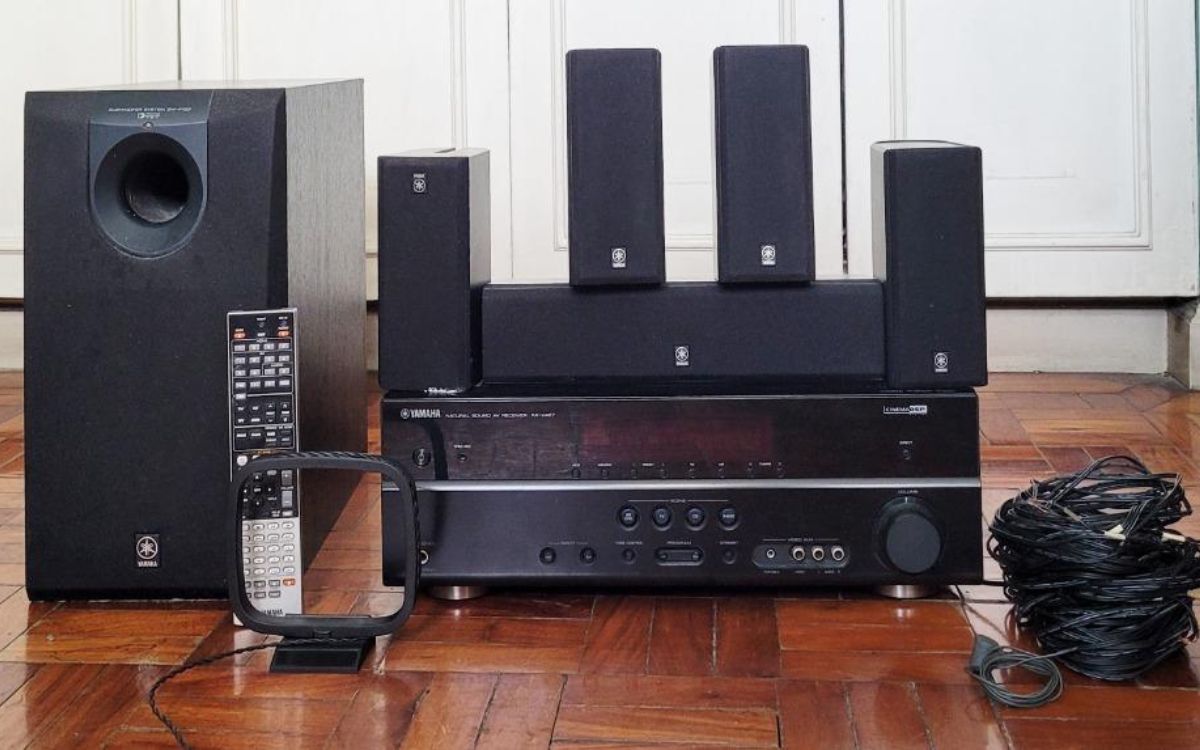
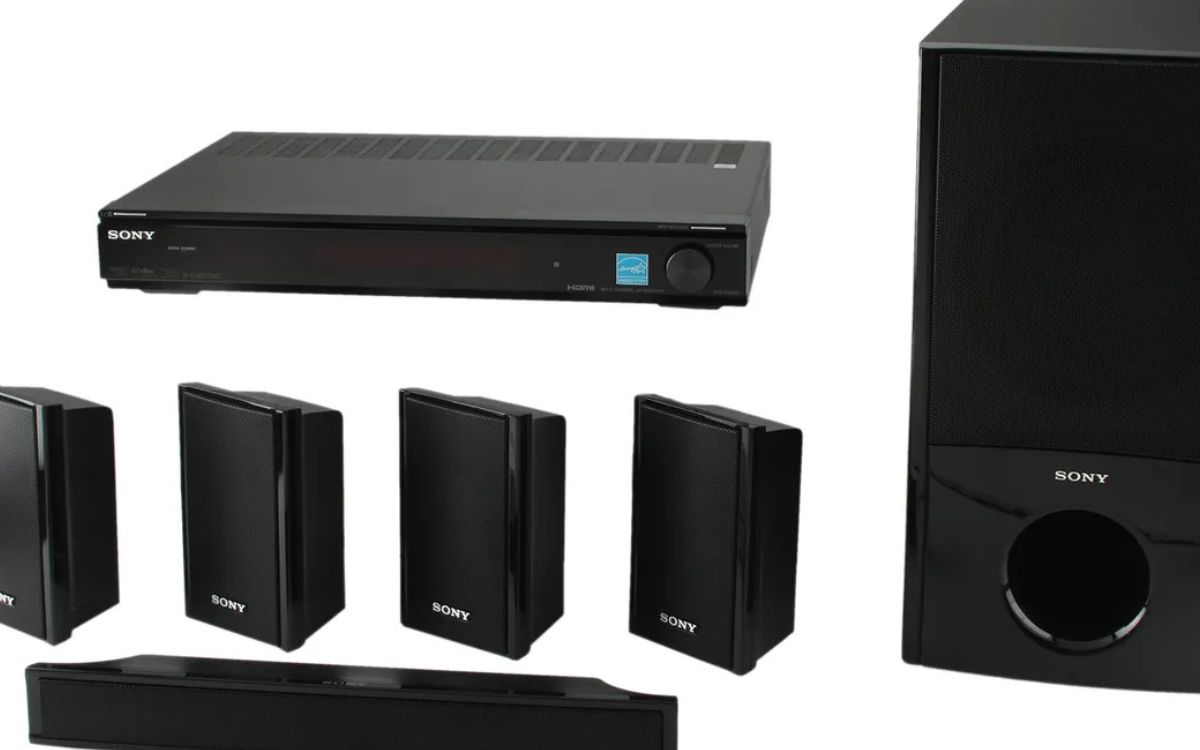
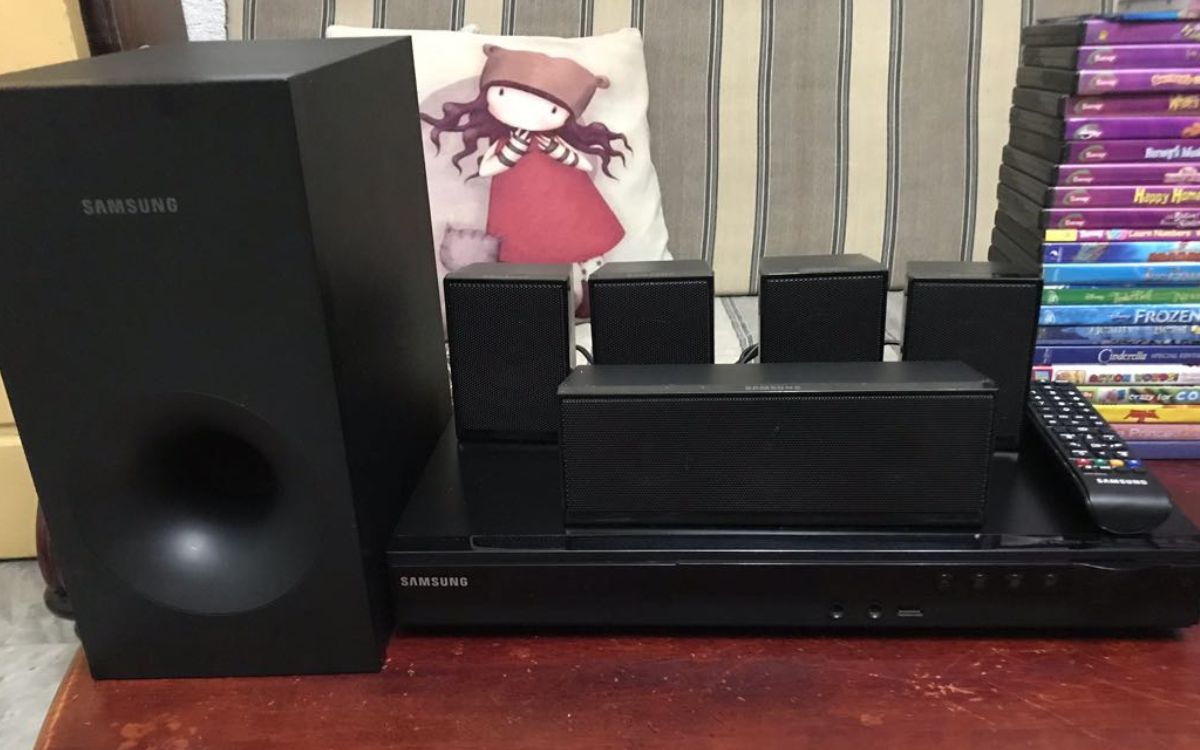
- A Yamaha surround sound system: This includes the main receiver, speakers, and subwoofer. Make sure you have all the components of your specific surround sound system.
- A TV: Ensure that your TV has the necessary audio output options, such as HDMI or optical digital audio.
- HDMI cable: If your TV and Yamaha surround sound system support HDMI ARC (Audio Return Channel), this cable will transmit both audio and video signals between the devices. Alternatively, you can use an optical audio cable for audio transmission.
- Audio cables: Depending on the available audio input options on your Yamaha receiver and TV, you may need additional audio cables such as RCA or coaxial cables.
- Remote control: Keep the remote control of your Yamaha surround sound system handy to access the settings and make adjustments during the setup process.
Now that you have gathered all the necessary equipment, you are ready to move on to the next step of the setup process. Make sure to double-check that you have all the required components before proceeding.
Keep in mind that the specific equipment required may vary depending on the model of your Yamaha surround sound system and TV. Always refer to the user manuals for both devices to ensure compatibility and proper setup.
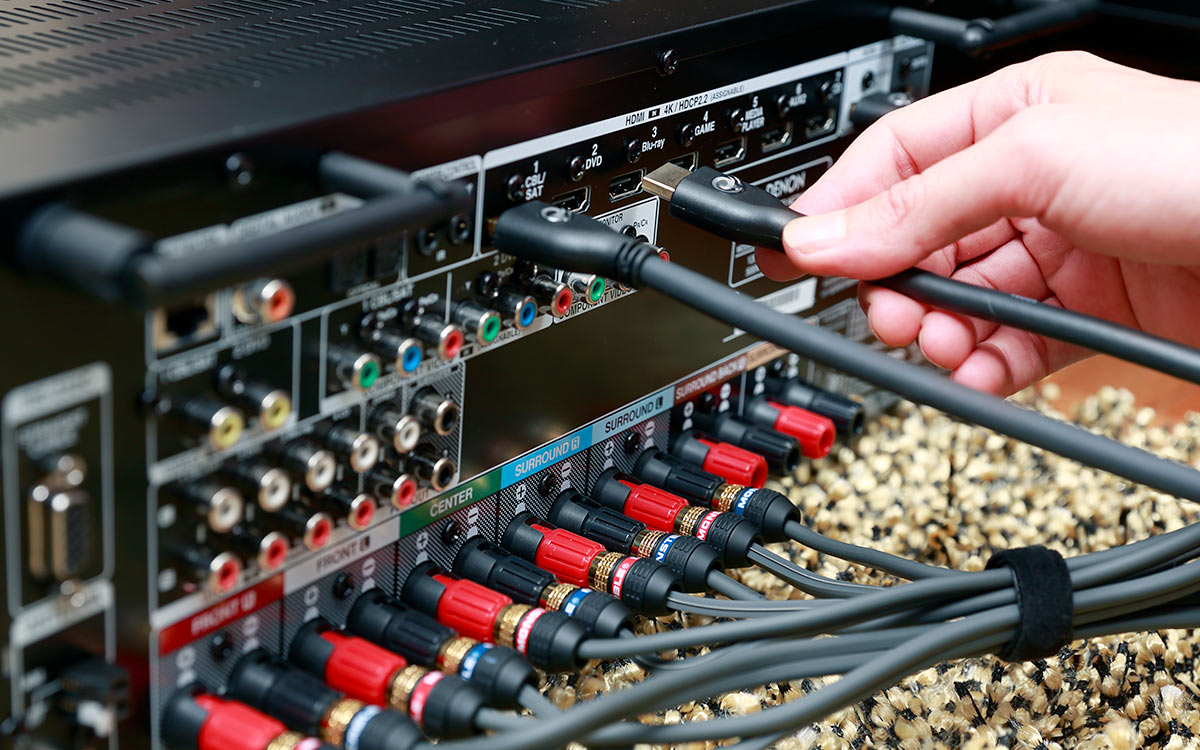
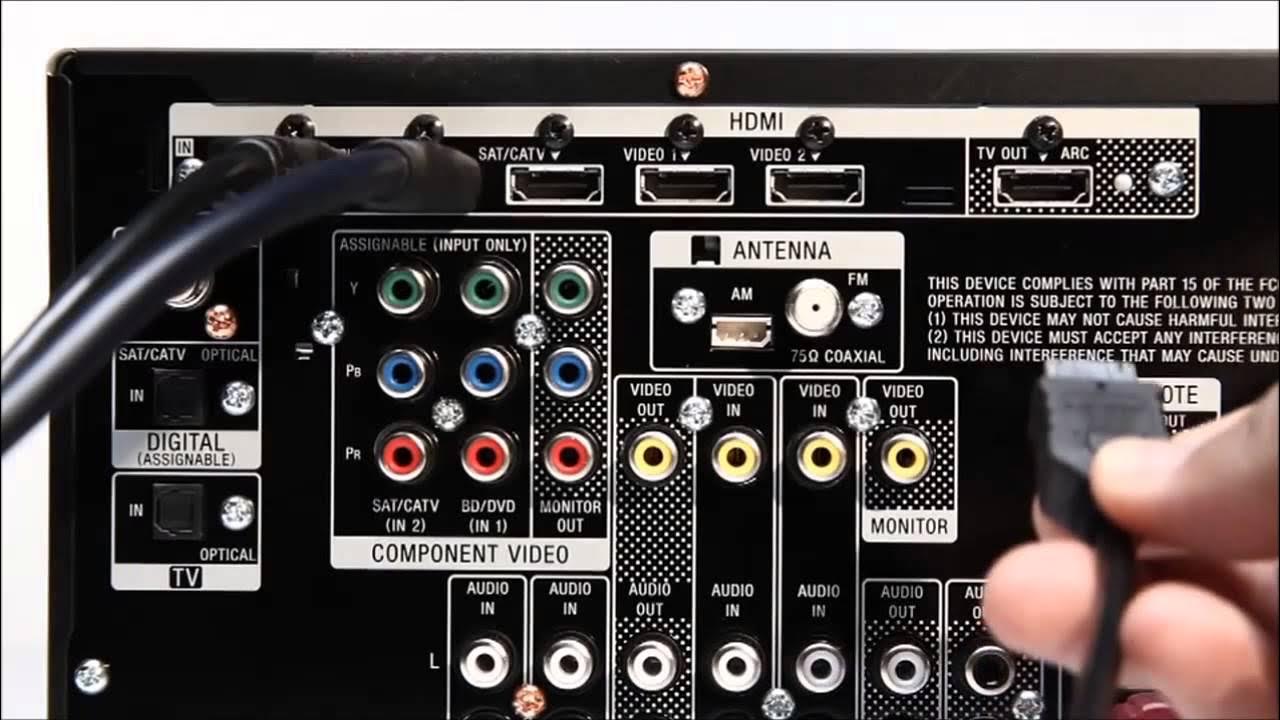
Step 2: Connect the HDMI cable
Now that you have gathered all the necessary equipment, it’s time to connect your Yamaha surround sound system to your TV using an HDMI cable. HDMI (High-Definition Multimedia Interface) provides a high-quality digital connection for both audio and video signals.
Here’s how you can connect the HDMI cable:
- Locate the HDMI ports on both your Yamaha receiver and your TV. These ports are usually labeled as “HDMI 1,” “HDMI 2,” and so on.
- Connect one end of the HDMI cable to the HDMI output port on your Yamaha receiver. The HDMI output is typically labeled as “HDMI Out” or “ARC” (Audio Return Channel).
- Connect the other end of the HDMI cable to an available HDMI input port on your TV. It is recommended to use the HDMI ARC input on your TV if available, as it allows for two-way audio transmission.
- Ensure that both ends of the HDMI cable are securely connected to the respective ports.
Once the HDMI cable is properly connected, the audio and video signals from your TV will be transmitted to your Yamaha surround sound system. This allows for a seamless integration of the audio output from your TV with the powerful sound of the surround sound speakers.
If your TV and Yamaha receiver do not have an HDMI ARC option, you can use an optical audio cable instead. Connect one end of the optical cable to the optical audio output on your TV and the other end to the corresponding optical audio input on your Yamaha receiver.
Now that you have successfully connected the HDMI cable, it’s time to move on to the next step and connect the audio cables between your TV and Yamaha surround sound system.
Step 3: Connect the audio cables
Now that the HDMI cable is connected, it’s time to establish the audio connection between your TV and Yamaha surround sound system. This step ensures that the audio from your TV is routed to the speakers of your surround sound system, providing an immersive audio experience.
Here’s how you can connect the audio cables:
- Check the available audio output options on your TV. Common options include RCA, 3.5mm headphone jack, and optical digital audio.
- Choose the appropriate audio output option on your TV based on the available input options on your Yamaha receiver. For example, if your Yamaha receiver has RCA audio inputs, you can use an RCA audio cable.
- Connect one end of the audio cable to the audio output port on your TV. If you are using an RCA cable, ensure that the red and white connectors are inserted into the corresponding red and white audio output jacks on your TV.
- Connect the other end of the audio cable to the corresponding audio input ports on your Yamaha receiver. Again, if you are using an RCA cable, insert the red and white connectors into the matching red and white audio input jacks on your receiver.
- Ensure that all connections are secure and tight to prevent any audio interference or loss of signal.
By properly connecting the audio cables, you establish the audio connection between your TV and Yamaha surround sound system. This allows the audio from your TV to be amplified and played through the speakers of your surround sound system, enhancing the overall audio experience.
It’s important to note that the specific audio cable and connection options may vary depending on the available inputs and outputs on your TV and Yamaha receiver. Always refer to the user manuals of both devices for detailed instructions and recommendations.
Now that the audio cables are connected, it’s time to move on to the next step and configure the audio settings on your TV.
Step 4: Configure the audio settings on the TV
Now that you have made the necessary physical connections between your TV and Yamaha surround sound system, it’s time to configure the audio settings on your TV. By adjusting these settings, you can ensure that the audio is correctly routed to your surround sound system and optimized for the best sound quality.
Follow these steps to configure the audio settings on your TV:
- Turn on your TV and navigate to the settings menu. The location of the audio settings may vary depending on the make and model of your TV.
- Look for an option related to audio or sound settings. This can usually be found under the “Settings” or “Sound” menu.
- Choose the audio output option. Select the option that corresponds to the audio connection you have made between your TV and Yamaha surround sound system, such as “HDMI” or “Optical.”
- Enable the audio output to external speakers. Ensure that the audio output is set to “External Speakers” or “Audio System” to route the sound to your Yamaha surround sound system.
- Depending on your TV’s settings, you may have additional audio options to adjust, such as sound modes, equalizer settings, or audio delay. Customize these settings according to your preferences and the capabilities of your surround sound system.
By correctly configuring the audio settings on your TV, you ensure that the audio signal is sent to your Yamaha surround sound system and optimized for the best sound experience. Once you have made the necessary adjustments, you can proceed to the next step and configure the audio settings on your Yamaha surround sound system.
It’s worth mentioning that the specific audio settings and menu options may slightly differ based on the brand and model of your TV. Refer to the TV’s user manual for detailed instructions related to audio settings and options.
Once you have configured the audio settings on your TV, you can move on to the next step and adjust the audio settings on your Yamaha surround sound system to complete the setup.
Step 5: Configure the audio settings on the Yamaha surround sound system
After configuring the audio settings on your TV, the next step is to fine-tune the audio settings on your Yamaha surround sound system. By adjusting these settings, you can optimize the sound output and customize the audio experience to your preference.
Follow these steps to configure the audio settings on your Yamaha surround sound system:
- Turn on your Yamaha surround sound system and access the settings menu. This can usually be done using the remote control that came with your system.
- Navigate to the audio or sound settings. The specific location of these settings may vary depending on the model of your Yamaha receiver.
- Set the audio input. Choose the input source that corresponds to the connection you made with your TV, such as “HDMI” or “Optical.”
- Choose the appropriate audio mode. Yamaha surround sound systems offer various audio modes, such as Stereo, Dolby Surround, DTS Neural:X, and more. Select the mode that suits your audio content and preference.
- Adjust the speaker levels. Use the receiver’s built-in speaker level calibration system to ensure that the audio is evenly distributed among all the speakers in your surround sound system. This will help create a balanced and immersive soundstage.
- Customize the sound settings. Depending on your Yamaha receiver model, you may have additional audio settings, such as tone controls, equalizer settings, or surround sound presets. Experiment with these settings to achieve the desired sound quality.
By configuring the audio settings on your Yamaha surround sound system, you can optimize the sound output to match your audio content and personal preference. Take your time to explore the different settings and find the combination that works best for your setup.
Refer to the user manual of your specific Yamaha surround sound system for detailed instructions on accessing and adjusting the audio settings. The manual will provide in-depth information on the specific features and capabilities of your particular model.
Once you have completed the configuration of the audio settings on your Yamaha surround sound system, you are ready to move on to the final step of testing the setup and making any necessary adjustments.
Step 6: Test the setup and make adjustments if needed
With your Yamaha surround sound system and TV properly connected and the audio settings configured, it’s time to test the setup and make any necessary adjustments. Testing the setup will ensure that everything is working as intended and allow you to fine-tune the audio performance for the best experience.
Follow these steps to test the setup and make adjustments if needed:
- Play a variety of audio and video content on your TV, such as movies, music, and games. This will allow you to evaluate the sound output and performance of your Yamaha surround sound system.
- Listen to the audio output from each speaker in your surround sound system. Pay attention to the clarity, balance, and positioning of the sound. Adjust the speaker levels or positioning if necessary to achieve the desired soundstage.
- Check for any audio syncing issues. If you notice a delay between the audio and video, adjust the audio delay settings on your Yamaha receiver or TV to synchronize the sound.
- Experiment with different audio modes and settings on your Yamaha surround sound system to find the one that suits your content and preference. Some audio modes may work better for movies, while others may enhance music or gaming experiences.
- Make note of any specific adjustments or improvements you’d like to make. This could include adjusting the equalizer settings, experimenting with different surround sound presets, or considering additional speakers or accessories to enhance the audio performance.
Testing the setup allows you to identify any issues or areas for improvement. By making adjustments based on your observations, you can further enhance the sound quality and customize the audio experience to your liking.
Remember, the optimal audio settings may vary depending on your room acoustics, personal preferences, and the specific capabilities of your Yamaha surround sound system. Take the time to experiment and fine-tune the settings until you achieve the desired audio performance.
By following these steps and testing the setup, you have successfully connected and configured your Yamaha surround sound system to your TV. Enjoy the immersive audio experience and indulge in the rich, dynamic sound that complements your visual content.
Feel free to revisit the settings and make further adjustments whenever necessary to optimize your audio experience for different types of content.
Now that you have completed the setup process and tested the audio, you are ready to enjoy your Yamaha surround sound system to its fullest potential. Sit back, relax, and immerse yourself in the captivating sound that brings your entertainment to life!
Conclusion
Congratulations! You have successfully learned how to hook up a Yamaha surround sound system to your TV. By following the step-by-step process outlined in this guide, you have created a setup that delivers immersive and high-quality audio to complement your visual content.
A Yamaha surround sound system offers a powerful and captivating audio experience, whether you’re watching movies, playing games, or enjoying your favorite music. The combination of advanced technologies, impressive speaker performance, and easy connectivity options makes Yamaha a trusted choice for audio enthusiasts.
Remember, during the setup process, it’s important to gather the necessary equipment, connect the HDMI and audio cables, and configure the audio settings on both your TV and Yamaha surround sound system. Testing the setup and making adjustments as needed will ensure optimal sound performance and allow you to personalize your audio experience.
As you enjoy your Yamaha surround sound system, don’t forget to refer to the user manuals for detailed instructions specific to your model. The manuals can provide additional insights and help you fully explore the features and capabilities of your system.
Whether you’re catching up on the latest blockbuster, immersing yourself in a gaming adventure, or simply enjoying your favorite music, the Yamaha surround sound system will elevate your audio experience to new heights. Experience every moment with intensity, clarity, and depth, just as the creators intended.
Now, it’s time to sit back, relax, and immerse yourself in the captivating soundscapes that only a Yamaha surround sound system can deliver. Enjoy the journey as the audio envelopes you, bringing your entertainment to life in the comfort of your own home.
Thank you for choosing Yamaha, and we hope you have many unforgettable audio experiences ahead!