Home>Production & Technology>Audio Interface>How To Use Mixer With Audio Interface

Audio Interface
How To Use Mixer With Audio Interface
Modified: February 15, 2024
Learn how to effectively use a mixer with an audio interface to enhance your sound quality and optimize your recording setup. Boost your audio performance with this comprehensive guide.
(Many of the links in this article redirect to a specific reviewed product. Your purchase of these products through affiliate links helps to generate commission for AudioLover.com, at no extra cost. Learn more)
Table of Contents
- Introduction
- What is an audio interface?
- What is a mixer?
- Why use a mixer with an audio interface?
- Setting up your mixer and audio interface
- Connecting your audio sources to the mixer
- Adjusting levels and routing audio
- Using effects and EQ with your mixer and audio interface
- Monitoring and recording with your mixer and audio interface
- Troubleshooting common issues
- Conclusion
Introduction
Welcome to the world of audio interfaces and mixers! If you’re a musician, podcaster, or content creator, having a good understanding of these tools is crucial for achieving professional-level audio recordings. In this article, we will explore the ins and outs of using a mixer with an audio interface, helping you make the most out of your setup.
An audio interface acts as the bridge between your computer and external audio equipment, allowing you to record and playback audio with high fidelity. It typically connects to your computer via USB or Thunderbolt and provides you with inputs and outputs for connecting microphones, instruments, and other audio sources.
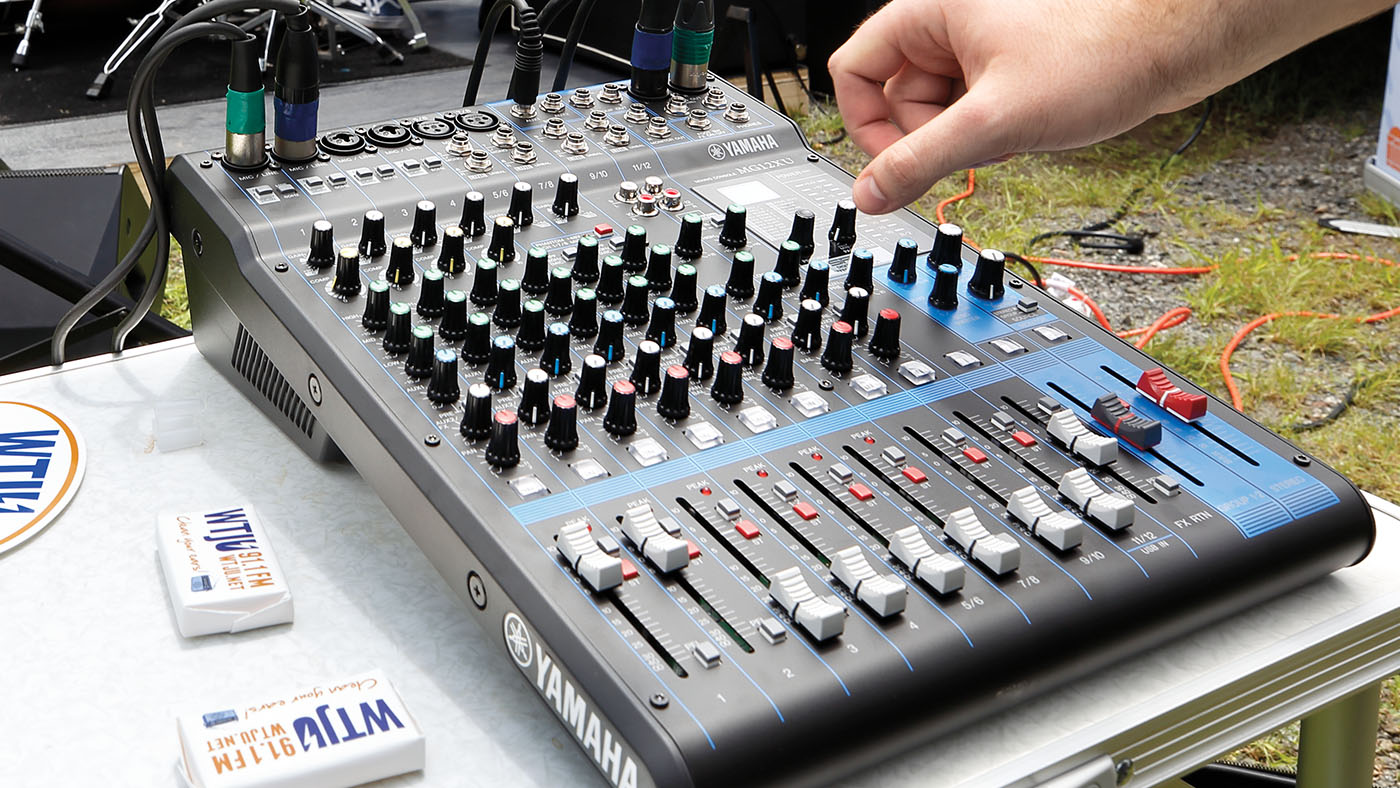
A mixer, on the other hand, is a device that allows you to control and manipulate multiple audio sources simultaneously. It provides various controls such as volume sliders, EQ knobs, and effects options, giving you the ability to shape and blend your audio signals.
Now, you might be wondering why you would need to use a mixer with an audio interface. The answer lies in the versatility and flexibility that a mixer brings to your setup. While audio interfaces offer a limited number of inputs and outputs, a mixer allows you to connect and control a larger number of audio sources. This can be incredibly useful if you work with multiple microphones, instruments, or if you need to mix audio from different sources, such as a live performance or podcast recording.
In the next sections, we will explore how to set up your mixer and audio interface, connect your audio sources, adjust levels and route audio, utilize effects and EQ, monitor and record, and troubleshoot common issues. By the end of this article, you will have a solid understanding of how to use a mixer with an audio interface and be well on your way to creating professional-quality audio recordings.
What is an audio interface?
An audio interface is a device that connects your computer to external audio equipment, allowing you to record and playback audio with high quality and low latency. It acts as a bridge between your computer and your audio sources, such as microphones, instruments, and other audio devices.
Audio interfaces come in various forms and sizes, ranging from compact portable units to rack-mounted interfaces for professional studios. They typically connect to your computer via USB, Thunderbolt, or Firewire, and provide you with inputs and outputs for connecting audio sources.
One of the primary functions of an audio interface is to convert analog audio signals from your microphones and instruments into digital data that your computer can process. It contains high-quality analog-to-digital converters (ADCs) for this purpose, ensuring that the sound is accurately captured and preserved during recording.
Alongside ADCs, audio interfaces also feature digital-to-analog converters (DACs), which convert digital audio playback signals from your computer into analog signals that can be sent to speakers or headphones. This ensures that you can listen to your recordings or music in high fidelity.
In addition to converting audio signals, audio interfaces typically offer a range of features to enhance your recording experience. This may include preamps, which amplify weak microphone signals to line level, phantom power for condenser microphones, headphone outputs for monitoring, and software control panels for adjusting settings.
When choosing an audio interface, consider the number and type of inputs and outputs you require, the audio quality you desire, and the connectivity options that best suit your setup. Higher-end interfaces often offer better sound quality, more inputs and outputs, and advanced features, but come at a higher price point.
Overall, an audio interface is an essential tool for any musician, podcaster, or content creator who wants to achieve professional-quality audio recordings. It provides the necessary connectivity and conversion capabilities to ensure that your sound is captured and reproduced accurately, allowing you to bring your creative vision to life.
What is a mixer?
A mixer, also known as a mixing console or mixing desk, is a device that allows you to control and manipulate multiple audio sources simultaneously. It gives you the ability to adjust the levels, balance, and tone of different audio signals, and route them to various outputs.
At its core, a mixer is designed to blend audio signals together, whether from microphones, instruments, or other audio sources, into a coherent mix. It usually consists of channels and controls for each input source, along with a main output section for monitoring or recording.
A typical mixer contains various controls and features that help you shape and manipulate your audio. This includes volume sliders or faders, which allow you to adjust the levels of each input source. By raising or lowering the faders, you can control the relative loudness of different audio elements in the mix. Additionally, mixers often provide pan knobs, which let you position audio sources in the stereo field, creating a sense of space and width.
Another important feature of mixers is EQ (equalization). Each channel on a mixer usually has its own EQ section, which allows you to adjust the frequency response of the audio signal. This helps you shape the tonal balance of individual sources and eliminate unwanted frequencies or enhance desired ones.
Many mixers also offer built-in effects processors, such as reverb, chorus, or delay, which add spatial and time-based effects to your audio. These effects can enhance the sound and create a more immersive listening experience.
In addition to these features, mixers often provide routing options, allowing you to send audio signals to different destinations. This can include sending signals to auxiliary sends for adding effects, creating monitor mixes for performers, or routing to recording devices like audio interfaces or DAWs (Digital Audio Workstations).
Mixers come in various sizes and configurations, from compact analog mixers with just a few channels to large digital consoles with dozens of channels and advanced processing capabilities. The choice of mixer depends on your specific needs and the complexity of your audio setup.
Overall, a mixer is an essential tool for audio professionals, live sound engineers, and anyone who needs to mix multiple audio sources together. It allows you to control and shape your audio signals, giving you the ability to create professional-sounding mixes that capture the true essence of your audio sources.
Why use a mixer with an audio interface?
While audio interfaces serve as the primary connection between your computer and external audio sources, using a mixer in conjunction with an audio interface can greatly enhance your recording and production capabilities. Here are some reasons why you might consider using a mixer with your audio interface:
- Expanded Input and Output Options: Audio interfaces typically offer a limited number of inputs and outputs. By connecting a mixer to your audio interface, you can expand your input capacity, allowing you to connect more microphones, instruments, and other audio sources. This is especially useful for recording bands, ensembles, or situations where you need to capture multiple audio sources simultaneously.
- Flexibility in Signal Routing: A mixer gives you greater control over how your audio signals are routed and mixed. You can adjust the relative levels, pan positions, and EQ settings for each input source individually, giving you the ability to create a balanced and cohesive mix. This flexibility is particularly valuable in live sound scenarios or when recording multiple audio sources with different sonic characteristics.
- Efficient Workflow and Hands-On Control: Using a mixer alongside your audio interface provides a tactile and intuitive way to control your audio signals. With physical knobs, faders, and switches, you can make real-time adjustments to your mix, allowing for a faster and more efficient workflow. This hands-on control can also be beneficial for live performances or podcast recordings, where quick adjustments and precise monitoring are necessary.
- Access to DSP Effects and Processing: Many modern mixers come equipped with built-in digital signal processing (DSP) effects, such as reverb, delay, compression, and EQ. By using a mixer with your audio interface, you can take advantage of these onboard effects, allowing you to add depth, ambience, and sonic enhancement to your recordings. This eliminates the need for external processors and simplifies your signal chain.
- Enhanced Monitoring Options: A mixer enables you to create custom monitor mixes for performers or recording artists. By sending individual audio sources to different channels on the mixer, you can tailor the headphone or monitor mix to suit each musician’s preferences. This provides greater control over the monitoring experience, ensuring optimal performance and comfort.
By using a mixer in conjunction with your audio interface, you can unlock a range of creative possibilities and achieve professional-quality audio recordings. The expanded input options, flexibility in signal routing, efficient workflow, access to DSP effects, and enhanced monitoring capabilities all contribute to a more polished and cohesive sound. Whether you’re a musician, podcaster, or content creator, integrating a mixer into your audio setup can take your productions to the next level.
Setting up your mixer and audio interface
Setting up your mixer and audio interface properly is crucial for ensuring seamless integration and optimal performance. Here are the steps to guide you through the process:
- Choose an appropriate workspace: Select a suitable location for your mixer and audio interface setup. Ensure you have enough space for both devices, as well as easy access to power outlets and audio cables.
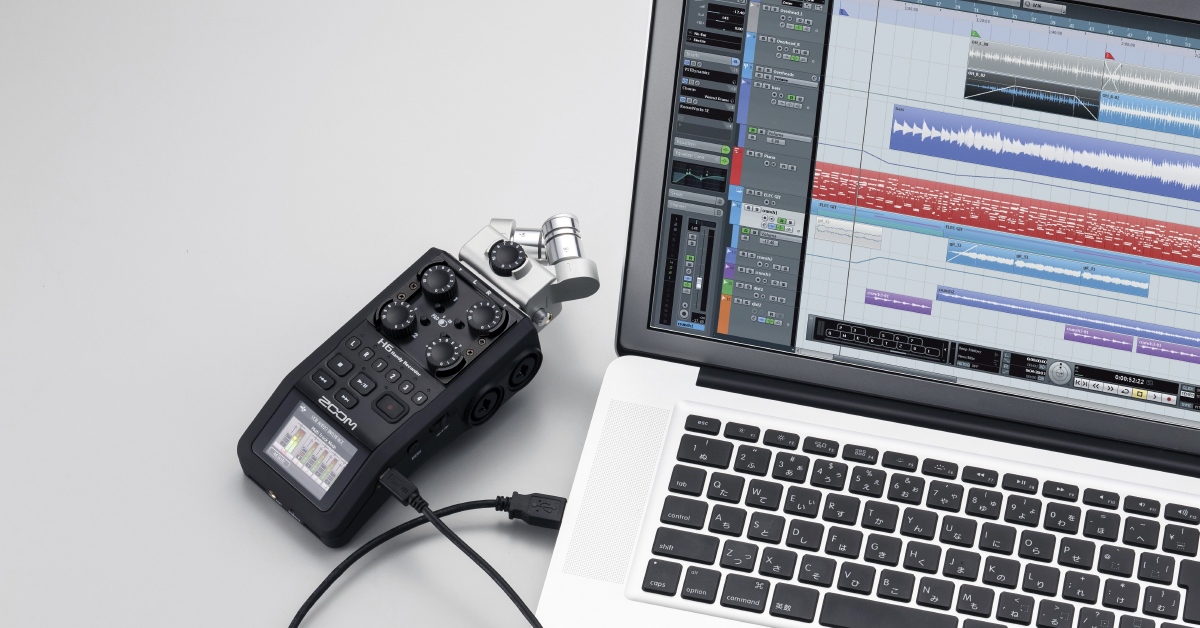
- Connect your audio interface to your computer: Using the appropriate cable (such as USB or Thunderbolt), connect your audio interface to your computer. Make sure the interface is powered on and recognized by your computer.
- Connect your mixer to your audio interface: Connect the outputs of your audio interface to the inputs on your mixer. Use balanced audio cables (XLR, TRS, or other appropriate cables) to ensure the best audio quality and minimize noise interference.
- Power on your mixer: Plug in your mixer and turn it on. Some mixers may require an external power supply, while others can be powered via USB or from the audio interface itself.
- Configure audio settings: Open your computer’s audio settings and ensure that the audio interface is selected as the input and output device. Adjust sample rate and buffer settings as needed for optimal performance.
- Set levels and gain staging: Start by setting the levels on your mixer and audio interface at unity (0 dB). Use the gain controls on your mixer to ensure proper signal levels. Avoid overloading the inputs or outputs, as this can result in distorted or clipped audio.
- Test audio signal flow: Play audio from your computer and monitor the output from your mixer. Verify that the audio signal is passing through your mixer and being properly routed to the outputs. Adjust the faders, pan knobs, and other controls on your mixer to confirm that signals are being mixed and balanced correctly.
- Test audio sources: Connect your microphones or instruments to the inputs on your mixer. Verify that audio signals from each source are being properly picked up and routed through the mixer. Make any necessary adjustments to levels, EQ, and effects settings on the mixer to achieve the desired sound.
- Monitor and listen: Connect your headphones or speakers to the appropriate outputs on your audio interface or mixer. Test the sound to ensure proper monitoring. Adjust the headphone or monitor levels on the mixer for comfortable listening.
It’s important to consult the user manuals of your specific mixer and audio interface for detailed instructions on connection options, control settings, and any extra features they may offer. Additionally, be sure to use high-quality audio cables and follow best practices to minimize audio interference and maximize sound quality.
By following these steps and taking the time to set up your mixer and audio interface properly, you can create a solid foundation for your audio production setup and start capturing professional-quality sound.
Connecting your audio sources to the mixer
Connecting your audio sources to the mixer is an essential step in creating a well-balanced and versatile audio setup. Here’s how to connect your microphones, instruments, and other audio sources to your mixer:
- Identify your audio sources: Determine the types and number of audio sources you want to connect to your mixer. This could include microphones, instruments, playback devices, or other audio equipment.
- Select appropriate cables: Use the appropriate cables for each audio source. Microphones typically use XLR cables, while instruments like guitars may use TS (mono) or TRS (stereo) cables. Ensure that the cables are high-quality to minimize noise interference.
- Connect the microphones: Plug the XLR cables from your microphones into the XLR input channels on the mixer. Make sure to connect them to the corresponding channel inputs and engage any necessary features like phantom power for condenser microphones.
- Connect instruments: For instruments such as keyboards, guitars, or electronic drums, use TS or TRS cables to connect them to the appropriate line or instrument input channels on the mixer. Some mixers also offer dedicated DI (Direct Injection) inputs for connecting instruments with a high-impedance output.
- Connect playback devices: If you want to play audio from external devices like smartphones or laptops, connect them to the mixer using RCA, TRS, or other audio cables. Use the auxiliary inputs or line inputs on the mixer to receive the audio signals from these playback devices.
- Consider using direct outputs: Some mixers offer direct outputs for each channel, allowing you to send individual audio signals to external recording devices, audio interfaces, or other equipment. If needed, connect the direct outputs of specific channels to the desired destination using appropriate cables.
- Utilize additional inputs and outputs: Depending on your mixer’s capabilities, you may have additional inputs and outputs such as insert points, group/auxiliary outputs, or effects loops. These can be utilized for specific purposes like adding external effects processors or routing signals to different destinations.
Once you have connected your audio sources to the mixer, it’s important to double-check the connections to ensure proper signal flow. You should also verify that each audio channel on the mixer corresponds to the correct audio source by monitoring the audio levels and making any necessary adjustments.
Remember to consult the user manual of your specific mixer for any unique connection options or specific instructions related to audio source connectivity. Taking the time to properly connect your audio sources to the mixer will enable you to harness the full potential of your setup and achieve professional-quality sound reproduction.
Adjusting levels and routing audio
Once you have connected your audio sources to the mixer, it’s time to adjust the levels and route the audio signals to achieve a balanced and polished mix. Here are the key steps involved in adjusting levels and routing audio on your mixer:
- Set the initial levels: Start by setting the initial levels for each audio channel on the mixer. Begin with all the faders at unity (0 dB) and gradually raise the faders of the individual channels corresponding to your audio sources. Adjust the levels until you achieve a balanced mix, ensuring that no channel is too loud or too soft.
- Use solo and mute buttons: Solo buttons allow you to isolate individual channels and listen to them exclusively, helping you pinpoint any issues in the audio signal. Mute buttons, on the other hand, temporarily silence specific audio sources. Utilize these buttons to fine-tune and troubleshoot your mix as needed.
- Make use of panning: Pan controls allow you to position audio sources in the stereo field. Adjusting the pan knobs can create a sense of space and width in your mix. Pan sources panned to the left will primarily be heard on the left side, while those panned to the right will be heard on the right side. Center panning results in equal distribution of the audio signal between the left and right speakers.
- Apply EQ adjustments: Each channel on the mixer typically has an EQ section. Use the EQ controls to shape the tone of your audio signals. For instance, you can boost or cut specific frequencies to enhance clarity or remove unwanted noise. Experiment with the EQ settings to achieve a pleasing balance and tonal character for each audio source.
- Route audio to mix busses: Mix busses allow you to group multiple audio sources together for collective control. By routing channels to specific buses, you can create submixes and apply overall adjustments to the grouped sources. This can be useful for creating separate mixes for different purposes or applying effects to specific groups of audio sources.
- Send audio to effects or auxiliary sends: Many mixers offer auxiliary sends or effects loops that allow you to route audio to external effects processors or apply additional effects within the mixer itself. Use these sends to add reverbs, delays, or other desired effects to specific channels or submixes.
- Monitor your mix: Use the mixer’s headphone output or monitor outputs to listen to your mix. Pay attention to the overall balance, dynamics, and clarity of the audio. Make adjustments as necessary, taking into account any feedback from performers or collaborators.
- Test the mix through different outputs: If your mixer offers multiple output options, such as main outputs, sub-group outputs, or direct outputs, test the mix through each of these outputs to ensure consistent sound across different destinations.
Adjusting levels and routing audio is an iterative process that requires careful listening and experimentation. Continuously monitor the mix and make incremental adjustments until you achieve the desired balance and sonic characteristics. Be mindful of clipping or distortion, and make use of the mixer’s meters to ensure that you’re staying within appropriate levels.
Remember to consult the user manual of your specific mixer for detailed information on the control layout and specific routing options available. With practice and experience, you’ll become more proficient at adjusting levels and routing audio, resulting in a refined and professional-sounding mix.
Using effects and EQ with your mixer and audio interface
One of the powerful features of a mixer is the ability to apply effects and EQ to your audio signals, enhancing their quality and adding creative elements to your mix. Here’s how you can effectively use effects and EQ with your mixer and audio interface:
Effects:
1. Internal Effects: Many mixers come with built-in digital signal processing (DSP) effects like reverb, delay, chorus, or compression. These effects can add depth, space, and character to your audio. Engage the desired effect on the appropriate channel or bus by selecting the effect type and adjusting its parameters. Use the send control to determine how much of the audio signal is sent to the effect.
2. External Effects: If you have external effects processors, such as guitar pedals or rack-mounted processors, connect them to your mixer using the auxiliary sends or effects loops. Route specific audio channels or groups to these external effects through the send controls, adjusting the level and blend as desired. This allows you to apply a wider range of effects tailored to your preferences and expand your sonic possibilities.
3. Automation and Control: Some mixers offer automation capabilities, allowing you to program and control the effects in a precise and automated manner. This can be helpful for live performances or complex mixes, where changes in effects parameters need to be synchronized with specific sections or timings of the audio.
EQ (Equalization):
1. Channel EQ: Every channel on the mixer usually features an EQ section, allowing you to shape the tonal characteristics of individual audio sources. Use the EQ controls to boost or cut specific frequencies, adjust the bass, midrange, and treble response, and deal with any frequency anomalies or unwanted noise. Experiment with different EQ settings to achieve a balanced and pleasing sound for each audio source.
2. Master EQ: Some mixers provide a master EQ section that allows you to apply equalization to the overall mix. This can be useful for making slight adjustments to the entire mix or compensating for the acoustic characteristics of the listening environment. Use the master EQ to fine-tune the tonal balance and ensure that your mix translates well across different playback systems.
3. Feedback Suppression: Many mixers offer feedback suppression features that automatically detect and suppress feedback frequencies to prevent audio feedback during live sound situations. These functions can be crucial for maintaining a clean and stable audio performance during events or performances in challenging acoustic environments.
When using effects and EQ, it’s important to exercise restraint and avoid over-processing the audio. Less can often be more, and subtle adjustments can have a significant impact on the final sound. Keep in mind the context and purpose of your mix, and apply effects and EQ tastefully to enhance the audio rather than overshadow it.
Consult the user manual of your specific mixer for detailed information on the available effects and EQ options, and familiarize yourself with the different parameters and controls. With practice and experimentation, you’ll be able to use effects and EQ effectively to elevate the quality and creativity of your audio mix.
Monitoring and recording with your mixer and audio interface
Monitoring and recording are essential aspects of using a mixer and audio interface setup. Monitoring allows you to listen to your audio in real-time, while recording captures and stores your audio for future use. Here’s how you can effectively monitor and record with your mixer and audio interface:
Monitoring:
1. Headphone Monitoring: Connect your headphones to the headphone output on your audio interface or mixer. This allows you to listen to your mix or individual audio sources while recording or during playback. Use the dedicated headphone level control on the mixer to adjust the volume to a comfortable level.
2. Monitor Outputs: If you have studio monitors or external speakers, connect them to the monitor outputs on your audio interface or mixer. This provides a more accurate representation of your mix, allowing you to assess the overall sound quality and make adjustments as needed. Ensure that the monitor levels on the mixer are appropriately set for optimal monitoring.
3. Monitor Mixes: Some mixers offer the ability to create multiple monitor mixes, each with its own unique combination of audio sources. This is particularly useful in live sound situations or recording scenarios where different performers or listeners require personalized mixes. Use the auxiliary send controls on the mixer to adjust the levels of individual audio sources in each monitor mix.
Recording:
1. Connect Recording Devices: If you intend to record your audio, connect your audio interface’s outputs to the inputs of your recording device (e.g., computer, DAW, or standalone recorder) using appropriate cables. Ensure that you select the correct inputs in your recording software or device to capture the desired audio signals from the audio interface.
2. Set Recording Levels: Adjust the input levels on your recording device or software to avoid clipping or distortion. Start by setting the levels on the individual channels of your mixer, ensuring that the audio signals are appropriately balanced and not peaking into the red zone. Fine-tune the recording levels on your recording device to achieve optimal signal-to-noise ratio.
3. Configure Recording Settings: In your recording software, set the sample rate, bit depth, and recording format according to your preferences and project requirements. Consider the file format that provides both high-quality audio and compatibility with your intended distribution platforms.
4. Monitor and Playback: When recording, it’s essential to monitor your audio in real-time to ensure no technical issues or unwanted noise are present. Use the headphone output or monitor speakers connected to your audio interface or mixer to listen to your recording as it happens. After recording, playback the recorded audio to check for any errors or artifacts.
By effectively monitoring and recording with your mixer and audio interface, you can create high-quality recordings and have full control over the sound throughout the production process. Remember to experiment with different monitoring techniques and ensure that your recording settings are optimized for your specific project.
Troubleshooting common issues
While using a mixer and audio interface setup, you may encounter some common issues that can impact your audio quality or hinder your workflow. Here are a few troubleshooting tips to help resolve these issues:
No audio signal:
- Check that all cables are securely connected to the appropriate inputs and outputs of the mixer and audio interface. Loose connections can result in no audio signal.
- Ensure that the volume levels on the mixer, audio interface, and connected devices are turned up and not muted.
- Verify that the audio interface is selected as the input and output device in your computer’s audio settings.
- Try restarting your computer and audio interface to reset any potential software or hardware conflicts.
Audio interference or noise:
- Make sure all audio cables are properly shielded and not placed near power cables or other sources of interference.
- Try using balanced audio cables (XLR, TRS) instead of unbalanced cables (RCA, TS) to reduce noise pickup.
- Check if any nearby electronic devices or appliances are causing interference. Move them away from your audio setup if possible.
- Consider using a power conditioner or surge protector to filter out any noise introduced through the power supply.
Clipping or distorted audio:
- Ensure that input and output levels on both the mixer and audio interface are properly set. Adjust the gain or trim controls on the mixer to avoid overloading the input signals.
- Check if any EQ or effects settings on the mixer are causing excessive boost or distortion. Reset or adjust these settings as needed.
- Verify that the sample rate and bit depth settings on your audio interface and recording software are matching. Mismatched settings can result in audio distortion.
- Consider using a compressor or limiter in your signal chain to prevent excessively high peaks that may lead to clipping.
Latency issues:
- Ensure that you are using the latest drivers and firmware for your audio interface. Updates can often improve performance and reduce latency.
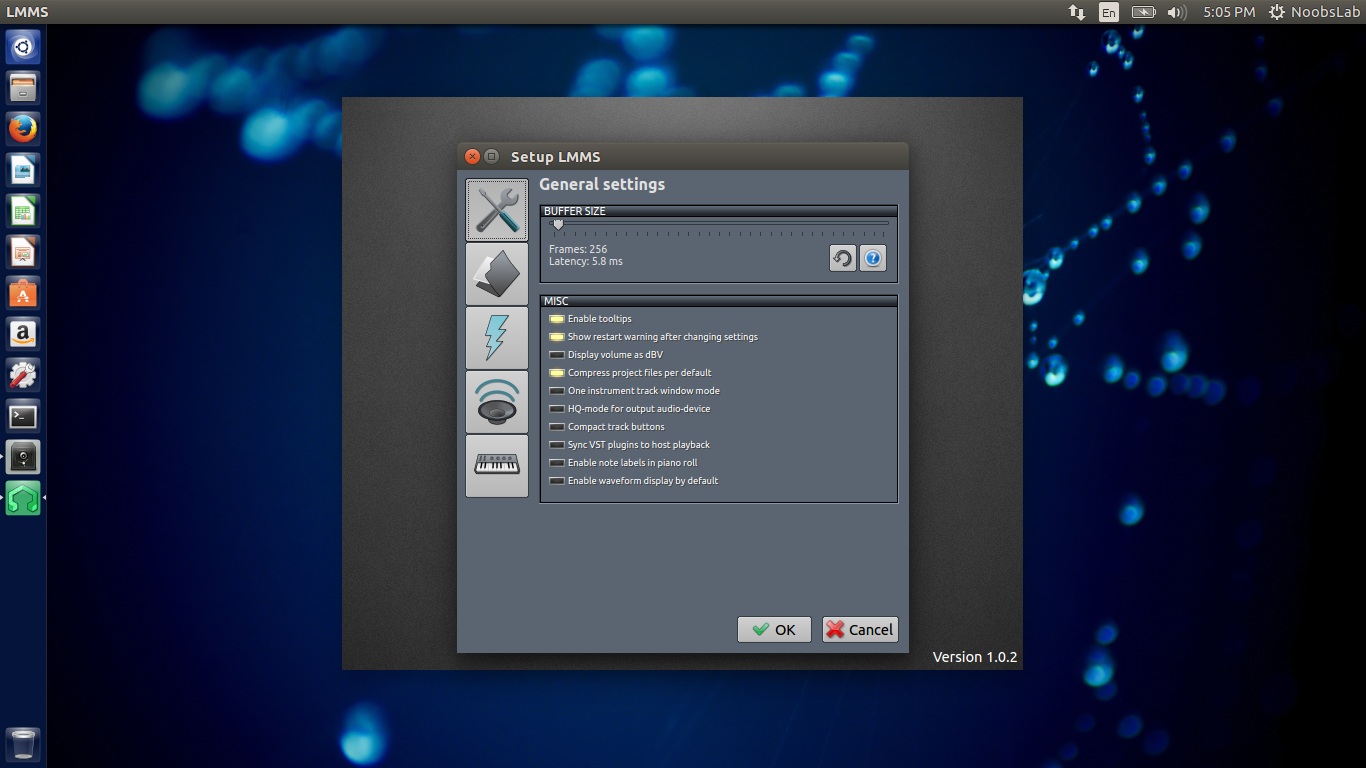
- Adjust the buffer size in your audio interface settings to find a balance between low latency and stability. Lower buffer sizes reduce latency but may put a heavier load on your computer.
- Close any unnecessary applications or processes running in the background of your computer to free up resources for audio processing.
- Consider using a dedicated audio interface with low-latency features for optimal performance.
If you encounter any other issues or the troubleshooting tips provided above do not resolve the problem, consult the user manuals of your specific mixer and audio interface for further assistance. Additionally, manufacturers’ support websites and online forums can be valuable resources for troubleshooting specific issues related to your equipment.
By being aware of these common issues and troubleshooting strategies, you can overcome technical hurdles and ensure a smooth and enjoyable audio production experience with your mixer and audio interface setup.
Conclusion
Congratulations! You now have a solid understanding of how to use a mixer with an audio interface to enhance your audio recording and production capabilities. By combining the functionality of these two essential tools, you can achieve professional-level sound quality and have greater control over your audio sources.
We started by understanding the purpose and functionality of an audio interface, which acts as a bridge between your computer and external audio equipment. We then explored the world of mixers, which allow you to control and manipulate multiple audio sources simultaneously, creating balanced and cohesive mixes.
Using a mixer with an audio interface provides several benefits, including expanded input and output options, flexibility in signal routing, efficient workflow, access to effects and EQ, and enhanced monitoring capabilities. These advantages enable you to unleash your creativity and achieve professional-quality recordings.
We discussed the importance of setting up your mixer and audio interface correctly, ensuring proper connectivity and audio signal flow. Adjusting levels, routing audio, and utilizing effects and EQ were explored in detail, guiding you on how to shape and enhance your audio to achieve the desired sound.
We also covered the significance of monitoring your audio mix and how to effectively record your audio signals with your mixer and audio interface. By monitoring and recording accurately, you can ensure quality control and produce exceptional audio recordings.
Lastly, we provided troubleshooting suggestions for common issues that may arise during the use of a mixer and audio interface setup. These troubleshooting tips will assist you in resolving any technical difficulties and maintaining a smooth workflow.
Remember, practice makes perfect. Experiment with different techniques, monitor the results, and fine-tune as necessary to achieve the desired sound and capture the essence of your audio sources.
With the knowledge and skills you’ve acquired, you’re well-equipped to embark on your audio production journey. Embrace the versatility and creative possibilities of your mixer and audio interface, and let your imagination guide you in creating exceptional audio recordings.

