Home>Production & Technology>Sound Bar>How To Set Up Yamaha Sound Bar
Sound Bar
How To Set Up Yamaha Sound Bar
Modified: January 22, 2024
Learn how to set up your Yamaha Sound Bar and enhance your audio experience at home. Follow our step-by-step guide for a hassle-free installation.
(Many of the links in this article redirect to a specific reviewed product. Your purchase of these products through affiliate links helps to generate commission for AudioLover.com, at no extra cost. Learn more)
Table of Contents
- Introduction
- Step 1: Unboxing the Yamaha Sound Bar
- Step 2: Connecting the Sound Bar to Power
- Step 3: Placing the Sound Bar
- Step 4: Connecting the Sound Bar to the Television
- Step 5: Adjusting Sound Bar Settings
- Step 6: Pairing the Sound Bar with a Bluetooth Device
- Step 7: Troubleshooting Common Issues
- Conclusion
Introduction
Are you looking to enhance your audio experience while watching movies or listening to music? A sound bar is a perfect solution that can transform your living room into a mini theater. And when it comes to sound bars, one brand that stands out is Yamaha. With their reputation for producing high-quality audio equipment, Yamaha sound bars are known for delivering exceptional sound quality and immersive surround sound.
In this article, we will guide you on how to set up your Yamaha sound bar, step by step. Whether you’re a tech enthusiast or a beginner, you can follow these instructions to get your sound bar up and running in no time.
Before we dive into the setup process, it’s important to mention that different Yamaha sound bars may have slightly different configuration options. Therefore, it’s always a good idea to consult the user manual that comes with your specific sound bar model. However, we will provide general guidance that applies to most Yamaha sound bars, so you can have a solid foundation to work with.
So, let’s get started and explore the process of setting up your Yamaha sound bar for an optimized audio experience.
Step 1: Unboxing the Yamaha Sound Bar
The first step in setting up your Yamaha sound bar is unboxing the package. When you receive your sound bar, ensure that you handle the box with care to avoid any damage. Once you have the box in a safe and convenient location, follow these steps:
- Remove any tape or packaging material securing the box.
- Lift the top cover of the box and set it aside.
- Carefully lift the sound bar out of the box.
- Check if you have received all the necessary components. These typically include the sound bar itself, a power cord, a remote control, wall mounting brackets (if applicable), and any additional cables such as HDMI or optical cables.
- Inspect the sound bar for any visible damage. If you notice any defects or physical damage, contact the retailer or Yamaha customer support for assistance.
It’s important to keep the packaging in case you need to return or transport the sound bar in the future. Store it in a safe place where it won’t get damaged or clutter your living space.
Once you have completed these steps, you are ready to move on to the next phase of setting up your Yamaha sound bar: connecting it to power.
Step 2: Connecting the Sound Bar to Power
After unboxing the Yamaha sound bar, the next step is to connect it to a power source. Follow these instructions to ensure a successful power connection:
- Locate the power cord that came with your sound bar. It is usually a detachable cable with a standard power plug.
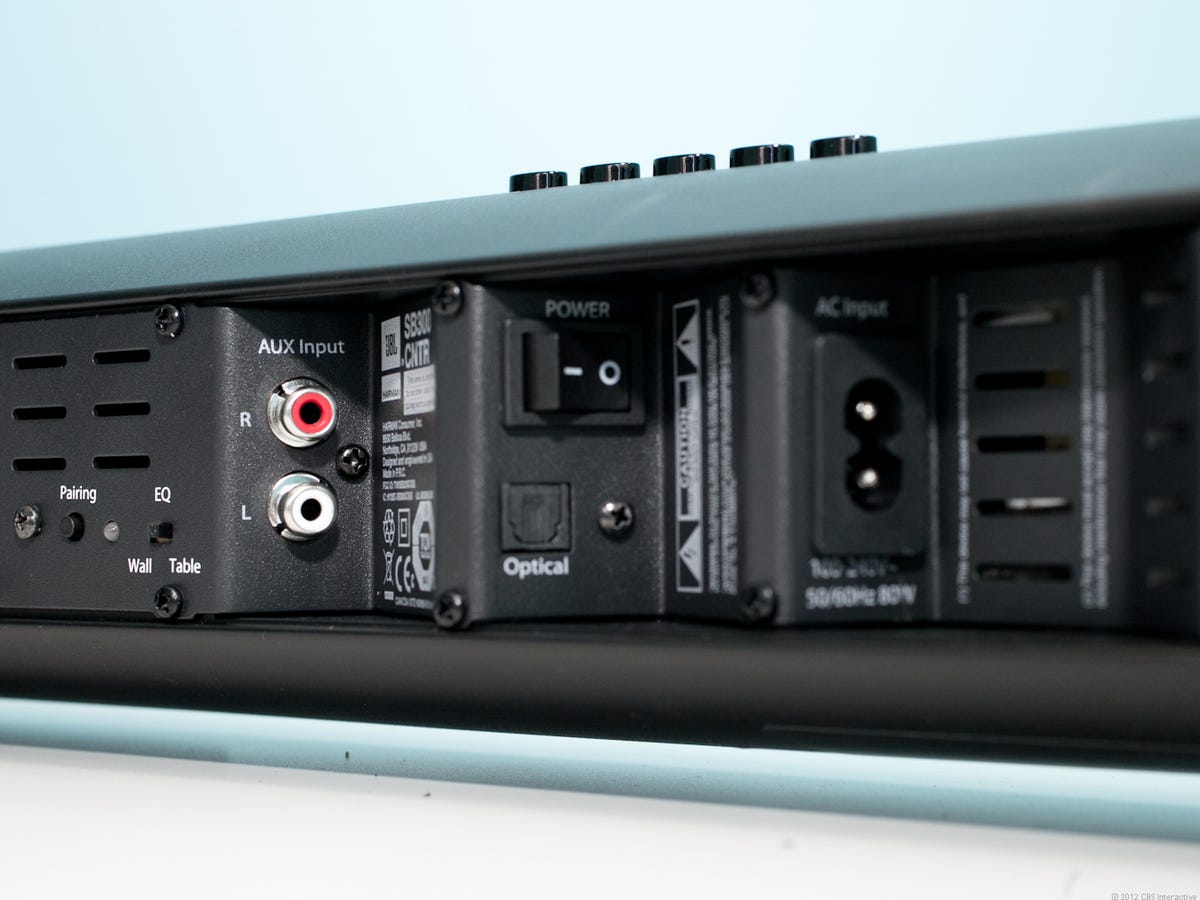
- Identify the power input port on the back of the sound bar. It is typically labeled as “Power” or has a symbol resembling a power cord.
- Insert one end of the power cord into the power input port on the sound bar.
- Plug the other end of the power cord into a wall outlet or a surge protector. Make sure the outlet or surge protector is easily accessible and within reach.
- Ensure that the power cord is securely connected and there are no loose connections.
- Turn on the power by using the power button located on the sound bar or the remote control.
- Check if the sound bar’s LED indicator lights up, indicating that it is receiving power.
It’s important to note that the power requirements may vary depending on the specific model of your Yamaha sound bar. Some sound bars have built-in power supplies, while others may require an external power adapter. Always refer to the user manual for the correct power specifications and follow the manufacturer’s instructions.
Once the sound bar is connected to power, you are ready to proceed to the next step: placing the sound bar in your desired location.
Step 3: Placing the Sound Bar
Now that your Yamaha sound bar is powered on, it’s time to find the perfect spot to place it for optimal audio performance. Follow these guidelines for placing your sound bar:
- Consider the layout of your room: Take into account the size, shape, and furniture arrangement in your room. You want to position the sound bar in a location that ensures the best audio dispersion and coverage.
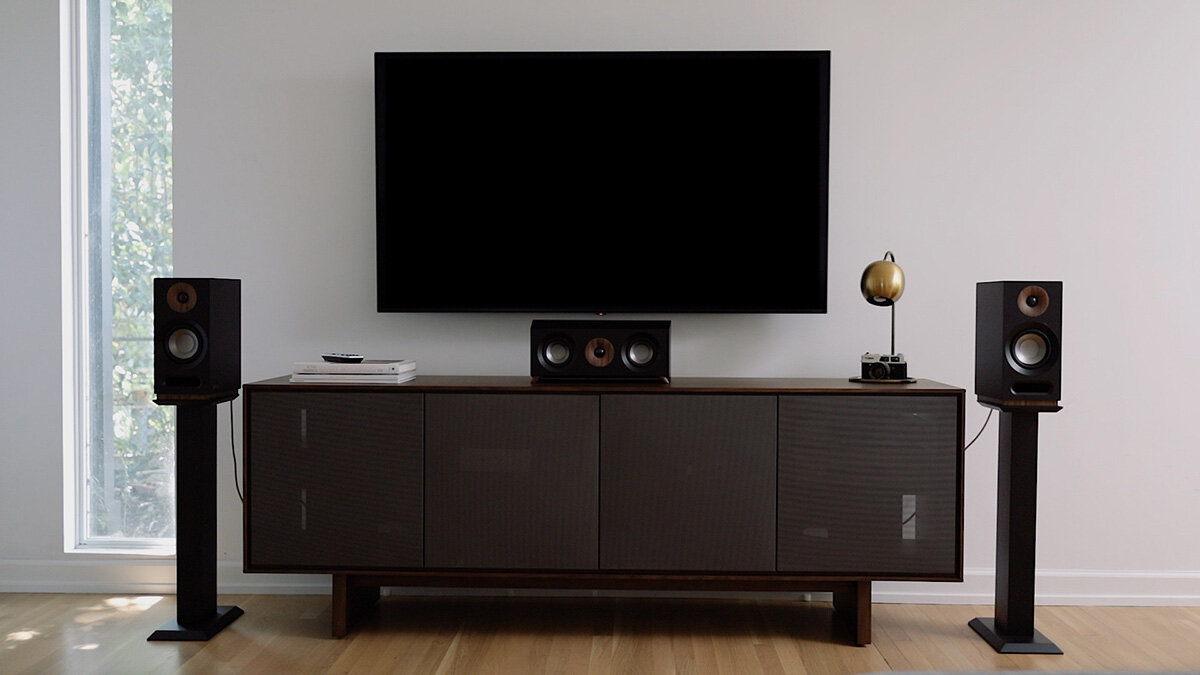
- TV placement: If you have a television, the sound bar is typically placed in front of or below the TV. Ensure that the sound bar does not obstruct the screen or interfere with the infrared sensor of the TV remote.
- Mounting options: Some Yamaha sound bars come with wall mounting brackets for a sleek and space-saving setup. If you prefer wall mounting, consult the user manual for detailed instructions on how to securely attach the sound bar to the wall.
- Room acoustics: Take into consideration the acoustics of your room. Hard surfaces such as walls and floors can cause sound reflections and distortions. Position the sound bar away from reflective surfaces to minimize any unwanted echoes or reverberations.
- Height placement: For sound bars with built-in upward-firing speakers, placing the sound bar at ear level or slightly above can enhance the soundstage and create a more immersive experience.
- Cable management: Ensure that any necessary cables, such as HDMI or optical cables, are neatly tucked away to maintain a clean and organized setup.
Experiment with different placements and listen to the audio output to find the positioning that delivers the best sound quality for your space. Once you have found the ideal spot, you can proceed to the next step: connecting the sound bar to your television.
Step 4: Connecting the Sound Bar to the Television
Now that you have placed your Yamaha sound bar in the desired location, it’s time to connect it to your television to enjoy an immersive audio experience. Follow these steps to make the necessary connections:
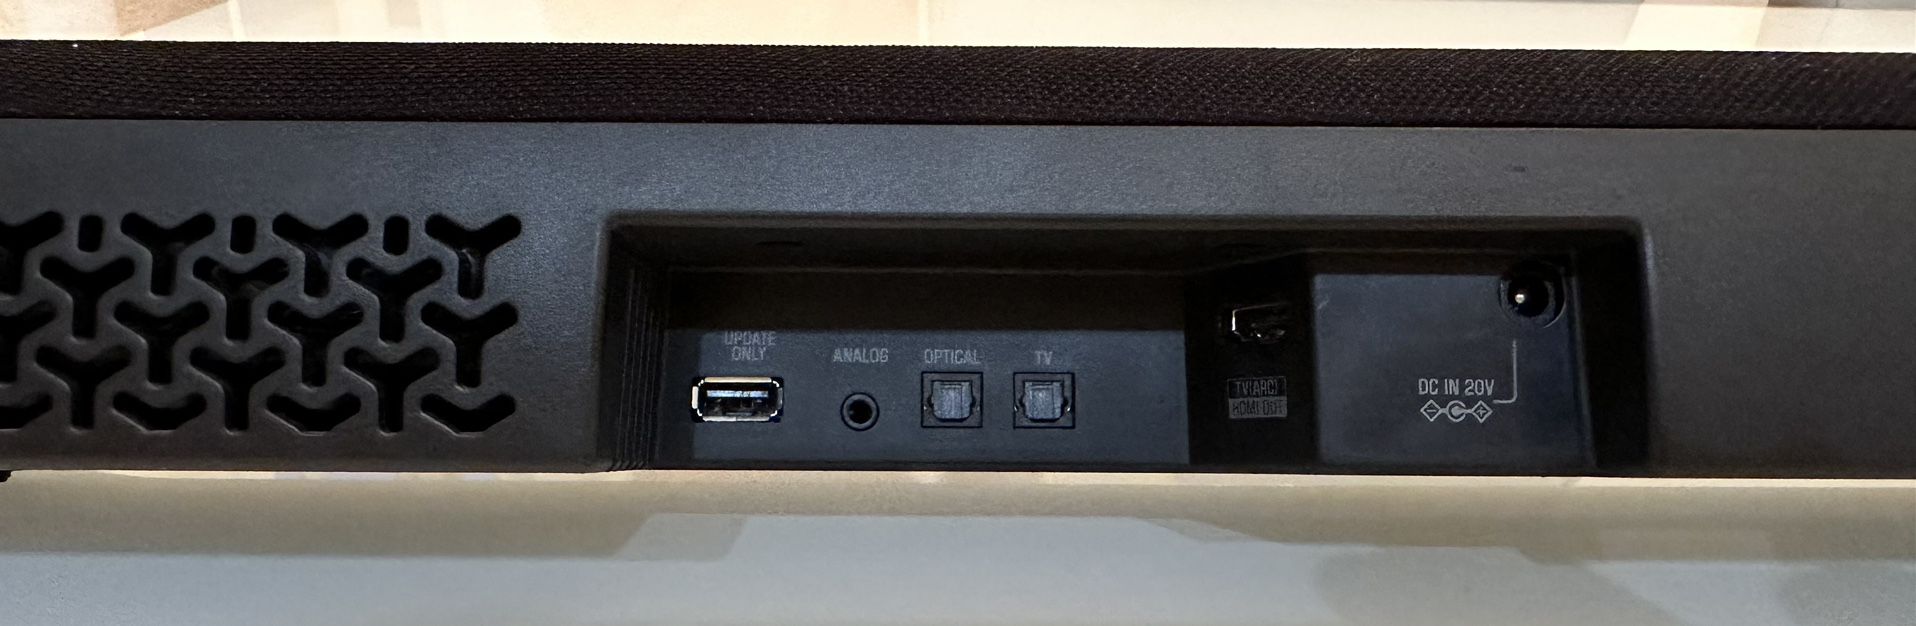
- Locate the HDMI or optical cable that came with your sound bar. These are the most common cables used for connecting the sound bar to the TV.
- Identify the HDMI or optical input port on the back of the sound bar. It is usually labeled as “HDMI IN” or “OPTICAL IN”.
- Ensure that the HDMI or optical output port on your TV is easily accessible and visible.
- Connect one end of the HDMI or optical cable to the corresponding input port on the sound bar.
- Connect the other end of the cable to the HDMI or optical output port on your TV.
- Ensure that the connections are securely plugged in and there are no loose connections.
- Turn on your television and sound bar.
- On your TV, navigate to the settings menu and select the audio output options. Choose the appropriate audio output option that corresponds to the connected sound bar.
- Adjust the volume settings on your TV and sound bar to balance the audio output.
It’s important to note that the specific connection options may vary depending on your TV and sound bar model. Refer to the user manuals for both devices for detailed instructions and any additional connection options that may be available.
Once the sound bar is successfully connected to your television, you can move on to the next step: adjusting the sound bar settings to optimize your audio experience.
Step 5: Adjusting Sound Bar Settings
After connecting your Yamaha sound bar to your television, it’s time to fine-tune the settings to ensure the best audio experience. Here are the steps to adjust the sound bar settings:
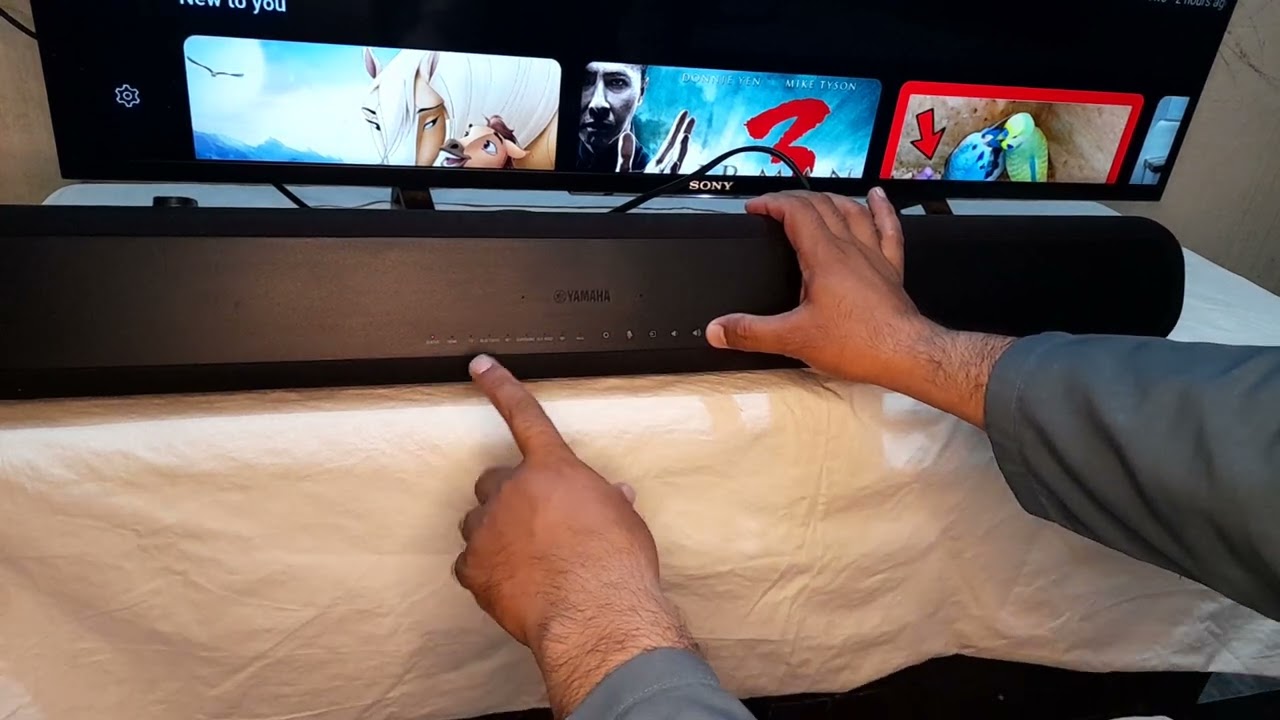
- Access the sound bar’s settings: Most Yamaha sound bars have an on-screen display or a dedicated remote control that allows you to access the settings menu.
- Sound modes: Yamaha sound bars often come with different sound modes tailored for specific types of audio content, such as music, movies, or gaming. Explore these modes and choose the one that enhances your desired audio experience.
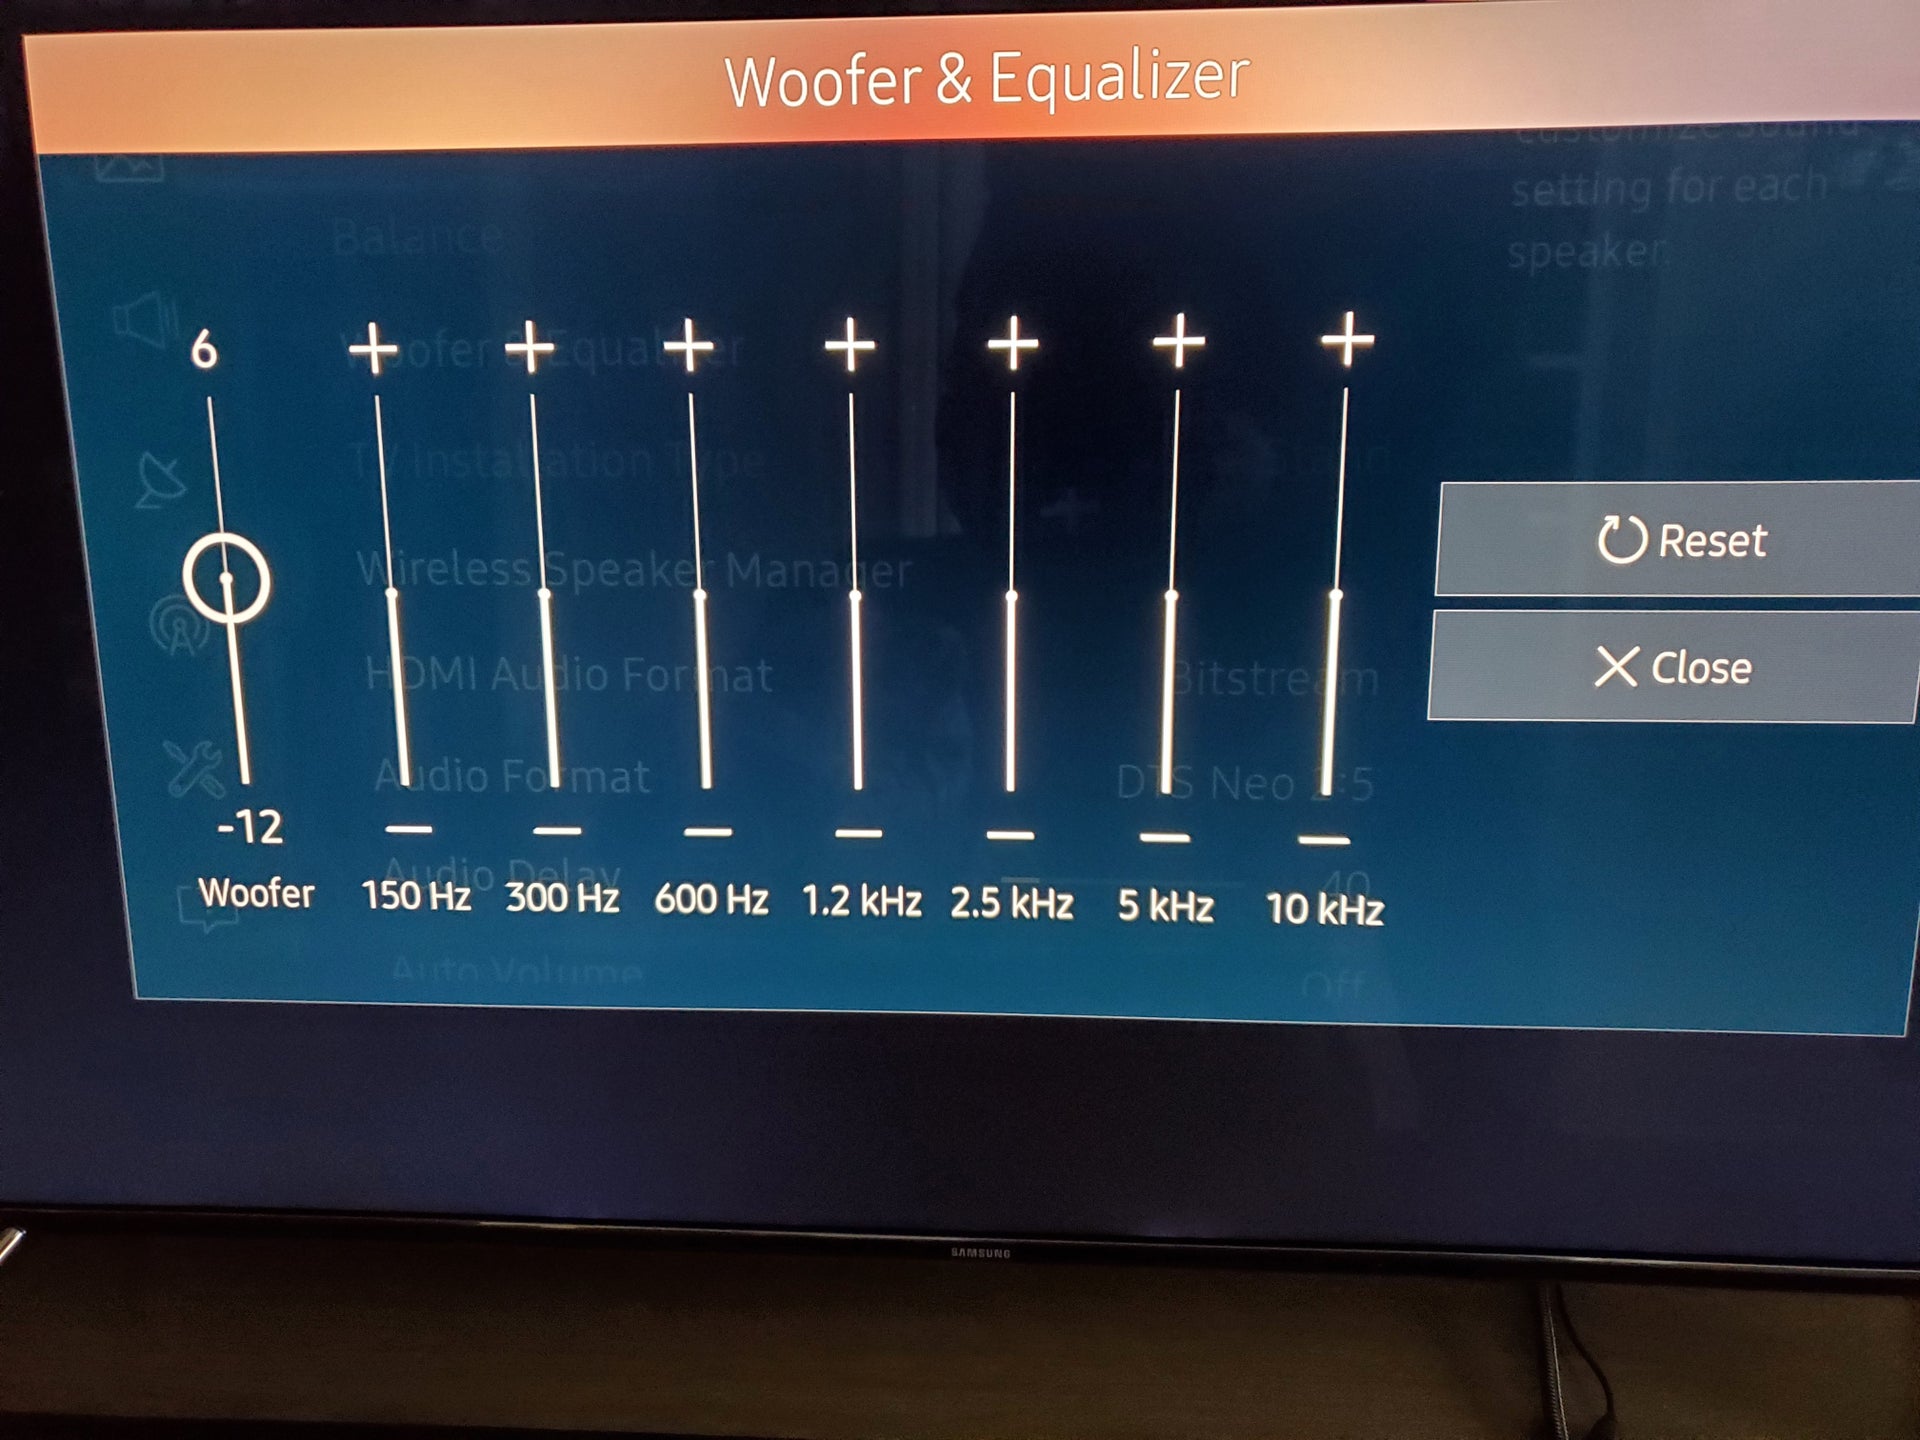
- Equalizer settings: Some Yamaha sound bars allow you to adjust the equalizer settings to fine-tune the audio output. You can modify the settings to emphasize certain frequencies or adjust the balance of the sound to your liking.
- Virtual surround sound: If your sound bar supports virtual surround sound, enable this feature to create a more immersive audio experience. It simulates a surround sound effect without the need for additional speakers.
- Bass and treble adjustment: Adjust the bass and treble settings to suit your preferences. Boosting the bass can add depth and impact to the audio, while tweaking the treble can enhance clarity and detail.
- Volume levels: Ensure that the volume levels on your sound bar and television are balanced. You can adjust the volume on your sound bar directly or use the TV remote control if it is programmed to control the sound bar’s volume.
- Bluetooth pairing: If your sound bar has Bluetooth capabilities, you can pair it with your smartphone, tablet, or other Bluetooth-enabled devices. Follow the instructions in the user manual to pair and connect your devices wirelessly.
Remember to experiment with different settings and listen to the audio output to find the configuration that suits your preferences and provides the best audio quality for your desired content. Take note of any changes you make so that you can easily revert back if needed.
With the sound bar settings adjusted to your liking, you are now ready to enjoy an immersive audio experience. Whether you’re watching movies, playing games, or listening to music, the Yamaha sound bar will enhance the sound and bring your entertainment to life.
Step 6: Pairing the Sound Bar with a Bluetooth Device
In addition to its wired connections, many Yamaha sound bars offer the convenience of Bluetooth connectivity. This allows you to stream audio wirelessly from your smartphone, tablet, or other Bluetooth-enabled devices. Here’s how to pair your sound bar with a Bluetooth device:
- Make sure the Bluetooth device you want to pair with the sound bar is within range (typically 10 meters or 30 feet).
- On your Bluetooth device, navigate to the settings or Bluetooth menu.
- Enable Bluetooth if it is not already turned on.
- On the sound bar, press the Bluetooth pairing button or navigate to the Bluetooth settings via the on-screen display or remote control.
- Your sound bar should now be discoverable by your Bluetooth device. Look for the sound bar listed in the available devices list on your Bluetooth device.
- Select the sound bar from the list to initiate the pairing process.
- Once the pairing is successful, you should see a notification on your Bluetooth device confirming the connection.
After the initial pairing, your sound bar and Bluetooth device should automatically connect when they are in range and the Bluetooth feature is enabled on both devices. You can now play audio from your Bluetooth device, and the sound will be wirelessly transmitted to your Yamaha sound bar.
It’s worth noting that some Yamaha sound bars support advanced Bluetooth features such as multi-device pairing or NFC (Near Field Communication) pairing. Refer to the user manual for your specific sound bar model to explore these additional Bluetooth capabilities and learn how to use them.
With your sound bar successfully paired to a Bluetooth device, you can enjoy the freedom of wirelessly streaming your favorite music, podcasts, or other audio content directly to your Yamaha sound bar.
Step 7: Troubleshooting Common Issues
While setting up and using your Yamaha sound bar, you may encounter some common issues. Here are some troubleshooting tips to help you resolve these problems:
- No sound or low volume: If you’re not hearing any sound or the volume is too low, ensure that the sound bar and TV are properly connected. Check that the volume levels on both devices are adjusted correctly. Also, make sure that the input source on the sound bar is set to the correct input connected to the TV.
- Remote control not working: If the remote control is not functioning, first check the battery level and replace them if necessary. Ensure that there are no obstructions between the remote control and the sound bar. If the issue persists, try resetting the remote control or contacting Yamaha customer support for assistance.
- Bluetooth connection issues: If you’re having trouble pairing or connecting your Bluetooth device, make sure that both the sound bar and the Bluetooth device are in pairing mode. Ensure that they are within range and that there are no interfering devices nearby. Try resetting the Bluetooth settings on both devices and attempt the pairing process again.
- Audio delay: If you notice an audio delay, especially when watching videos, check the audio settings on your TV. Look for an option to adjust the audio delay or lip-sync. Experiment with different settings to find a suitable delay correction for your setup.
- Noisy or distorted sound: If the sound from the sound bar is distorted or noisy, check the audio cables for any loose connections or damage. Try using a different cable or port to see if that resolves the issue. Adjusting the equalizer settings on the sound bar can also help to improve the sound quality.
- Software updates: It’s always a good idea to ensure that your Yamaha sound bar is running the latest firmware or software version. Check the manufacturer’s website for any available updates and follow the instructions to update your sound bar.
If you encounter any other issues or the troubleshooting tips mentioned above do not resolve the problem, consult the user manual for your specific Yamaha sound bar model. Additionally, you can reach out to Yamaha customer support for further assistance and troubleshooting guidance.
By addressing common issues and finding solutions, you can ensure a smooth and enjoyable audio experience with your Yamaha sound bar.
Conclusion
Setting up your Yamaha sound bar can greatly enhance your audio experience, whether you’re watching movies, playing games, or listening to music. By following the steps outlined in this guide, you can easily get your sound bar up and running in no time.
We started by unboxing the sound bar and ensuring that all the necessary components were included. Then, we connected the sound bar to power and found the ideal placement to optimize audio dispersion. Next, we connected the sound bar to the television using HDMI or optical cables.
After the physical setup was complete, we moved on to adjusting the sound bar settings, including sound modes, equalizer settings, and virtual surround sound. We also explored the process of pairing the sound bar with a Bluetooth device, allowing for wireless audio streaming.
Lastly, we discussed common troubleshooting tips to help you resolve any potential issues, such as no sound, remote control problems, Bluetooth connection issues, audio delay, and distorted sound. We encouraged staying up to date with software updates and seeking assistance from Yamaha customer support if needed.
Now, armed with the knowledge and steps provided in this guide, you can enjoy the immersive audio experience that a Yamaha sound bar offers. Sit back, relax, and immerse yourself in the rich and powerful sound that will elevate your entertainment to the next level.
Remember, while this guide provides a general overview, it’s always important to consult the user manual for your specific Yamaha sound bar model for more detailed instructions and specifications. Enjoy your audio journey with your Yamaha sound bar!