Home>Production & Technology>Audio Interface>How To Connect Apogee Duet Audio Interface To Speakers

Audio Interface
How To Connect Apogee Duet Audio Interface To Speakers
Published: February 5, 2024
Learn how to connect your Apogee Duet Audio Interface to speakers with this step-by-step guide for optimal audio performance.
(Many of the links in this article redirect to a specific reviewed product. Your purchase of these products through affiliate links helps to generate commission for AudioLover.com, at no extra cost. Learn more)
Table of Contents
Introduction
Welcome to the world of audio interfaces! If you’re a musician, sound engineer, or a hobbyist looking to improve the quality of your audio recordings, an audio interface is an essential tool to consider. In particular, the Apogee Duet Audio Interface is a popular choice for its outstanding sound quality, sleek design, and user-friendly features.
Connecting your Apogee Duet audio interface to your speakers is a crucial step in setting up your home recording studio or improving your audio playback experience. By doing so, you can ensure that the audio output is clear, accurate, and full of detail.
In this guide, we will walk you through the process of connecting your Apogee Duet audio interface to your speakers, providing you with step-by-step instructions to ensure a seamless setup. Whether you are a beginner or an experienced user, this guide will help you get the most out of your audio interface.
Before we dive into the connection process, let’s quickly discuss what an audio interface is and why it is essential. An audio interface acts as a bridge between your computer or recording device and your audio equipment. It allows you to capture and monitor audio signals with higher quality and lower latency compared to the built-in sound card of your computer.
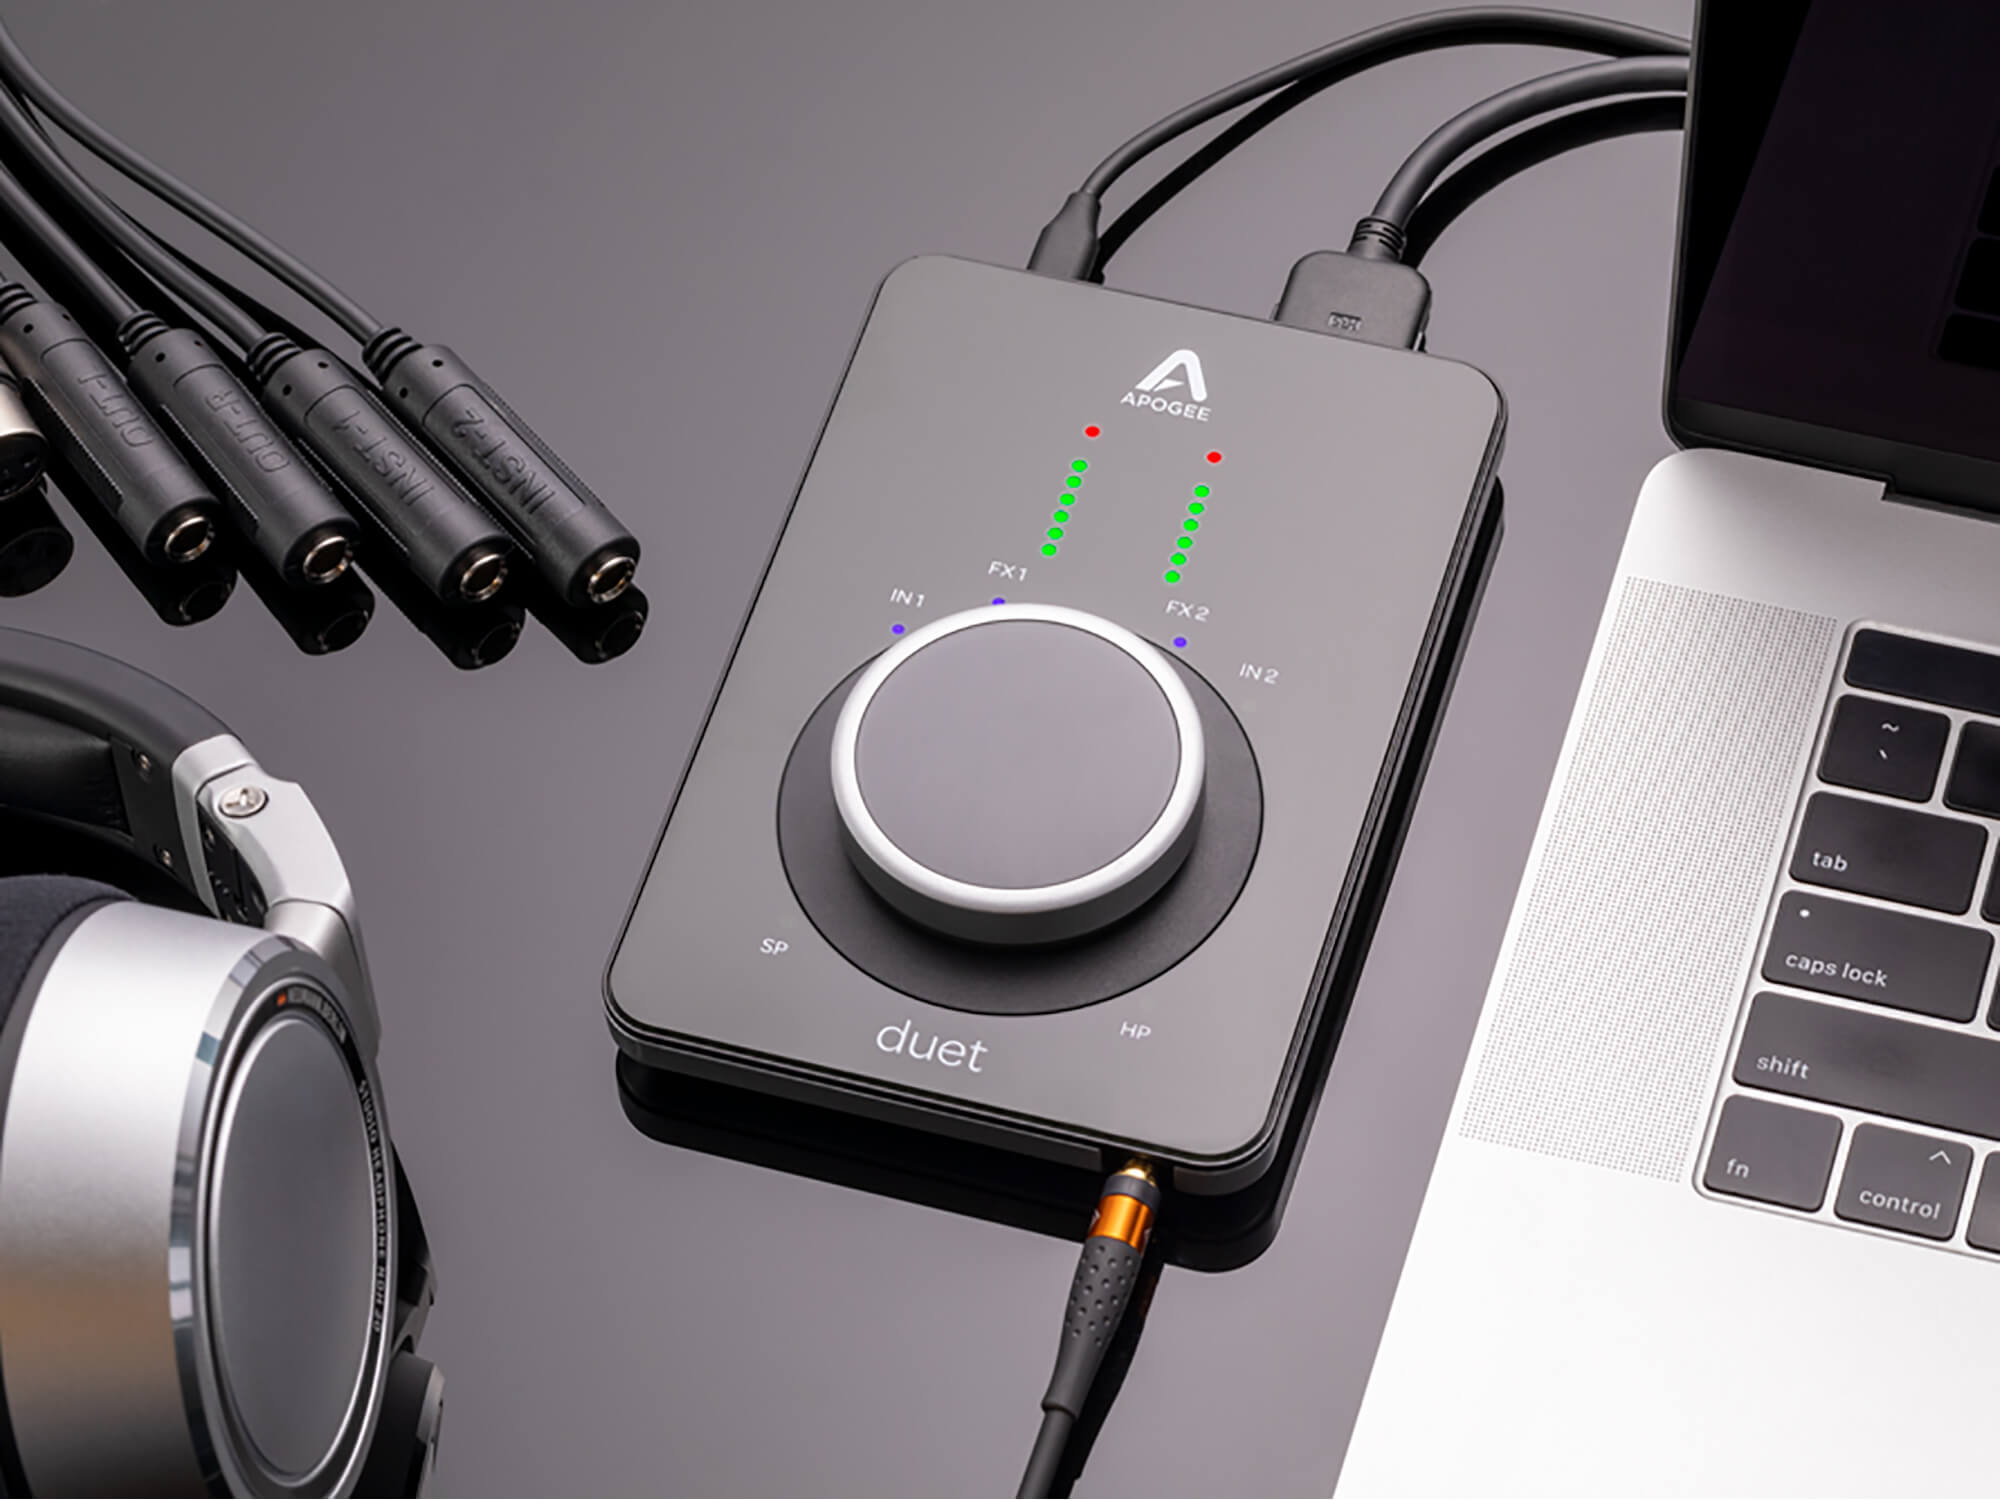
The Apogee Duet audio interface is renowned for its exceptional audio quality and advanced features. It is a compact and portable device that offers two inputs and four outputs, making it suitable for a variety of recording and playback scenarios. Whether you’re recording vocals, guitars, or other instruments, or you simply want to enjoy high-fidelity audio playback, the Apogee Duet is designed to deliver outstanding performance.
Now that we have an understanding of the importance of an audio interface and the capabilities of the Apogee Duet, let’s move onto the steps for connecting the interface to your speakers. By following these steps, you will be able to enjoy the full potential of your audio interface and create an immersive audio experience.
Step 1: Checking the Apogee Duet Audio Interface
Before connecting your Apogee Duet audio interface to your speakers, it is essential to ensure that the interface is in proper working condition. This step will help you avoid any potential issues later on and ensure a smooth connection process.
Here are the key things to check for when inspecting your Apogee Duet:
- Physical Condition: Examine the exterior of the Apogee Duet audio interface for any visible damage or wear and tear. Check the connectors, knobs, and buttons to make sure they are intact and functioning properly. If you notice any issues or abnormalities, it may be necessary to contact the manufacturer for support or consider getting a replacement.
- Connections: Inspect the input and output connectors on the Apogee Duet. Make sure they are clean and free from debris or dust. Dirty connectors can cause poor audio quality or connectivity issues. If necessary, gently clean the connectors using a lint-free cloth and isopropyl alcohol.
- Power Supply: The Apogee Duet can be powered via USB or an external power adapter. Ensure that you have the necessary power source available and that the interface is getting an adequate power supply. If using the USB power option, connect the Apogee Duet to a USB port on your computer using the provided USB cable.
- Software and Drivers: Ensure that you have the latest software and drivers for the Apogee Duet installed on your computer. Visit the Apogee website and download the appropriate software for your operating system. Keeping the software up to date will ensure compatibility and optimal performance.
Once you have confirmed that your Apogee Duet audio interface is in good condition and ready to be connected, you can proceed to the next step of the setup process. This will involve establishing the connection between the interface and your computer.
Step 2: Connecting the Apogee Duet to Your Computer
Now that you have ensured the Apogee Duet audio interface is in proper working condition, it’s time to establish the connection between the interface and your computer. This step is crucial for enabling communication and data transfer between the two devices.
Follow these steps to connect the Apogee Duet to your computer:
- USB Connection: If you are using the USB power option for the Apogee Duet, connect one end of the provided USB cable to the USB port on the audio interface. Then, connect the other end of the USB cable to an available USB port on your computer. Make sure the connections are secure.
- Power Source: If you are using an external power adapter to power the Apogee Duet, connect the power adapter to the power input on the audio interface. Then, plug the power adapter into a power outlet. Ensure that the power adapter is compatible with your region’s voltage and that you are using the supplied power adapter from Apogee.
- Driver Installation: Depending on your computer’s operating system, you may need to install the appropriate drivers for the Apogee Duet. Visit the Apogee website and download the latest drivers for your operating system. Follow the installation instructions provided by Apogee to complete the driver installation process.
- Software Configuration: Once the drivers are installed, open your Digital Audio Workstation (DAW) or audio recording software. Navigate to the settings or preferences section and select the Apogee Duet as your audio interface. Configure the sample rate and buffer size according to your needs and the capabilities of your computer system.
- Testing the Connection: To ensure that the Apogee Duet is properly connected to your computer, play some audio through your DAW or media player. Check if the sound is coming through the Apogee Duet and if the levels are being detected in your software’s audio meter. If everything is working as expected, you have successfully connected the Apogee Duet to your computer.
Once you have successfully connected the Apogee Duet to your computer, you can proceed to the next step of connecting the audio interface to your speakers. This step will allow you to transfer the audio signal from the Apogee Duet to your speakers for playback or monitoring purposes.
Step 3: Connecting the Apogee Duet to Your Speakers
Now that you have successfully connected the Apogee Duet audio interface to your computer, it’s time to connect the interface to your speakers. This step will allow you to hear the audio playback from your computer through your speakers, ensuring a high-quality and immersive listening experience.
Follow these steps to connect the Apogee Duet to your speakers:
- Audio Cables: Determine the type of audio cables required for your setup. The Apogee Duet provides various connectivity options, including XLR, 1/4″ TRS, and RCA. Depending on your speakers’ input options, you will need the appropriate cables. Ensure that the cables are in good condition and free from any damage or wear.
- Speaker Inputs: Locate the input connectors on your speakers. These can include XLR, 1/4″ TRS, RCA, or other types of connectors. Take note of the input types available on your speakers, as you will need to use the corresponding cables to establish the connection.
- Output Options: On the Apogee Duet audio interface, locate the output connectors. These can also include XLR, 1/4″ TRS, RCA, or other types of connectors. Use the appropriate cables to connect the output of the Apogee Duet to the input of your speakers. Ensure that the cables are securely connected to both devices.
- Stereo or Mono: Depending on your preference and the capabilities of your speakers, you may choose to connect them in stereo or mono configuration. In a stereo setup, you will connect both the left and right outputs of the Apogee Duet to the corresponding inputs on your speakers. In a mono setup, you will connect just one output of the Apogee Duet to either the left or right input on your speakers.
- Volume Control: Adjust the volume control on your speakers to an appropriate level. Start with a low volume setting to avoid any sudden loud sounds. You can gradually increase the volume until you reach a comfortable listening level.
Once you have completed the steps above, you have successfully connected the Apogee Duet audio interface to your speakers. Now, when you play audio through your computer, it will be routed through the Apogee Duet and outputted to your speakers for a high-quality audio experience.
It’s important to note that the specific steps for connecting the Apogee Duet to your speakers may vary depending on the models and types of equipment you are using. Refer to the user manuals and documentation provided with your speakers and the Apogee Duet for detailed instructions tailored to your specific setup.
With the interface properly connected to both your computer and speakers, you are now ready to adjust the audio settings on your computer to optimize the audio playback experience. This will be covered in the next step of the setup process.
Step 4: Adjusting Audio Settings on Your Computer
After connecting the Apogee Duet audio interface to your speakers, it’s important to adjust the audio settings on your computer to optimize the audio playback experience. This step will help ensure that the audio output is balanced, clear, and tailored to your preferences.
Follow these steps to adjust the audio settings on your computer:
- System Preferences: On a Mac, navigate to “System Preferences” and select “Sound.” On Windows, right-click on the speaker icon in the taskbar and select “Playback Devices.” These menus allow you to access the audio settings of your computer.
- Select Apogee Duet as Output Device: In the audio settings menu, choose the Apogee Duet as the default output device. This ensures that the audio output is routed through the interface and sent to your speakers.
- Sample Rate and Bit Depth: Adjust the sample rate and bit depth settings in the audio settings menu to match the capabilities of the Apogee Duet. It is recommended to use a sample rate and bit depth that corresponds to the quality of your audio files and the capabilities of your speakers.
- Volume Control: Use the volume control options in the audio settings menu to adjust the output volume of the Apogee Duet. This allows you to control the overall volume level of the audio playback through your speakers.
- Equalizer Settings: Some audio settings menus may provide options for adjusting equalizer settings. Experiment with these settings to tailor the audio output to your preferences. Adjust bass, treble, and other equalizer parameters to achieve the desired sound signature.
- Monitor Mix: If your Apogee Duet audio interface offers a monitor mix feature, use the audio settings menu to control the balance between the audio playback from your computer and the input signal from your microphones or instruments. This allows you to achieve a comfortable balance between your playback and recording signals.
Once you have adjusted the audio settings on your computer, you can begin playing audio through your preferred media player, DAW, or other audio software. The audio will be routed through the Apogee Duet and outputted to your speakers, delivering a high-quality sound experience.
Remember to periodically revisit your audio settings to make any necessary adjustments based on your preferences and the specific audio content you are working with. Taking the time to optimize your audio settings will help you achieve the best audio quality and ensure an enjoyable listening experience.
In the next and final step, we will guide you through how to test the connection to ensure everything is functioning correctly.
Step 5: Testing the Connection
Once you have connected your Apogee Duet audio interface to your computer and speakers, it’s important to test the connection to ensure that everything is working correctly. Performing a quick test will help you identify any potential issues and allow you to make any necessary adjustments for optimal performance.
Follow these steps to test the connection between the Apogee Duet and your speakers:
- Audio Playback: Play some audio through your computer’s media player or your preferred audio software. It can be a song, a podcast, or any audio file of your choice. Listen for the audio output through your speakers connected to the Apogee Duet.
- Monitoring Input Signals: If you have connected microphones or instruments to the inputs on the Apogee Duet, test the monitoring capabilities. Speak into the microphone or play an instrument while monitoring through the speakers. Check if the input signals are being captured and monitored accurately.
- Volume and Balance: Adjust the volume and balance controls on the Apogee Duet and your computer to ensure that the audio playback is at an appropriate level and properly balanced between the left and right channels. Verify that both channels of your speakers are outputting sound evenly.
- Latency and Playback Accuracy: Pay attention to any noticeable latency or delay in the audio playback. The Apogee Duet is known for its low-latency performance, but it’s always a good idea to test for any potential issues. Also, confirm that the audio playback is accurate without any distortion or interference.
- Monitoring Headphones: If your Apogee Duet has a headphone output, connect your headphones and test the audio playback through them as well. Ensure that the headphone output is clear and provides an accurate representation of the audio being played.
If all the different aspects of the connection test are successful, congratulations! You have successfully connected your Apogee Duet audio interface to your speakers and verified that the system is functioning as expected. You can now enjoy high-quality audio playback and potentially begin recording music or other audio content with confidence.
However, if you encounter any issues during the test, such as poor audio quality, distorted playback, or malfunctioning inputs or outputs, it is advisable to review the previous steps and check the connections, settings, and drivers to ensure everything is correctly configured.
If you are unable to resolve the issues on your own, consult the user manual of the Apogee Duet, visit the Apogee website for troubleshooting resources, or reach out to their customer support for further assistance. They will be able to provide specific guidance and solutions based on your particular setup and concerns.
By following the steps outlined in this guide, you can ensure a seamless connection between your Apogee Duet audio interface and your speakers, ultimately enhancing your audio playback and recording capabilities. Enjoy the immersive sound and unleash your creativity in your music or audio projects!
Note: The instructions and steps mentioned in this guide are general guidelines. For specific details and tailored instructions, always refer to the user manual and documentation provided by the Apogee Duet and other related equipment.
Conclusion
Congratulations on successfully connecting your Apogee Duet audio interface to your speakers! By following the step-by-step instructions in this guide, you have set up a solid foundation for an enhanced audio experience, whether you’re recording music, podcasts, or simply enjoying high-quality audio playback.
The Apogee Duet audio interface provides exceptional sound quality and user-friendly features, making it a top choice for musicians, sound engineers, and audio enthusiasts. With its compact design and versatile connectivity options, the Apogee Duet allows you to capture, monitor, and play back audio with precision and clarity.
Checking the condition of the Apogee Duet, ensuring the interface is connected to your computer, making the necessary audio settings adjustments, and testing the connection are all important steps in setting up your home recording studio or improving your audio playback setup.
Remember, being thorough in each step and paying attention to details will optimize the performance of your audio interface and ensure a high-quality output. Regularly checking and updating the software and drivers will also contribute to a smooth and efficient operation of your Apogee Duet.
If you encounter any challenges or have specific inquiries regarding your Apogee Duet or speaker setup, always consult the user manual or reach out to Apogee’s customer support. They have dedicated resources and knowledgeable staff who can provide personalized support and guidance.
Now that you have successfully connected your Apogee Duet audio interface to your speakers, it’s time to unleash your creativity and explore the limitless possibilities of high-quality audio production. Whether you’re a musician, podcaster, or audio enthusiast, enjoy the rich and immersive sound that your setup now offers.
Continuously seek ways to improve your setup by experimenting with different microphones, instruments, and recording techniques. As you dive deeper into the world of audio production, you’ll discover new ways to utilize the capabilities of your Apogee Duet and speakers to create stunning recordings and captivating audio projects.
With a solid foundation in place, you are now ready to embark on your audio journey with confidence. Embrace the possibilities, create amazing music or content, and enjoy the rewards of high-fidelity sound with your Apogee Duet audio interface and speakers!

