Home>Devices & Equipment>Turntable Setup, Computer and Receiver Connections
Devices & Equipment
Turntable Setup, Computer and Receiver Connections
Modified: 3 October 2026
Table of Contents
- Before you plug anything in: turntable computer connection basics
- Connecting a turntable to your computer
- Recording vinyl into digital files
- Setting up specific turntable models
- Turntable maintenance and mechanical adjustments
- Integrating turntables with stereo systems
- Turntable placement and physical setup
- Moving, packing, and removing turntables
Before you plug anything in: turntable computer connection basics
Before you attempt a turntable computer connection, gather your turntable setup essentials, including the turntable itself and a way to hear it through speakers or headphones, along with a clear understanding of what kind of output it provides. Many people get stuck because they skip past the built-in phono preamp switch on their USB deck, so check the back of your unit for that setting before assuming the computer will recognize the signal. If you are using an automatic turntable, its mechanism handles the start and return of the tonearm for you, but the signal chain requirements do not change. When you want to make a Bluetooth turntable work with your phone, use the turntable's own instructions to put it in discovery or pairing mode first and keep it within about 33 feet of the phone during pairing. On an iPhone you then go to Settings > Bluetooth, turn it on, and tap the accessory name when it appears, while on Android you can open Settings > Connected devices or long-press the Bluetooth icon and tap Pair new device before selecting the turntable from the list. Remember that the computer’s sound settings need the correct capture input selected before any software will see the turntable.
Connecting a turntable to your computer
When you want to hook up a turntable to a computer for the first time, the path your audio takes depends entirely on the output your deck provides. A USB turntable carries its own built-in phono preamp and RIAA equalization, so connect the cable directly to a spare USB port on the computer rather than through a hub. Once connected, launch Audacity, or if the program was already open, use Transport > Rescan Audio Devices. Open the Audio Setup Toolbar and choose the turntable’s input, often listed as USB Audio CODEC, and set Recording Channels to 2 (stereo). Since many USB turntables have no sound output of their own, set the playback device to your computer’s built-in speakers and enable audible input monitoring under Transport > Transport Options if you want to hear what you are capturing. If you are trying to record from USB turntable using audacity, ignore any suggestion to select stereo mix, as that is not the correct input for this type of device.
A traditional turntable without USB requires a different chain. Route the signal through a standalone phono preamp or a receiver with a phono input first, then feed that line-level output into your computer’s line-in jack using a dual RCA to stereo 3.5 mm cable, or into a USB audio interface if no usable line-in exists. The built-in preamp handles the conversion before the signal reaches your capture software. The general USB turntable steps are the documented method to hook up ion USB turntable. If your goal is to hook up a turntable to maschine, open Preferences > Audio inside the software and select the audio interface connected to your external phono stage as the audio Device, since Maschine’s ¼-inch TRS line inputs require a line-level source.
Recording vinyl into digital files
Once your turntable is connected and recognized, the capture workflow depends on which software you use. Many setups fail at the input selection stage. Double-check that your computer’s sound settings list the turntable as the active input device before you launch your capture program. If you are learning how to convert records to MP3 files with Stanton T.92 USB turntable, the process relies on Audacity with the input set to USB AUDIO CODEC, Channels to 2 (Stereo), and Software Play Through ticked in Edit > Preferences > Audio I/O. After capturing your audio, you trim the desired song segment. Then use File > Export Selection As MP3 to create the final file. Owners who want to record records with Numark USB turntable can bypass manual configuration entirely by downloading the free EZ Vinyl/Tape Converter. This tool captures the signal and saves tracks directly to your iTunes library as WAV or MP3. Regardless of the tool, always monitor your levels during the first few seconds of playback. This prevents clipping before you commit to a full-side capture.
Setting up specific turntable models
Getting a clean transfer starts with how you setup an audio technica LP120 turntable before you even touch a USB cable. Level the chassis, place the slip mat, balance the S-shaped tonearm, and dial in the correct tracking force for the included cartridge. Only then should you check that the rear switch is set to LINE, because feeding a PHONO-level signal into your computer's sound card will result in a weak, noisy capture.
Belt-drive models in the Audio-Technica family add a specific physical step: after fitting the belt over the brass motor pulley using the red ribbon, you must rotate the platter ten full turns clockwise by hand to clear any transport twists before releasing the tonearm tie and removing the stylus guard.
Decks that use a removable headshell and a counterweight with a numbered stylus-force dial require a careful sequence. Install the headshell with the tonearm locked, float the arm horizontally and zero the dial, then apply the recommended downforce and matching anti-skate value. The approach changes slightly when you set up a audio technica turntable or set up crosley c6 turntable compared to how you set up marantz 6100 turntable or set the gears on my RCA rp-176 turntable, but the core decisions remain the same while the counterweight style, belt routing, and switch labeling differ. Similarly, a guide to set up marantz 6100 turntable is invaluable for vintage enthusiasts who need to understand its unique suspended-chassis design and tonearm adjustments. If you own a modern entry-level deck, learning how to set up crosley c6 turntable will help you get the most out of its preamp and belt-drive system.
Balancing a tonearm and setting tracking force is the single most important physical adjustment for sound quality and record wear. A stylus tracking too light will skate across the groove and cause permanent damage, while a stylus tracking too heavy will grind fine detail away and accelerate vinyl wear. With the cue lever up and the tonearm locked, remove the stylus guard and rotate the counterweight until the arm floats perfectly horizontal. Hold the counterweight still, turn only the numbered dial to zero, then rotate the entire assembly backward until the dial reads the cartridge manufacturer's recommended force. Set the anti-skate dial to the same number to keep the stylus centered in the groove and preserve channel balance. If you hear distortion in one channel, adjust the anti-skate slightly up or down while listening on headphones.
Turntable leveling matters more than most people expect, because a deck that is not level will cause the tonearm to drift, introduce uneven groove wear, and make accurate anti-skate settings impossible. Use a small bubble level on the platter, check front-to-back and side-to-side, and adjust the turntable feet until the bubble centers. On suspended-chassis designs, leveling also ensures the springs work evenly and the platter does not rub against the plinth.
Belt-drive models require a clean, properly seated belt for stable speed. After unboxing, remove the platter, stretch the belt around the inner rim, and pull the red ribbon to guide the belt over the motor pulley. Rotate the platter by hand several times to confirm smooth movement, because a belt that is twisted or riding too high on the pulley will cause audible wow and flutter. Replace the belt every few years as rubber loses elasticity over time. Direct-drive turntables skip the belt entirely, with the platter sitting directly on the motor spindle. These models often include a strobe light and speed dots on the platter rim; adjust the pitch slider until the dots appear to stand still under room lighting. Direct-drive motors deliver strong torque and quick start-up times, which makes them popular for DJ use and for listeners who want consistent playback without belt maintenance.
The built-in phono preamp decision trips up many new users. Turntables with a LINE/PHONO switch let you choose between an internal preamp and an external one. Set the switch to LINE when connecting directly to powered speakers or a computer line input, and set it to PHONO when connecting to a dedicated phono input on a stereo receiver or an external phono preamp. Sending a LINE signal into a phono input will overload the input and produce harsh distortion, while sending a PHONO signal into a line input will sound thin and quiet with no bass.
USB turntables add a digital output to the standard analog signal path. Connect the USB cable to your computer and the operating system should recognize the deck as an audio input device. Select it in your capture software's preferences, set the sample rate to 44.1 kHz or 48 kHz at 16-bit or 24-bit depth, and monitor the input level while playing the loudest passage on the record. Aim for peaks around -6 dB to leave headroom and avoid clipping.
Grounding eliminates the low-frequency hum that plagues many setups. Most turntables include a thin ground wire with a spade connector; attach it to the ground post on your preamp or audio interface. If your deck lacks a separate ground wire, the grounding may run through one of the RCA cables. A persistent hum often means the ground connection is loose or missing. Keep the turntable away from power transformers, Wi-Fi routers, and large amplifiers to reduce electromagnetic interference.
Cartridge alignment affects tracking accuracy and stereo separation. Use a printed alignment protractor designed for your tonearm geometry, loosen the headshell screws slightly, and position the cartridge so the stylus tip lands on both null points while the cartridge body remains square to the grid lines. Tighten the screws gently and recheck. A misaligned cartridge will produce inner-groove distortion and uneven channel balance. Cleaning records before each capture session removes surface noise that no software can fix later. A carbon-fiber brush swept lightly across the record surface picks up loose dust, while a wet-cleaning system removes deeper grime from the grooves and extends stylus life.
- set up a audio technica turntable — How To Set Up A Audio Technica Turntable
- set up marantz 6100 turntable — How To Set Up Marantz 6100 Turntable
- set up crosley c6 turntable — How To Set Up Crosley C6 Turntable
- set the gears on my RCA rp-176 turntable — How Do I Set The Gears On My Rca Rp-176 Turntable
- house of marley stir it up turntable how to setup — House Of Marley Stir It Up Turntable How To Setup
- setup an audio technica LP120 turntable — How To Setup An Audio Technica LP120 Turntable
Turntable maintenance and mechanical adjustments
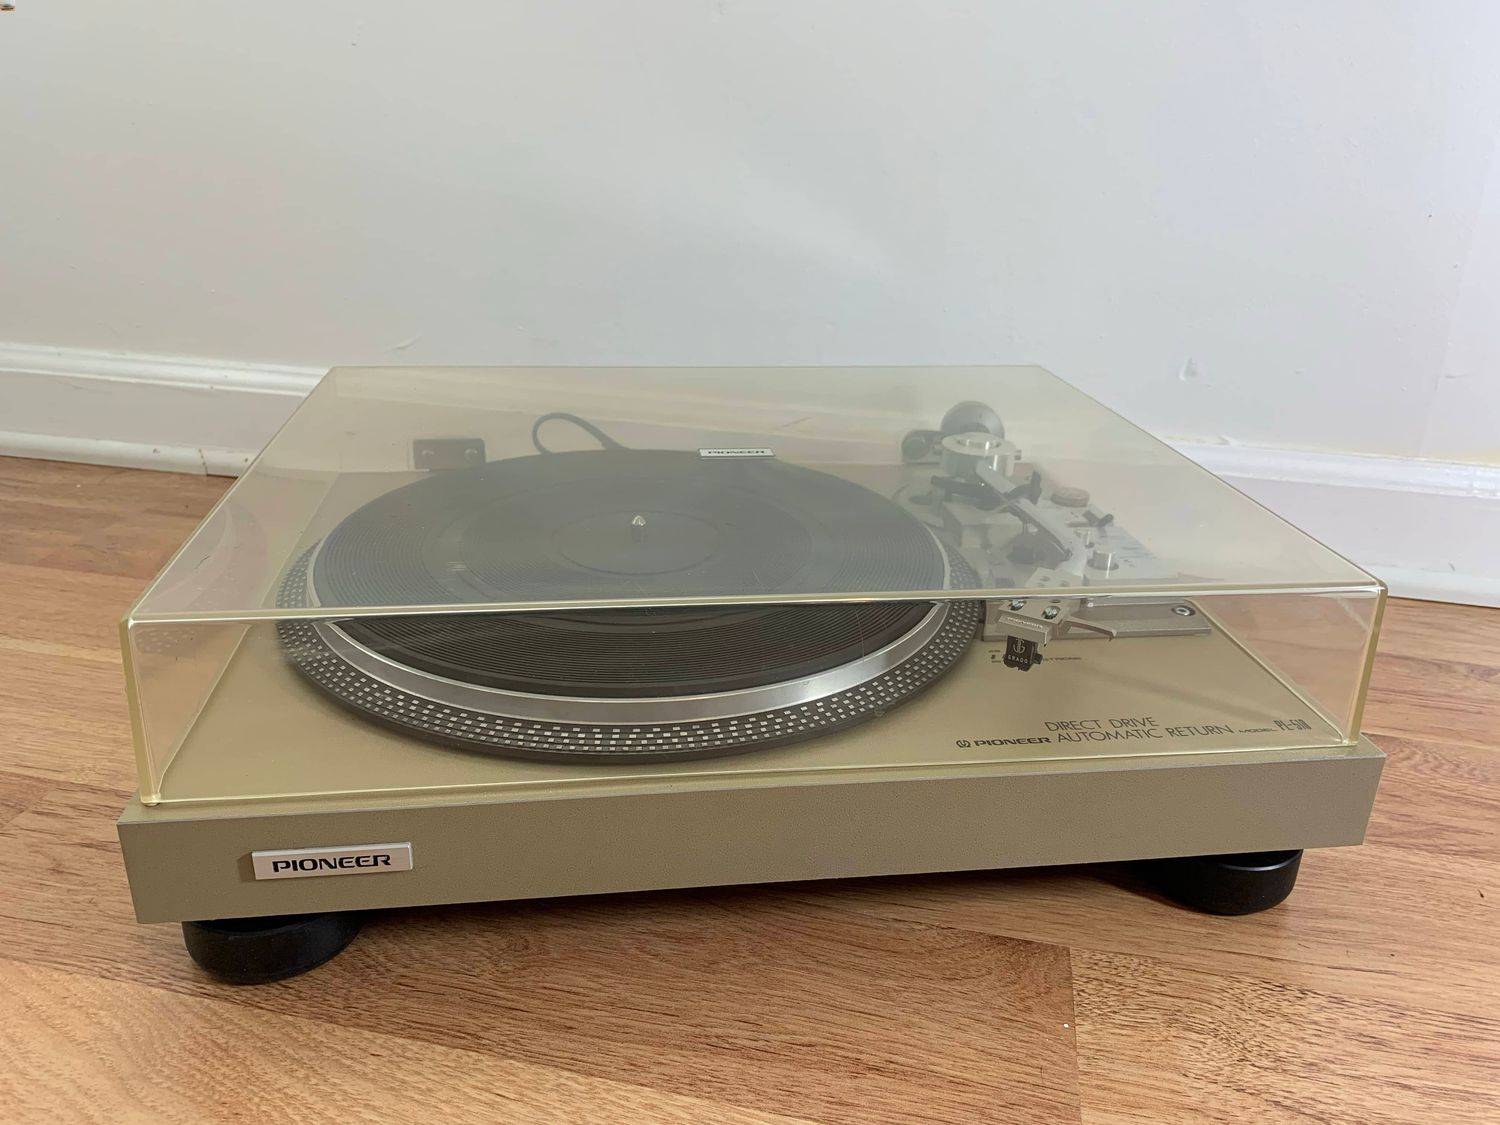
Before you chase down a hum in your signal chain, start with the physical deck itself. A properly configured USB input cannot fix a turntable that is mechanically out of alignment. For most Pioneer belt-drive and direct-drive models, the setup sequence begins when you set the anti-skating to 0, release the arm clamp, and rotate the counterweight until the tonearm floats perfectly horizontal. Once balanced, you lock the arm back and turn only the tracking-force scale ring to line up the zero mark with the index line. Then dial in the full recommended downforce for your cartridge. If you need to adjust pioneer PL $00 turntable. Wiring issues create their own set of problems. The black wire is the ground wire that must be secured to your amplifier's GND terminal to eliminate low-frequency hum. Owners of less common decks sometimes need to ground the JVC AL-L20R linear tracking turntable owners manual may reference a similar grounding scheme. The exact terminal layout depends on your particular integrated amplifier or phono stage. While some hobbyists explore modifications, it is not possible to make my Pioneer PL-518 in to a manual turntable by bypassing its automatic mechanisms. That kind of alteration falls outside the standard adjustment procedures covered by the service documentation.
Integrating turntables with stereo systems
When you want to use turntable on Sony receiver or another traditional hi-fi component, the first physical check is the output switch on the back of the deck. For an Audio-Technica model like the AT-LP120XBT-USB, if you need to use USB on audio technica turntable, set that selector to LINE if you are connecting to standard AUX or LINE inputs. Only set it to PHONO when the receiver has its own dedicated magnetic phono input with a ground terminal. The same logic applies as you set up turntable to audio system that includes powered speakers or a compact desktop amplifier. A LINE-level signal will match the input sensitivity those devices expect. A mis-set PHONO signal will sound thin and noisy.
For wireless connections, the Victrola Stream series lets you press and hold the illuminated control knob for one second to use victrola Bluetooth turntable with your default speaker or group. The Victrola app shows toggles for Bluetooth and VINYLSTREAM Wi‑Fi (UPnP) for use with UPnP-enabled gear from brands including Sony and Samsung. Once the physical signal path is correct, your computer-side task is confirming that the operating system sees the turntable as USB Audio Codec before you open any capture software. If you want to use a cd with a turntable, you will need a model with a built-in CD ripper or a separate adapter to combine both sources. For those starting from scratch, learning how to use a vinyl turntable ensures you select the right cartridge and tracking force for your records. The remaining scenarios follow this same pattern of matching output settings to input types. The specific steps vary by product family, so the short list below separates them by function. Choose the one that names the connection method or feature printed on your deck.
- use a cd with a turntable — How To Use A Cd With A Turntable
- use victrola Bluetooth turntable — How To Use Victrola Bluetooth Turntable
- use USB on audio technica turntable — How To Use USB On Audio Technica Turntable
- use a vinyl turntable — How To Use A Vinyl Turntable
Turntable placement and physical setup
Start with the surface itself. A turntable needs a solid, heavy, stable piece of furniture that sits firmly on the floor, such as a stereo cabinet or heavy wooden shelf unit that resists the vibration muddying low-frequency detail. If you plan to put a turntable in a TV stand, the stand must be heavy and perfectly level. Never place the deck directly on top of a receiver, amplifier, or subwoofer, and speakers belong on separate surfaces entirely. The whole setup stays quietest in a climate-controlled indoor space away from footfall and electrical noise.
When you move into custom work, the path depends on your goal. You can build turntable systems from the ground up using an Orbit Custom configuration, where U-Turn assembles the deck to your chosen finish and cartridge, giving you control over the platter and phono-stage options without fabricating parts yourself. If you need to build a powered turntable for a compact listening station, that same configurator lets you add an internal Pluto preamp so the deck outputs a clean line-level signal straight to powered speakers or your computer interface. For digital creators who need to make a turntable for 3d model photography, the approach shifts entirely to a motorized display platform built for smooth, repeatable rotation under a camera rather than audio-grade isolation.
Moving, packing, and removing turntables
Before you move a deck across the room or across an ocean, the first safety step is to secure the tonearm in its rest or transport clip. Remove the counterweight so its mass cannot stress the bearing during a bump. If you need to remove my turntable from old record player furniture or a built-in cabinet, pull the platter straight up off the center spindle. Pack the platter separately with padding. A platter left in place can shift and damage the motor spindle in transit. When you ship project turntable to germany how to pack it safely comes down to the same universal rule. Remove the headshell if it is detachable. Use a stylus guard if you have one. Keep the dust cover closed or separated so it does not scratch the finish. Place the deck in a box with firm cushioning on all six sides. Tape and reinforce the bottom. Shake the carton gently to confirm nothing moves inside. Once the turntable arrives at its new location, the first step to setup a turntable correctly is placing it on a level surface. Adjust the feet only if the surface is not level. Set the platter onto the center spindle and make sure it is fully seated. Connect the power adapter. Run the audio cable to the correct output and playback device before you fine-tune anything else.